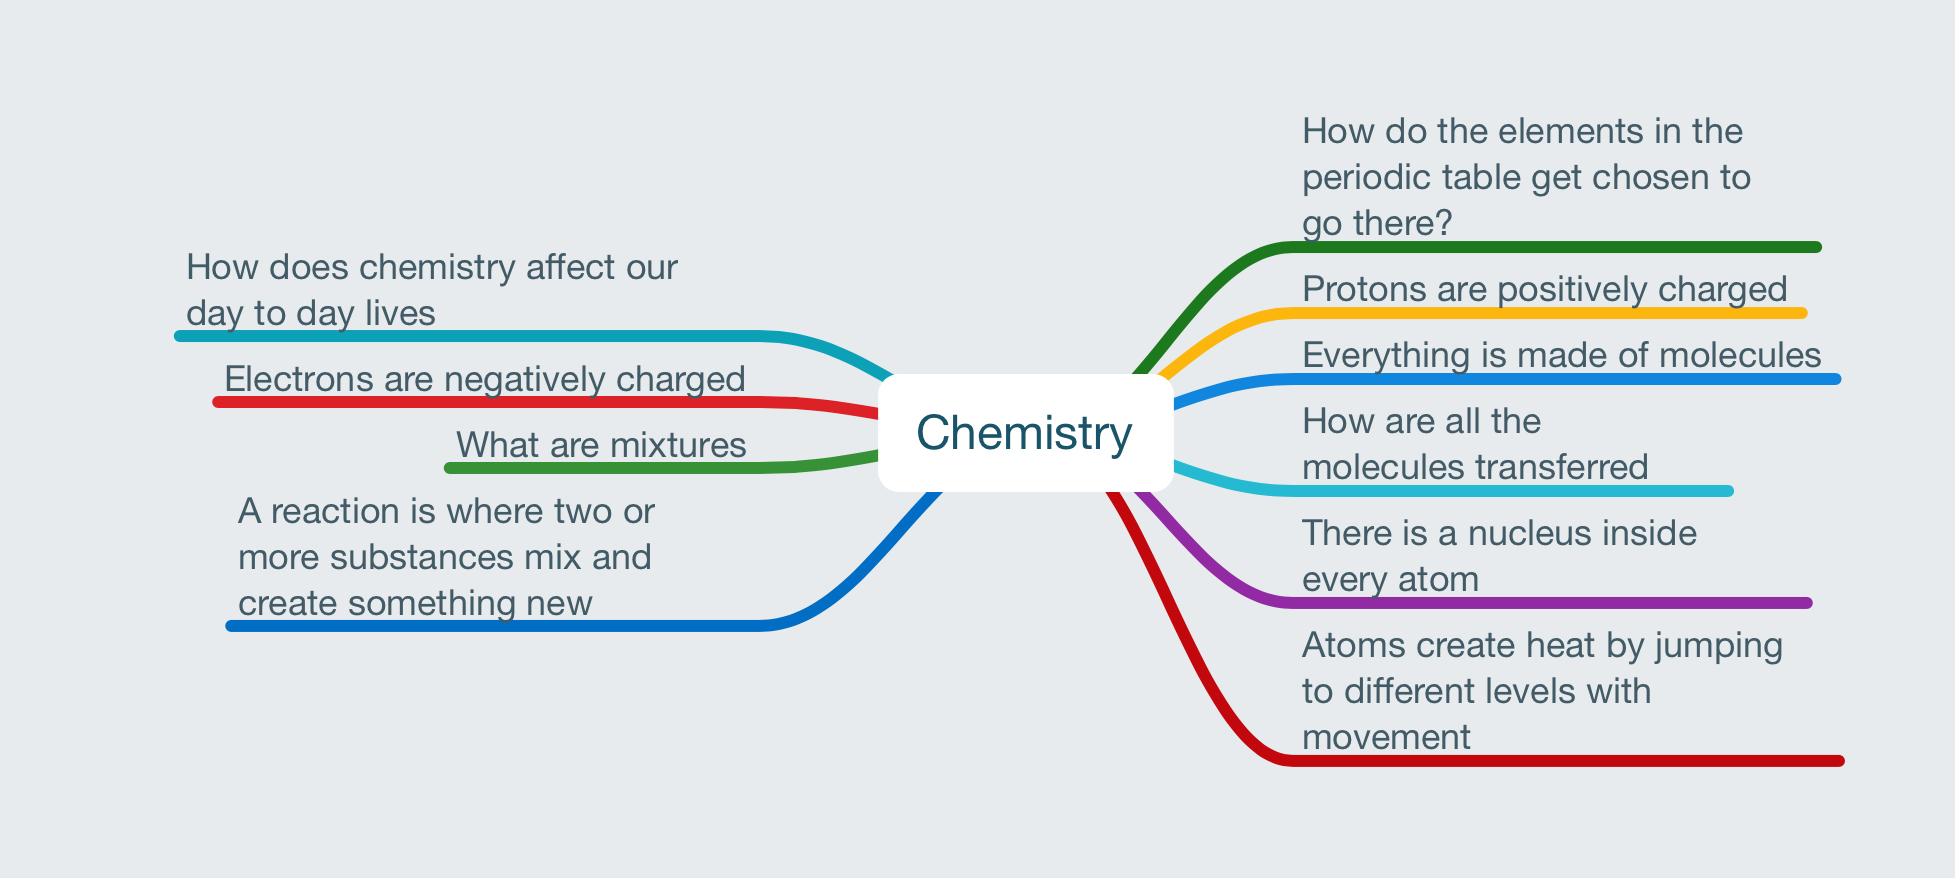
Recently in science 9 we covered the topic chemistry. We started our chemistry unit with creating a mind map, within this mind map we discussed things that we knew about chemistry, and some questions that we wanted to answer by the end of the unit. This is my first mind map.
It’s a pretty bland mind map, but it did cover all the questions I had! Now that the term is over we had to make an end of term mind map as well. This end of term mind map had to cover the questions that we had, and had to expand on what we learned! This is mine.
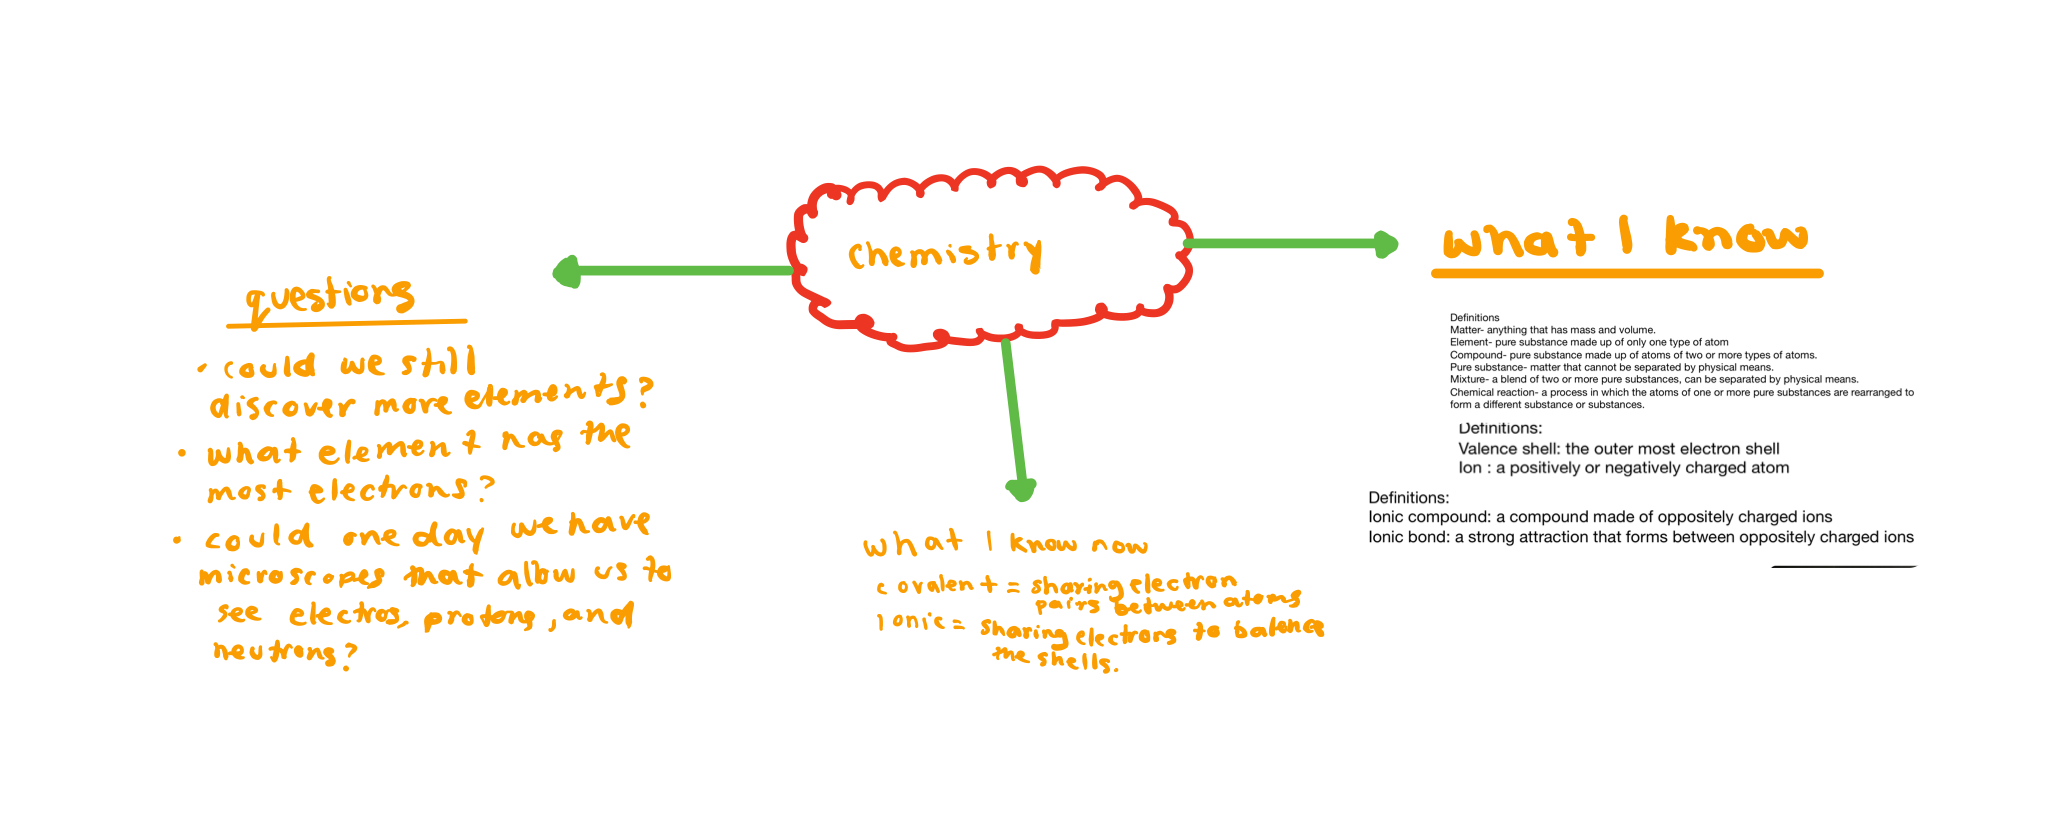
It’s a bit less bland, but it really help me to focus my thoughts, and remember and refresh my memory! In this chemistry unit we also learned all about the different bonds, (ionic and covalent). Let me explain what a covalent and an ionic bond is!
Covalent : a covalent bond is the bond between two, or more (most of the time) nonmetals. This bond is made by the elements sharing there electrons to create full valence shells. An example could be carbon and hydrogen. Carbon and hydrogen each share one electron to create a full valence shell.
Ionic : an ionic bond is when you have 2 charged atoms that are bound by the attraction between there opposite charges. And so usually when a metal binds to things it create an ionic bond. An example of this sharing of electrons is sodium and fluorine. Sodium has one electron on its valence shell, and fluorine has 7 instead of 8 on its valence shell! They create, a perfectly (explosive) pair!
We also learned about matter, different blends of substances, (compounds, pure substance, and mixtures), and we learned about valence shells and ions.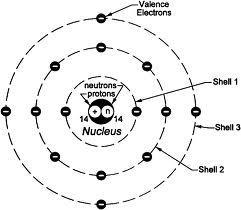
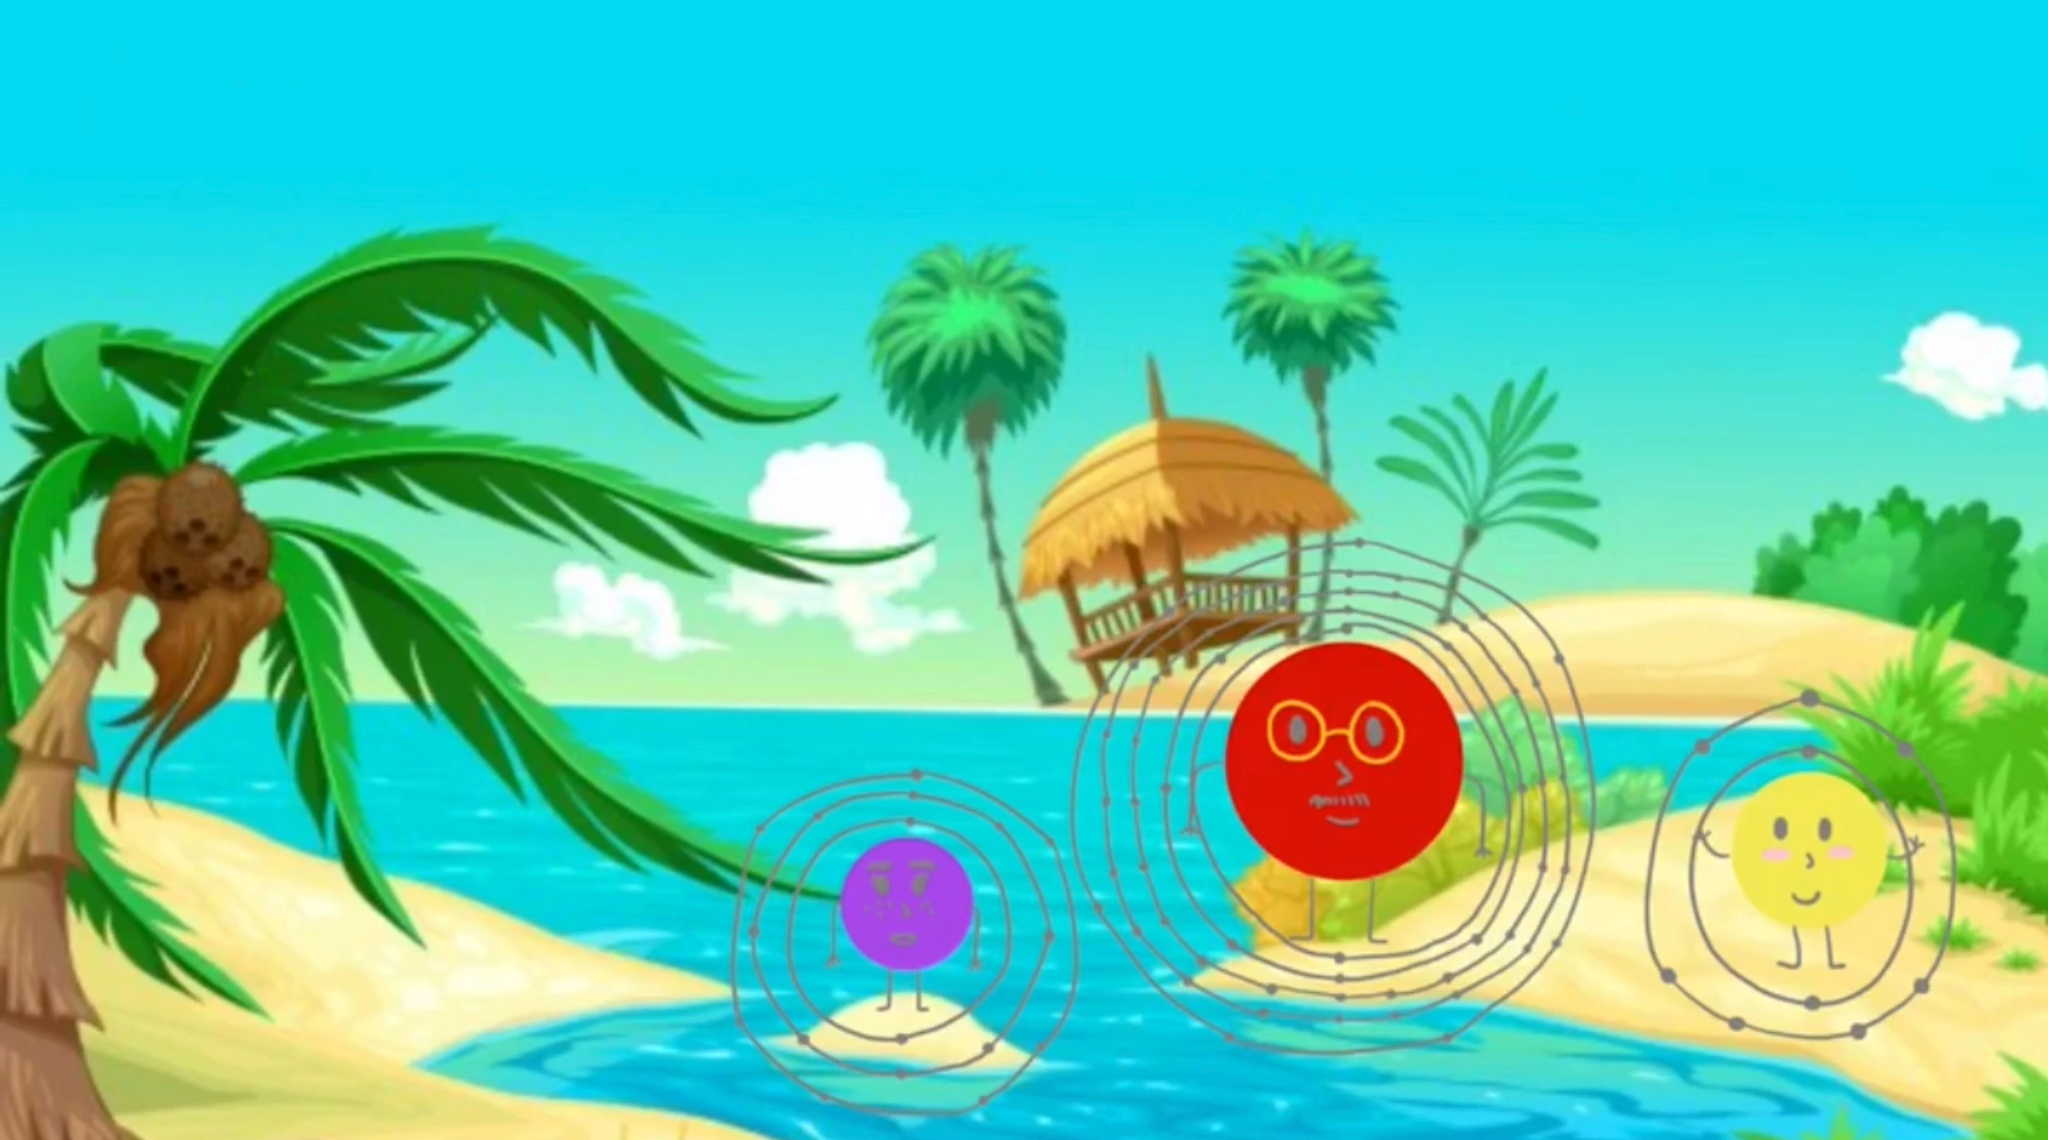
We then took all of this information and used it to create a video that portrayed the connection between the atoms with an ionic and covalent bond, and how the connection could be compared to things around us.
For this project I was paired up with Isabelle, and we chose to show the covalent bond between sodium, and fluorine.


There connection would be shown as friends, who come together to stand up to a bully. The next step was to write a short story with the bond that you chose. I’ll put the story below.

We finished up the script and started to plan for the video, part of the criteria for the project was that it could not be filmed, and people could not be the characters in the video, so we had to be creative. Isabelle drew each character out nicely so that you could see the electron shells and you could see the individual personalities.


We then took these drawings and placed them in Explain Everything where we had our backdrops. We then used screen record and recorded the little elements going around, and doing there things!
The next step was to take the clips and edit them in iMovie. It was a bit hard because iMovie continued to crash while I was editing and I kept losing all the work that I had done, but it ended up working, and I was able to edit and complete the video! My video is below! I hope you enjoy!
Published by