Rick Steves Would Be Proud 😀

Hi everyone, welcome back to a new post. We recently complete an awesome unit in humanities! This unit was on travel videos. For this unit we went to Victoria and had an adventure through time. We visited many amazing sites such as the Royal B.C. Museum, B.C. Legislature, Ross Bay, and Chinatown! Our project for this field study was to make a video on a specific place. I decided to do my video on Chinatown. Here it is below.

It took a lot of effort to get that video to where it is. Many hours of editing. Let’s rewind to the beginning of our unit so that I can explain how it got there.

This unit was called the Wild West referring to the founding of B.C. and in particular Victoria. So for thoughs of you who were hoping for cowboys, this is unfortunately not the right place, but please read on.

Just like any other unit we of course had a driving question. For this unit the driving  question was How might we help visitors to Victoria connect with BC’s history? With this question at the for front of our minds we began to learn about travel videos.

There are many different things that make a travel video as well as there being many different types of travel videos. We watched a variety of different type so that we could understand what type of videos we should be making. Some of the videos we watched were:

Michael Palin:

Departures:

And Ms. Maxwell’s favourite RICK STEVES!

As you can see these videos are all very different and unique in their own way. For our videos we were told to aim for somewhat of a mix between Rick Steves and Michael Palin. The idea was to make the video interesting and immersive but still formal and informative.

We also learned about camera angles and how to film someone professionally. It all is based upon one main idea, the rule of thirds. The rule of thirds states that the person in the shot should be on one side and the other should be of the background.

See how Kyle is in about 1/3 of the shot and the other thirds are empty. This is how you should be in a video. We did some practice with the rule of thirds because practice makes perfect. To know if you have done the rule of thirds correctly you should be able to draw a grid over the person and they should be sitting on a vertical line and their eyes should be on a horizontal line.

Sorry if this is a bit confusing but I hope the images helped. If you have any question feel free to comment them down below.

Victoria

I don’t know if you know already but in PLP we go on field studies to places that will help enhance our learning. This video and what we were supposed to learn in this unit “coincidently” could both be enhanced with a field study to guess where? Yes, Victoria!

Our trip began with a early morning as we had to be at seycove at 5 AM. It was then a 2 hour ish ferry ride across the Georgia strait to Vancouver Island and lastly a 30 minute drive south to the capital itself Victoria.

Views from the ferry

We stayed at Hotel Zedd which is a pretty nice hotel not to far from the city centre.

Our time in Victoria was three days shorter then our previous field studies but we still had a blast. While we were there we went to many magical places such as Ross Bay cemetery, The Parliament Building, Royal B.C. museum and of course Chinatown! At the parliament building we got a tour from our MLA Jane Thornthwaite!

The entire time we were constantly shooting and filming B-roll. It wasn’t easy as we were on a very tight schedule and had very little time to film us talking.

Video drafts

Before I show you my drafts we should go though the criteria that these videos had to pass. Firstly it had to be between 3-4 minutes in length. Second it had to have an intro sequence. Thirdly there had to answer and/or relate to our driving question.


James Douglas

Today’s blog post is on ….. CANADIAN HISTORY!!!! That’s right, for the past weeks we have been hard at work learning about the things that lead of the confederation of Canada. For this unit our driving question was “How does power alter relationships between individuals and society”? Our project for this unit was an animation showing how a famous Canadian figure had power over a group of people (More on that later). Without further ado lets get right into it!

We started off this unit with a fun intro activity. This activity took us to Manitoba in the year 1870 when the Manitoba act was signed. As for what we did, well we were randomly given a slip a paper. This paper explained whether you were a Metis or a prospector. I was given the task of prospector. As a prospector you needed to buy as much land a possible using any means necessary, the only catch. We had a budget of 300$. The metis were trying to get as much for their land as possible.

In the end this activity showed me that the metis got the short end of the stick in the Manitoba act.

For this unit there were two main parts, the first was the animation and the second was Louis Riel.

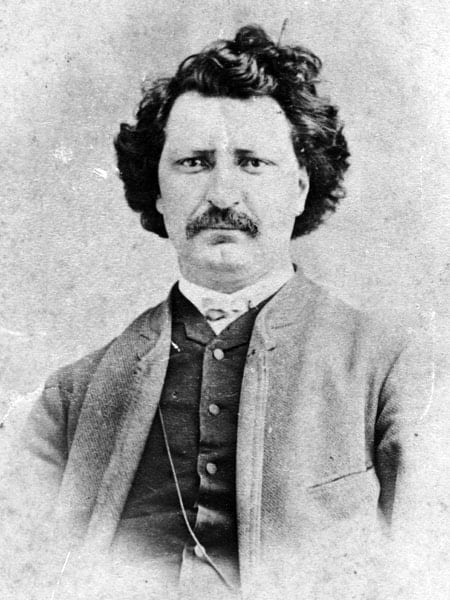
1. Louis Riel

For this part of the unit we read a comic book. This book, written by Chester Brown is all about Louis Riel. In the book we learned about all the stuff he achieved, did wrong, and what happend to him in the end. The book also taught us about Riel’s impact on the Métis, CPR, and the creation of Manitoba. The book was split into 4 parts. Every week we had to read a part and write a paragraph about all the important events that happend in that part. If I had to give a review about this book I would give it a solid 8/10 stars. I really enjoyed this book. It had a good storyline and the visual were good. Where it lost points was in the plot as it was hard to follow in some parts. As well as it being written from one persons point of view because that effects the way characters are portrayed.

Debate

At the end of this book we had a debate. The debate was on wether Louis Riel was a hero or not. I ended up on the hero side.

Right from the beginning you could tell we had the upper hand. Nik and Kyle  kicked it off with an outstanding opening statement. Amelia, Jason and Fraser continued the steamroll with precise blows that kept them on their toes. Finally I delivered the killing blow and the debate had been won.

In all the debate was a lot of fun. You had to know louis Riel’s history quite well otherwise you got shredded to bits. I really enjoyed this debate as it brings out the competitive side in a lot of people as well as having lots of people participate. I really hope we get to do more of these in the future as I really enjoyed them.

2. The project

Using the power that Louis Riel had as an example, our task was to feature another famous persons power. The person I choose was James Douglas.

Before we could begin our animation we first had to learn about the person we chose. One fact that I learned about Douglas was, he important man as he founded Fort Victoria (now the capital of B.C.).

Once we had done our research we had to draw out our plan in the form of a storyboard. Once done that we could begin drawing our animation.

First draft

Final draft

Reflection

In the end I thought this unit was FANTASTIC! I enjoy almost every moment of it. I really liked how my animation turned out as well as the debate. One thing I realize in this project is that I need to time block a lot better because I was up really late finishing my animation. If I had time blocked it better I could of spread it out a lot more instead of doing it all in one night.

So ya the my shpeal for this post I hope you enjoyed

-Em

The return of …. mPols!

January it’s a new year, new goals and a fresh start. But for the PLP students of seycove its a time of reflection. I’m talking about mPol’s. I’ve done a couple last year but thing have change since then.

Now I have the difficult task of explaining my achievements, success, growth, goals, and improvements. As well as talking about the new course and my thoughts on it.

PGP

This year in PLP we got a new course. This course PGP is the place where we dream. What we want to do, become, achieve, the places we want to be years from now. So far I have found that this course at first just seemed like a lot more work had assembled into arguably the most important course in PLP.

We also had to read this book. The book was called “What do you really want” by Beverly Bachel. In it I learned about goal setting and what truely inspires me. One of the forms that we need to do was not actually a form.

This was the dream board. The dream board was something that really pulled back the curtain into my true inspirations and goals. I really enjoyed this form because I got to put everything I love onto it. 

Next I would like to talk about my success this year so far.

Though out the year so far there has been two themes that has been obvious the first is video making and the second is story telling. Using these two things has been pretty much required in every project thus far.

Identity

This unit was the introduction to the true power of video editing. In this unit we went to Alberta. Our project was to film and edit a video the showed how the land impacts peoples identity. We had to feature at least 3 different places and have an interview. The hardest parts of this unit for me were first we only we able to film at each place once as we weren’t going back. So you had to plan ahead so that you could get the shots you needed. I struggled with this because I am not good at planing things out ahead of time and then following though. The second was the interview. If you didn’t know I get very nervous when I talk in front of lots of people and when I have to interview strangers. In this unit I learned a lot about filming, editing, audio, and problem solving if you don’t have the right shot. Also I have developed a new found respect for editors, as editing is really hard to do if you want to make it good.

Metaphor Machines

Next up we have metaphor machines. In this unit my group members were Kiera, Jason, Sam, and I. In this project we had to research a revolution and create metaphors for important events then we had to combine all of the metaphors together and make a machine out of them. I thought that our team did well. I picked this unit to show because I had to persevere though a lot. We had a sluggish start to our research and some parts of are machine were not built correctly due to lack of communication. But we managed to corral ourselves and get it done. All in all I think we did a great job on our video and our end result was great. 

Winter Exhibition 

This year our exhibition was different then lasts. This year we were assigned groups. For this exhibition we had to animate a story about chemical bonding. We then had to combine two stories together then after all that we had to pick one spot in our story and turn it into an immersive experience. For this project I thought I did pretty well. We had some rough spots and at one point we collapsed from problems with communication. But we managed to reel it back in and make an awesome room. I felt that in this project I could of done a lot more when we were designing our story.

Live event

Up last we have my live event. For this project we had to make a video featuring an event that was real or made up. The challenge was that we only had one shot at filming it so again you have to plan out your video. This project for me was definitely the hardest one. I can say 100% I F.A.I.L.ed this project. I thankfully after a long talk with mom was able to save it and get something in. Unfortunately it was weeks after the due date. From this I learned a lot about what to do if I get stuck.


Reflection

Since grade 8 started I have done some pretty great things. Before I even knew the benefits of goals the PLP teachers had already made us make some. The goal I set last year in the growth mindset unit which was “I want to take criticism as advice rather then a put down” has definitely been checked off. Another goal that I set at my first mPol unfortunately has not been completed. Although I have definitely been improving. Thanks to the new apps that we were taught how to use it has been easier to complete my work. Now my question for you “how did you manage sports, music, and school with out getting overwhelmed?”


A Chemical Affair

pastedGraphic.png

Hi people welcome back to another post and the first of the New Year. I hope you all had a very Merry Christmas and a great New Year. In this post I will be taking you back in time to a couple weeks ago. A time of stress for all PLP students, you’ve probably already guessed, the Winter Exhibition!

If you are a new reader, PLP has to yearly exhibitions. One in December and one in June so if you missed this one it’s ok. I hope you’re able to attend the one in June. If you would like to see my first two exhibitions, click here and here.

Last year both exhibition’s used an inquiry question as the main topic. This year we combined science and humanities to make something different.

As always we were first put into groups. The group making started in science with our chemistry unit. In my science group it was just Alex and I.

In science we were tasked to make a video about chemical bonding. This animation had to have a few things. First we had to write a screenplay, which is a script that includes acting instructions and scene directions. For me the challenge was animating the video, as animating in keynote isn’t the easiest.


Once we had made this chemical stories we were put into bigger groups based on our story’s plot. In this new group it was Kiera, Taylor, Alex and I.

The idea for this exhibition was to combine our two chemistry story’s together to create one big chapter. Then turn it into an immersive experience that shows an entire story in just one room. Also it had to incorporate chemical bonding into our room as well.

The first thing we had to do was combine our two stories into an amazing tale that would entice readers until the end. The thing we struggled with at this part was  incorporating the science side of things. But after much discussion with Mr. Gross our science teacher we final had something.

For our story we decided to combine a murder mystery and a romance together. Our plot was:

Ona Ozone (Kiera) has gone missing. It is up to you and Detective Ospino (Alex) to find and return Pho Phosphorus’s (Me) lost love. To help guide you along the path video clues have been placed around the room. Good luck detective. For those of you who weren’t at the exhibition Ali Aluminum (Taylor) is the kidnapper.

pastedGraphic_1.png

But before we get to the room we are going to have to rewind to planning stage. 

In my opinion this group was galloping along at a pretty good pace we were on a plan that would see us ready for the exhibition. But on the day of the horse ran out of speed. This was not unpredictable as most people act different as stress mounts. My group had to stop and talk thing out before we could continue on our way.

The aspects of our room

Food: Part of every PLP exhibition, food plays an important role in setting the plot and scene of the story. For our room we decided to make cookies and brownies from “Ali’s bakery”. 

pastedGraphic_2.png

The cookie batter

pastedGraphic_3.png

Cookies awaiting the oven


Mood: Mood is an important part of any immersive experience. To set mood we used candles and lamps for lighting and creepy music.

pastedGraphic_4.png

Pho’s desk

Decor: Decoration are easily one of the biggest things needed to create an immersive experience. 


The Cage!: That’s not a typo people. Kiera had to sit in a dog cage the entire night to show that she was kidnapped. 


Pictures from the night of


Overall the exhibition was in my opinion far better then both of last years ones. The reason is because I like working in groups as I am a very social person and like having other people to bounce ideas off. 

With everything take in into account I learn a lot from this exhibition. From animation to decoration, storytelling story writing and so much more.

I really enjoyed this exhibition and if you weren’t there I hope to see you at the one in June. 

👋 👋 

-Em

Chemistry

Hi guys welcome back to another post! Today we are talking about chemistry!

In this unit we learned a lot about chemical bonding and the different elements.

The two main things that we learned were:

Ionic bonding: Ionic bonding is when a metal and a non metal bond. This is done by the non metal give the metal (in most cases) its valence electrons because of this, they then bond together to create a compound.

and

Covalent bonding: Covalent bonding is when two non metals bond together. To do this they decide to share their valence electrons so that they both have full valence shells.

Lastly I have my mind map to show you guys. This map includes stuff that I learned during this unit (in black) and the stuff that I already knew (in red).


Thats everything for this post I hope you enjoyed and to see how we used chemistry in PLP stay tuned for this next post!

– Merry Christmas, Em


The Digital Language

Hello everyone and welcome to another SBC post. If you haven’t been reading my post this is week 9 of the student blogging challenge. I hope you enjoy.

geralt / Pixabay

This week the challenge is coding! Coding is really cool. It is the reason that all your devices like the one your reading this post on work. You might think it sounds hard to learn but it’s actually pretty easy. Lucky for me I had previously done some coding in a free app called swift playgrounds. It’s really easy to use and code with and there are many different options depending on you ability.

Unfortunately for this challenge the task was to use the hour of code website. After doing one of the challenges (which I will talk about in more detail later) I found it was a lot like swift. Now on to what you do with the code.

First I would like to say that even though it says hour of code the exercise only took me about 10 minutes. Most of them should take you from 10 to 20 minutes to complete.

I decided to do the Star Wars themed one. It was a pretty easy one that I recommend for people who don’t know anything about coding or if you are a younger person. I picked it because I like Star Wars.

The first step was pretty easy. You just have to move the blocks from the column to the box.

Now I have a challenge for y’all. I will put three different images of code from the exercise. You have to figure out the different moves from the movements in the column to get BB-8 to each of the scraps of metal.

1. 

2. 

3. 

Leave your answers in the comments.

If you enjoy coding you can get even more complexed and move to Java which is more of a code.

Anyways that’s all for this SBC post hope you enjoyed

-Em

Teaching is hard!

What’s up guys welcome to another post. Today I have an amazing experience to share with you guys! Recently it was take your kid to work day (which I’ll explain in a minute) I had so much fun at my mom’s work and I can’t wait to share it with you!

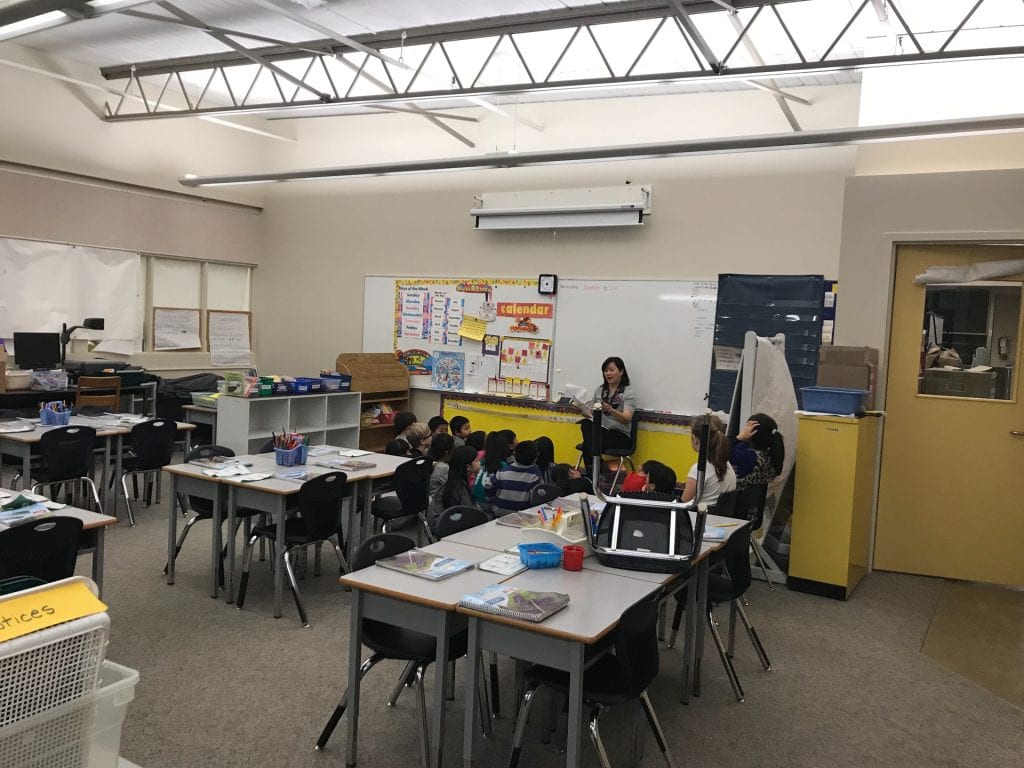
Every year across the Canada every grade 9 student has the opportunity to go to their parents or friends parents work. This year I am in Gr.9 so I had the opportunity to go. As I mentioned I went to my moms work because I didn’t want to sit around all day in an office cubicle like my dad. I decided that I would much rather go to see my moms school.

Yes that’s right my moms a teacher. So while some of my friends went to places like Amazon, I was still going to school.

Believe it or not I learned a lot about being a teacher as well as see the other side of a school.

I got to see many things that happen at a school that kids aren’t aware of. But one thing that stood out to me was how much a teacher has to work. Teachers have a tons to do. Not only do they have to plan lessons and what to teach but they also have meetings and marking. According to the Gr.7 teachers the marking takes forever and that’s just elementary school marking. I can’t imagine high school teachers having to mark not one but three to five classes worth of marking.

On top of all of the things that regular teachers have to do all the teachers at my moms school are moving back to their regular one.

For the last year and a bit Kingsford Smith the school my mom teaches at has been closed for earthquake renovations. The VSB decided to put half the school at Champlain heights and the other half at MacCorkindale. My mom got put at MacCorkindale so that’s where we went.

Normally when a company or a business they hire a company to pack up everything and move it all in a day. But unfortunately for the teachers they had to pack up everything that they wanted to take with them AND they still had to teach regular classes.

Being PLP we had a video assignment to do. Our task was to film a video that had an interview, a story and a focus. Below you will find my video. Enjoy!

What makes a good video!

Hello everyone and welcome back to another amazing post! In this post I will be explaining the process of video making and reflecting on all the videos I’ve made so far this year in Maker.

There are many things that make a video great so lets get into it!

1. Planning

The first step when making a video is planning. In this stage you should plan out everything. Some of the more important parts what to plan out are, your shots (what are you going to film and from where), who’s going to film it (wether its you or one of your friends or family), what your going to say (will you speak in your film).

One project that we did this year which was crucial that we planned was our Take Your Kid to Work Day video + post (which you can find here). It is important to plan out ever video as the better planned out your video is the better it will turn out.

2 ish. Scouting

What I mean by scouting is scoping out the place(s) you are going to film at. I have found scouting to be quite helpful if you are only going to a place once because then you can find out what’s there and what’s not. I would consider this an optional step as some times this will make it harder for you to make your video. e.x. If the images you are using to look at the site are out of date.

I used this particular step and found it quite helpful in the making of our ghost town video as we weren’t sure what places were in the town, so we used google maps to look it up.


3. Filming

Now we move on to the most important part of making a video, filming. One important thing to remember in this step is film 10 times more footage then you think you need. If you are making a 2 minute video, have enough B roll (extra footage) to make sure you don’t run out. Also making sure you have the right shot, take the time to ask or wait for people to move out of your shot and do your best to have a steady camera.

My Alberta post (found here) really shows that you need lots of B roll to make a good video. Remember that half of a great video is making sure you have great footage.

4. Editing

Now your probably asking yourself what is the other half to making a great video. My friend the answer is EDITING! Editing can be split into three major sections.

First up we have audio; audio is very important because without it you can’t really understand what’s going on.

Next is music; make sure to keep in mind that music basically sets the mood of the video so fining the right music is very important for a good video

Last and definitely not least is make sure everything lines up and makes sense; I know that sounds very confusing so let me put it this way. Re watch your video multiple times to make sure, the audio lines up with the images, your music achieves the mood that your going for, listen to make sure you audio is not drowned out my your music, and look for any errors in the footage to make sure everything looks right.

One video that shows all of this very well is the enchanted forest video that we made in Alberta. As it was very hard to check all of the editing parts off.

Ending

Looking back at all the videos that we have made so far in all of our subjects I realize how far I’ve come in completing these steps. I have leaned so much from making these videos and I’m so glad you took your time to read all of these steps. Even though we are writing the blog post now, this video unit has yet to officially end as we will continue making videos following this formula.

Lastly I leave you with a comparison of two videos. The first was made at the beginning of the year and the second was made just before Christmas break.

Enjoy!

Until next time

-Em

A big black hole

Hi guys I’m back with another sbc post. This week, which is week 6 our task was to research a top that we are interested about and feature it in this post.

I have always wondered a lot about outer space and the things that are out there. But one thing that has had me truly fascinated are black holes. Now most of you readers probably know what a black hole is. You’ve probably see one in a movie or TV show.

For those of you who don’t know what a black hole is it is a…

In case your still confused a black hole “eats” everything thing around it including light thus being called a black hole. With just a normal telescope you are unable to see a black hole because they absorb all the light around them. The reason scientists know about black holes is because of its gravitational pull. Using special tools scientist are able to find them by measuring the gravitational pull around space. Now I have a video about black holes to share with you people. Here it is.

I chose to show you this video because first crash course videos are amazingly helpful when it comes to understanding things. Also this video really covers the basics when it comes to black holes as well all the facts they gave are accurate.

Now I have a quiz for you guys. It’s called two truths and a lie. You’ve probably all played this before but anyway the rules are simple, below are 3 statements only 2 are facts the other is completely made up. All the info you need to solve these statements are in this post or in the video. Have fun and don’t forget to comment your answers below. Enjoy!

1. When you get really close to a black hole time slows down

2. If you get within a few dozen km of a stellar mass black hole you experience  spaghettification

3. Scientists say our sun will become a black hole in the future

Don’t forget to comment your guesses below. Thanks for reading

-Em

A Metaphorical Machine!


Welcome to a new post my readers. Today post is featuring 2 subjects; scimatics and humanities! In this project we learned about steampunk, the Industrial Revolution, metaphors, Revolutions, circuits, and scale diagrams. For this post I have divided it into three sections. The humanities side, the scimatics side and the actual video it’s self. Now let get it going with the humanities side!

Humanities

In this unit I learned a lot about steampunk and the Industrial Revolution. If you haven’t read my Steampunk post which defines steampunk and what it is you can check it out here. We started out this unit by learning about a man named Crane Brinton.

Brinton was an American historian who is best known for his book The Anatomy of a Revolution. Brintons theory was a guildline that almost all revolutions follow. In his theory he compares a revolution to a virus. His says that there are four stages to a revolution. I also compared his stages of a revolution to a story spine there is a exposition or incubation stage, next is the rising action or moderate stage, third is the climax or crisis stage, and finally is the conclusion or recovery stage.

After that we moved on to picking our revolutions. There were five different revolutions to pick from the options were: Russian, French, American, Chinese, and Haitian. I got put into the Chinese one with Jason, Kiera, and Sam. For some reason Ms. Maxwell our teacher decided to put all the asians into a group doing an Asia  revolution.

The requirements for this project were: there had to be at least 6 different metaphors, we had to fit all onto a 120 by 60 Cm board, and we had to incorporate a circuit.

The first thing we did about our revolutions was find out more about them. We had to make a timeline with all of our important events that happend in our revolution.

We then moved on to creating our metaphors. Because so much happens in a revolution and we can’t make every event into a metaphor we decided to pick the 6 most important events that happend in our revolution and turn them into metaphors. My group and I decided on these six events to be represented in our machine.

After we decided our metaphors we moved onto drawing. At this point I would like to remind you that this post is a multi subject one meaning we worked on this project in multiple subjects and got a grade for each one. At this moment I am going to switch to the scimatics side of things and come back to the humanities section in a bit. Thanks and hope you continue to enjoy this post.

Scimatics

While we were learning about history in humanities, in scimatics we were working on scale diagrams. For this we used a website called khan academy which you can find right here. I highly recommend it for anyone struggling in math because if you don’t understand the lesson there are videos that explain how to do it. Also its free!

Our work on scale diagrams was very interesting. Once I got the hang of it, it was quite easy to do. Anyways our first diagram blueprint that we drew was pretty good.

Once we had that done we began to learn about circuits. In this unit I learn a lot about electricity and how current flows. As well has how to get more power from the same amount of battery’s. We did quite a few worksheets and experiments that helped me understand and then further extend my knowledge about electricity.

As I said earlier we had to incorporate and make a circuit into one of our metaphors. Me and Sam were in charge of designing and making our circuit. We decided to make a parallel circuit an run a copper wire across the track so when the golf ball rolled through it would switch our circuit off.

The switch circled in black was a wire that ran across the track

Me and Sam not only had to design our circuit but we actually had to make it. Working as a team we had to sauter the wires and LEDs together so that they wouldn’t fall apart.

Now back to humanities

While me and Sam were hard at work making the circuit, Jason and Kiera were busy working on the machine its self. They had to spray paint and glue gun the tracks to the board. Everything was going along very well until we ran into a problem. Our original plan for the scale did not work so we ended up remodelling the scale so that it was easier to make.

It took us about 1 and a half weeks to make and build our machine. Then we spent another 2-3 days repeatedly making test runs to make sure that it worked. After we did our full run through we start making our video.

The video that we ended up with was very good. My group and I decided that me and Sam did a lot of the building of the machine so Jason and Kiera did most of the work editing the video. For science we also had to make a final blueprint and circuit diagram which you can find below.

Now with out further ado here is our final machine video hope you enjoy.

Conclusion

Refleting back on this unit there were many things that I learned. From the revolutions to circuits to even how to build and improvise if something doesn’t work. I really though I increased my knowledge on many things including how a revolution happens, what happend in The Industrial Revolution and how circuits and electricity work as well.  I really enjoyed this unit and I can wait to write about the next. Until next time 👋

-Em