There was a Blue Sky Yesterday

Hello there and welcome to my last blog post this year. This post is about blue sky. If you don’t know what we do for blue sky click here to read my last blue sky post.

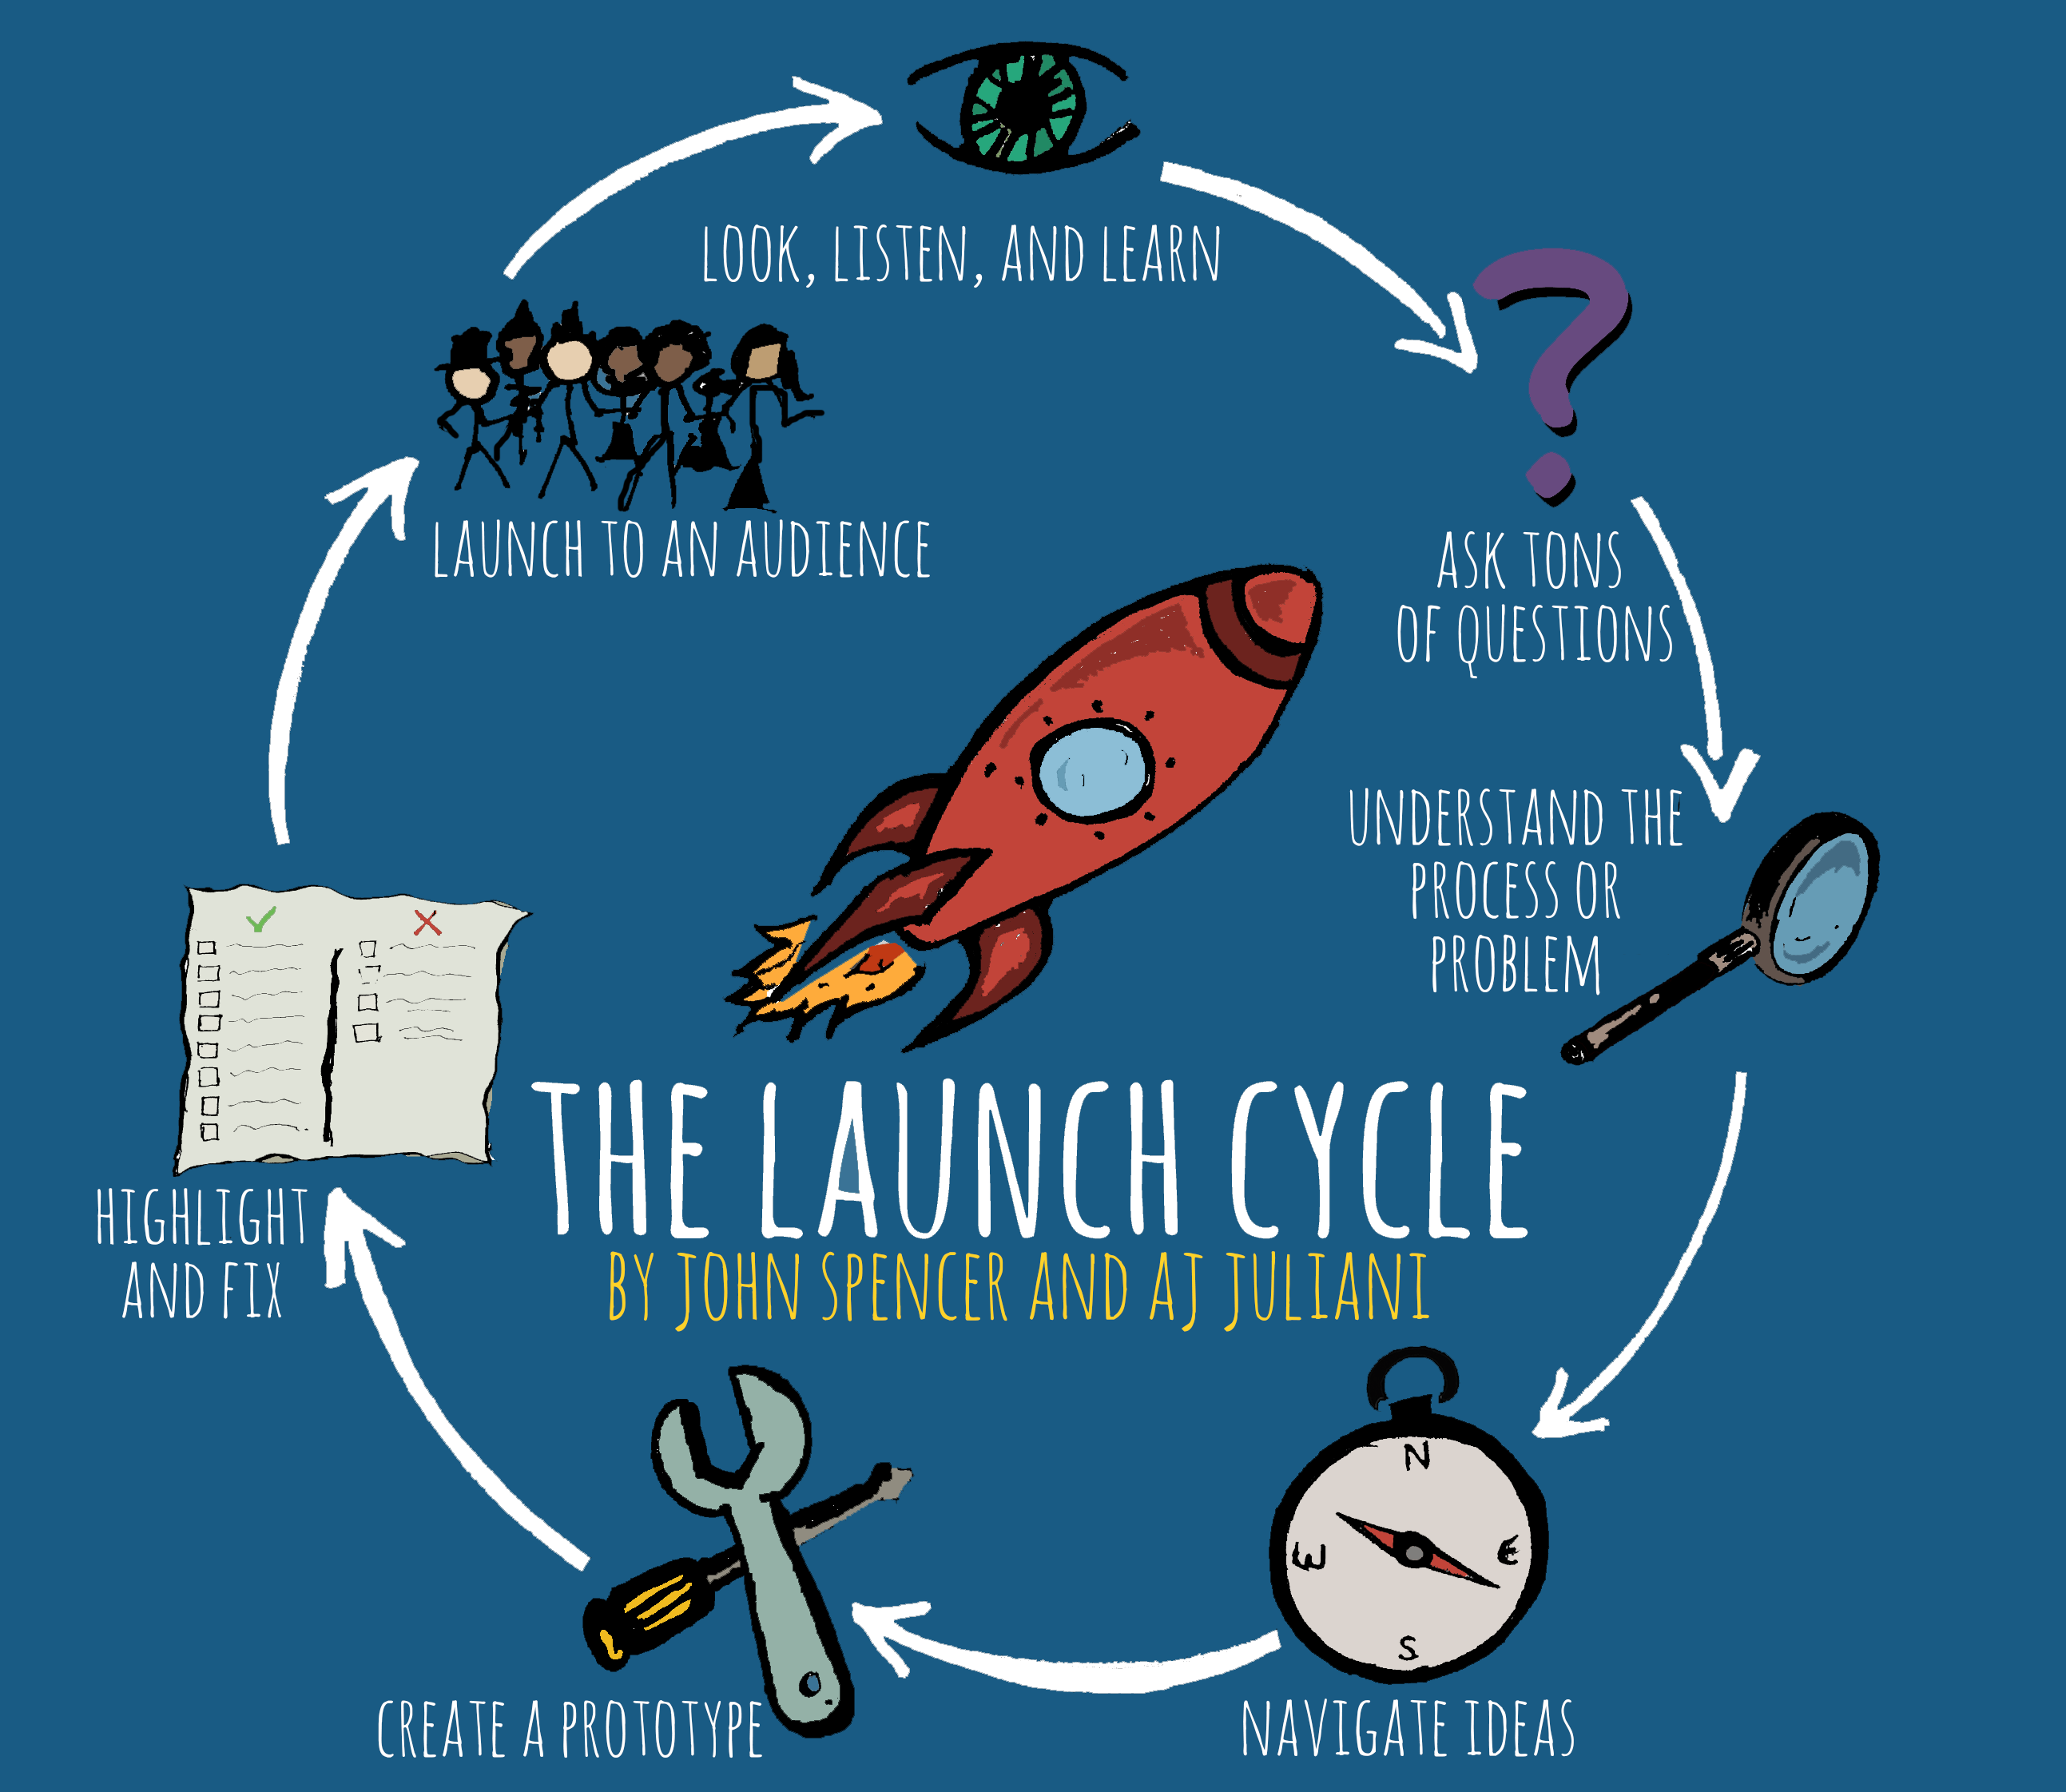
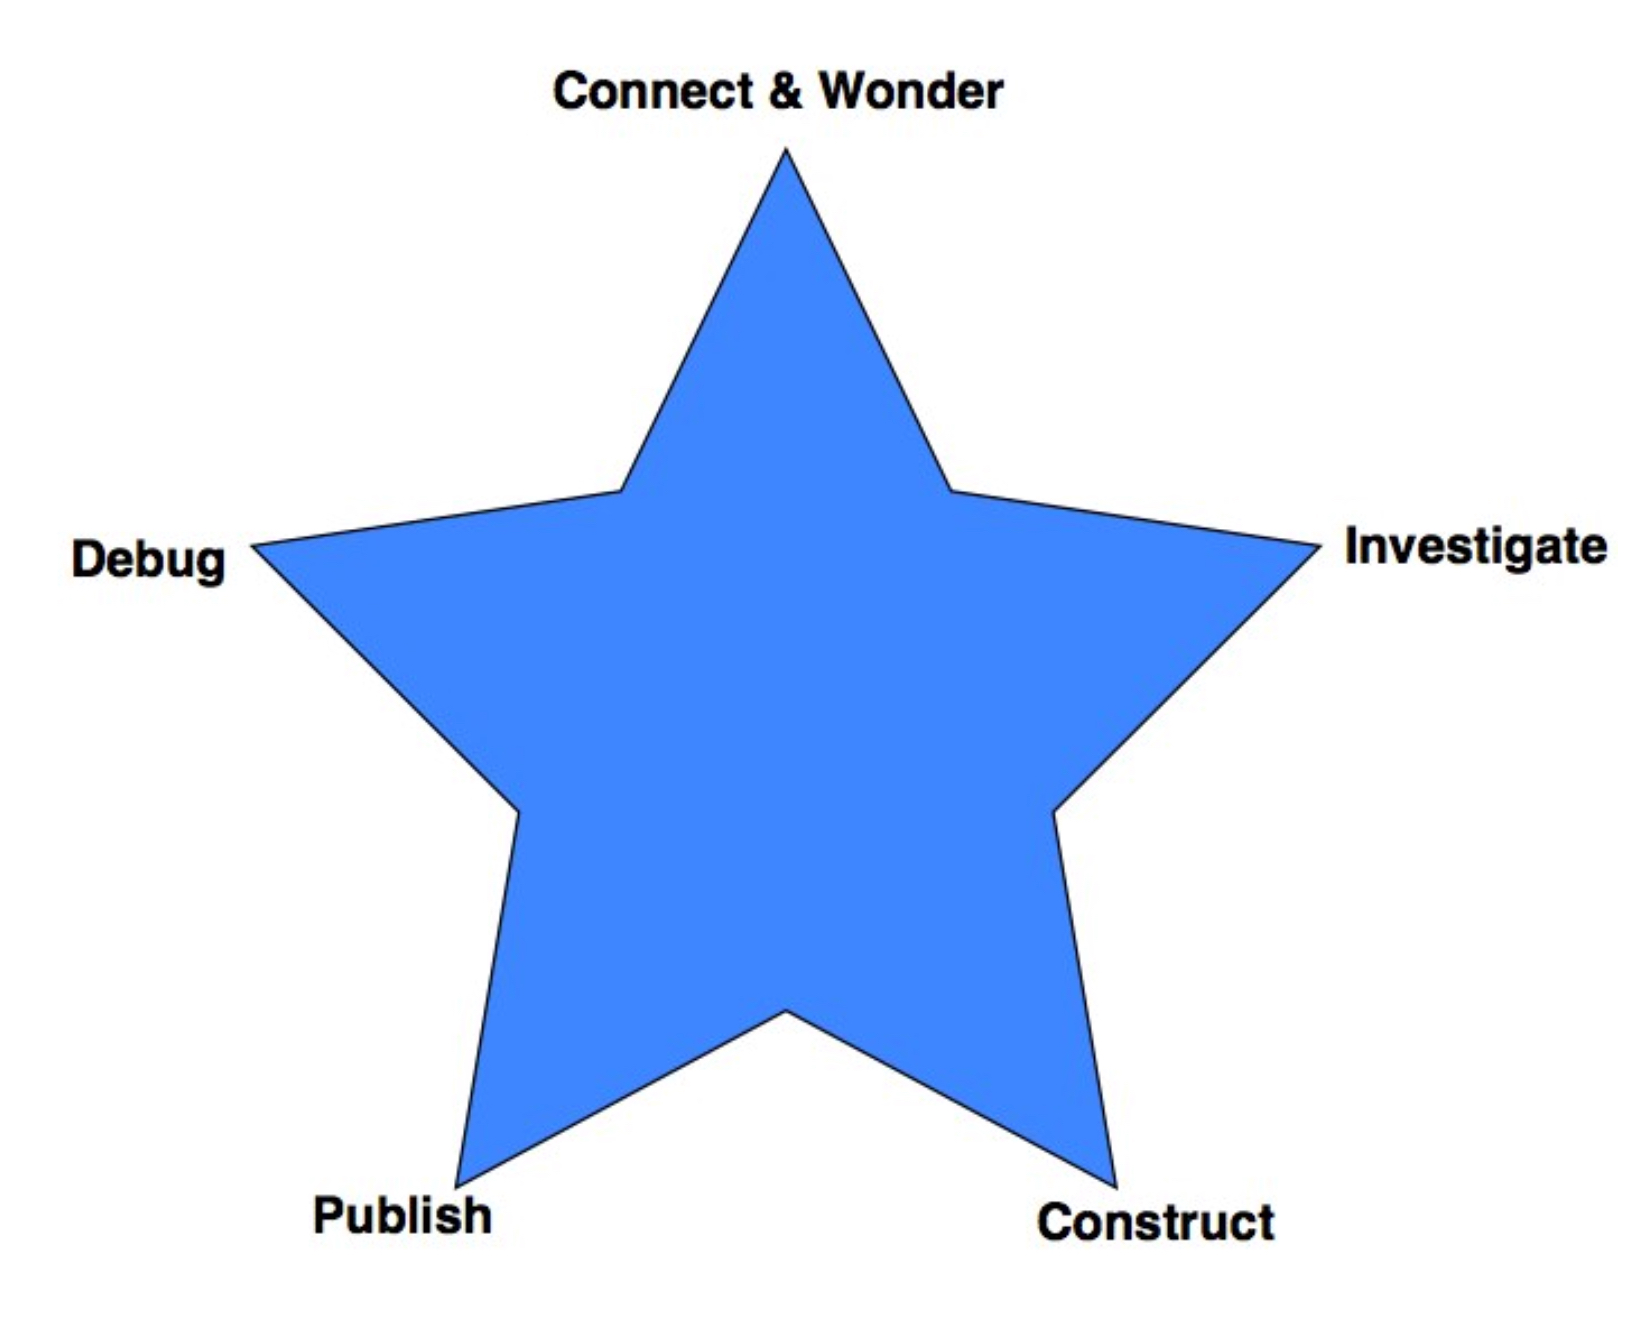
Just like last spring exhibition we followed the launch cycle to create our projects. The launch cycle is a very useful acronym that stands for; L. (Look, listen, learn) A. (Ask tons of questions) U. (Understand the problem) N. (Navigate ideas) C. (Create a prototype) H. (Highlight and fix). If some of the letters meanings are unclear watch this video to get a better understanding of the cycle.

L – Look, Listen, Learn

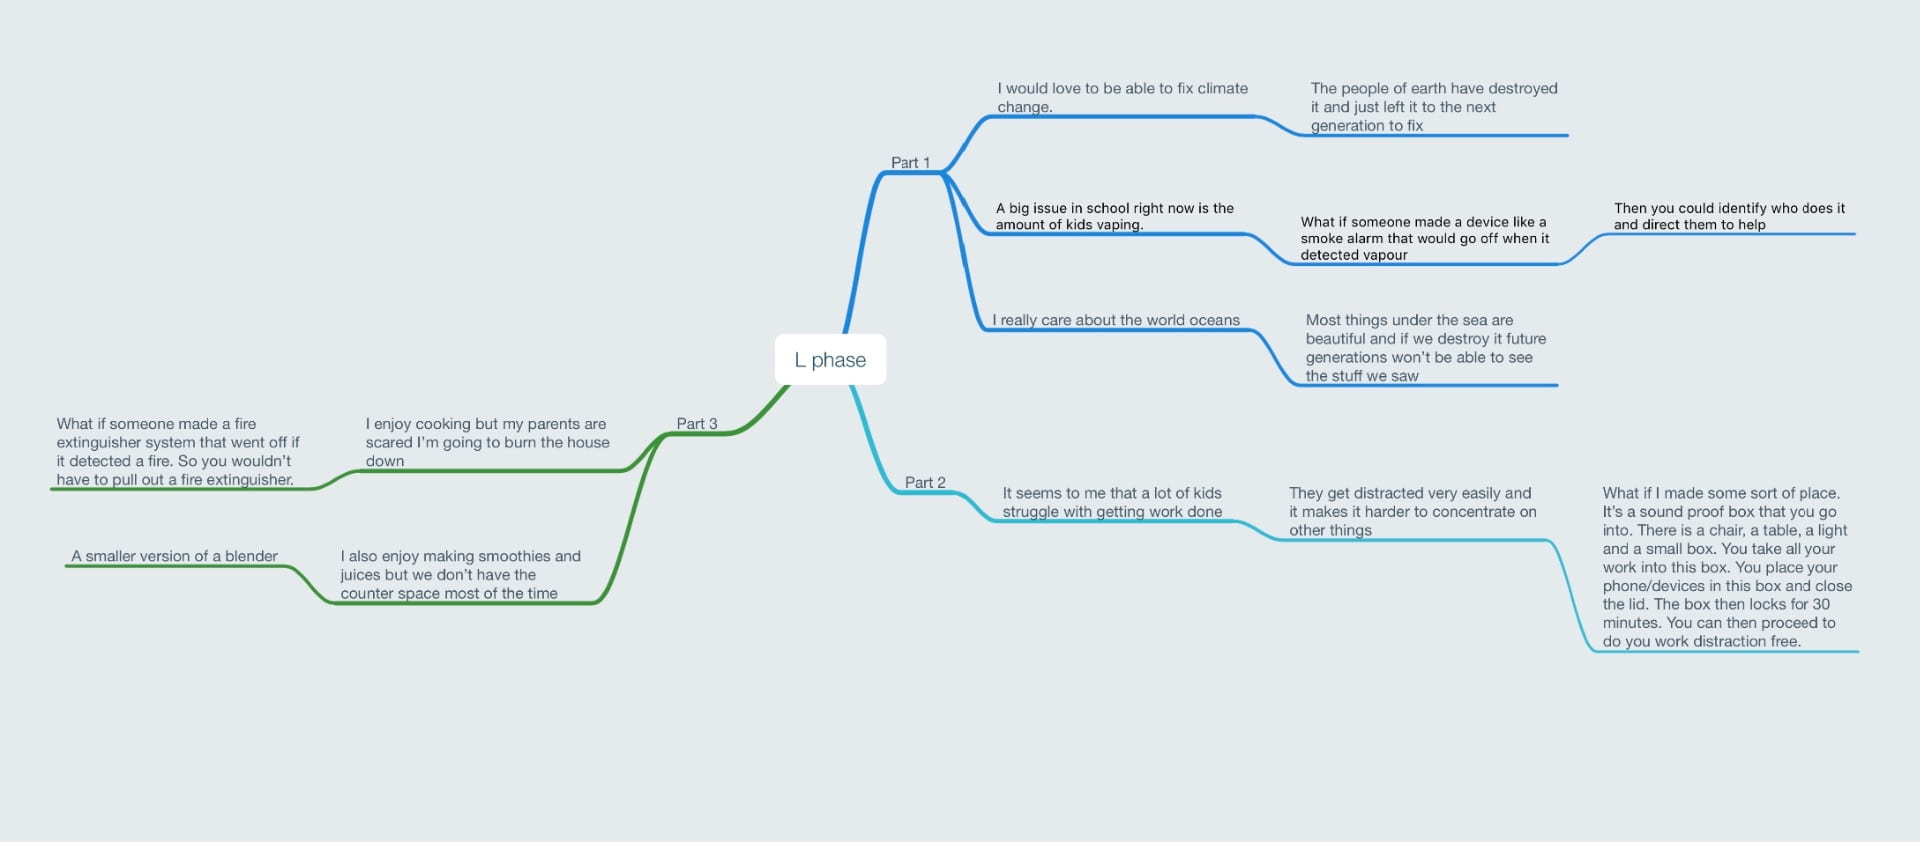
This is the brainstorming phase. We were given prompt questions and tasks that would help us decide what to make. In this phase I decided to create a mind map to plot out my ideas. You’ll notice that my idea isn’t on this mind map.

A – Ask Tons Of Questions

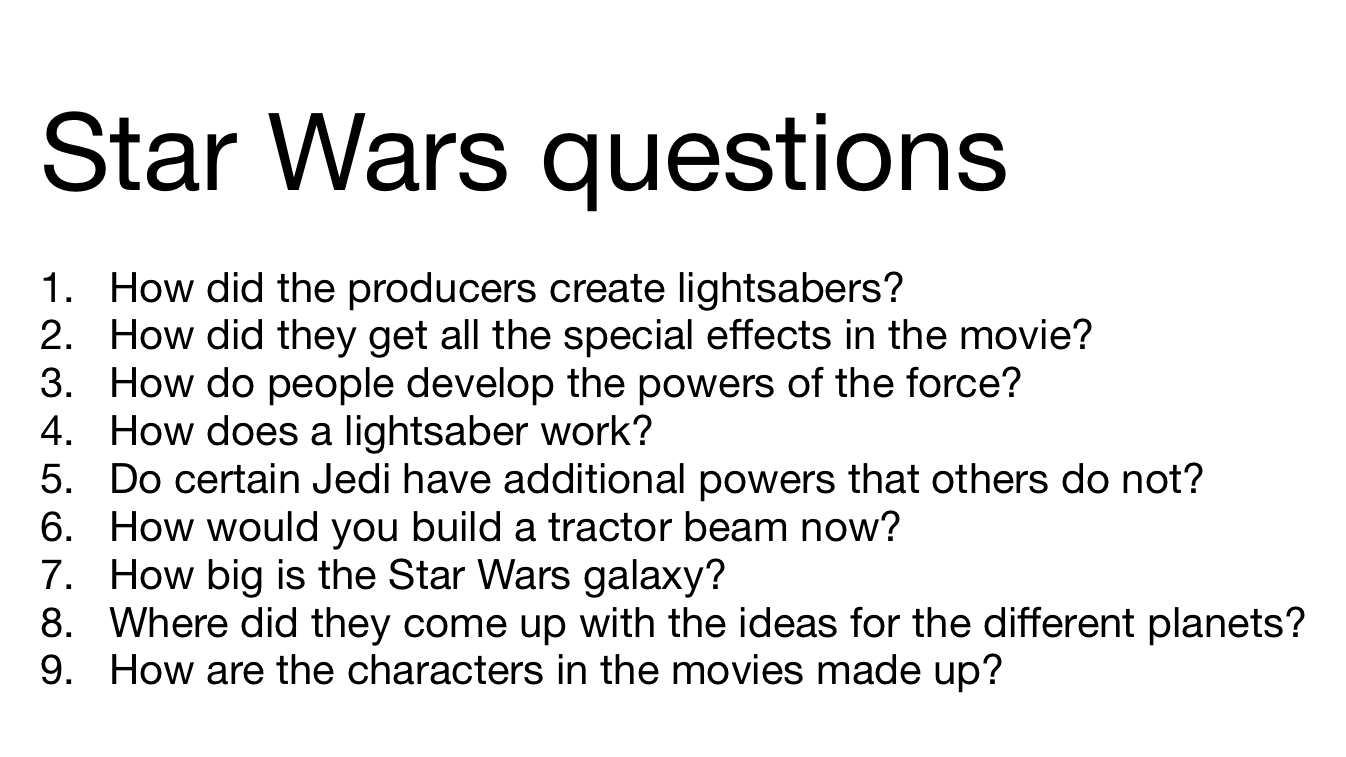
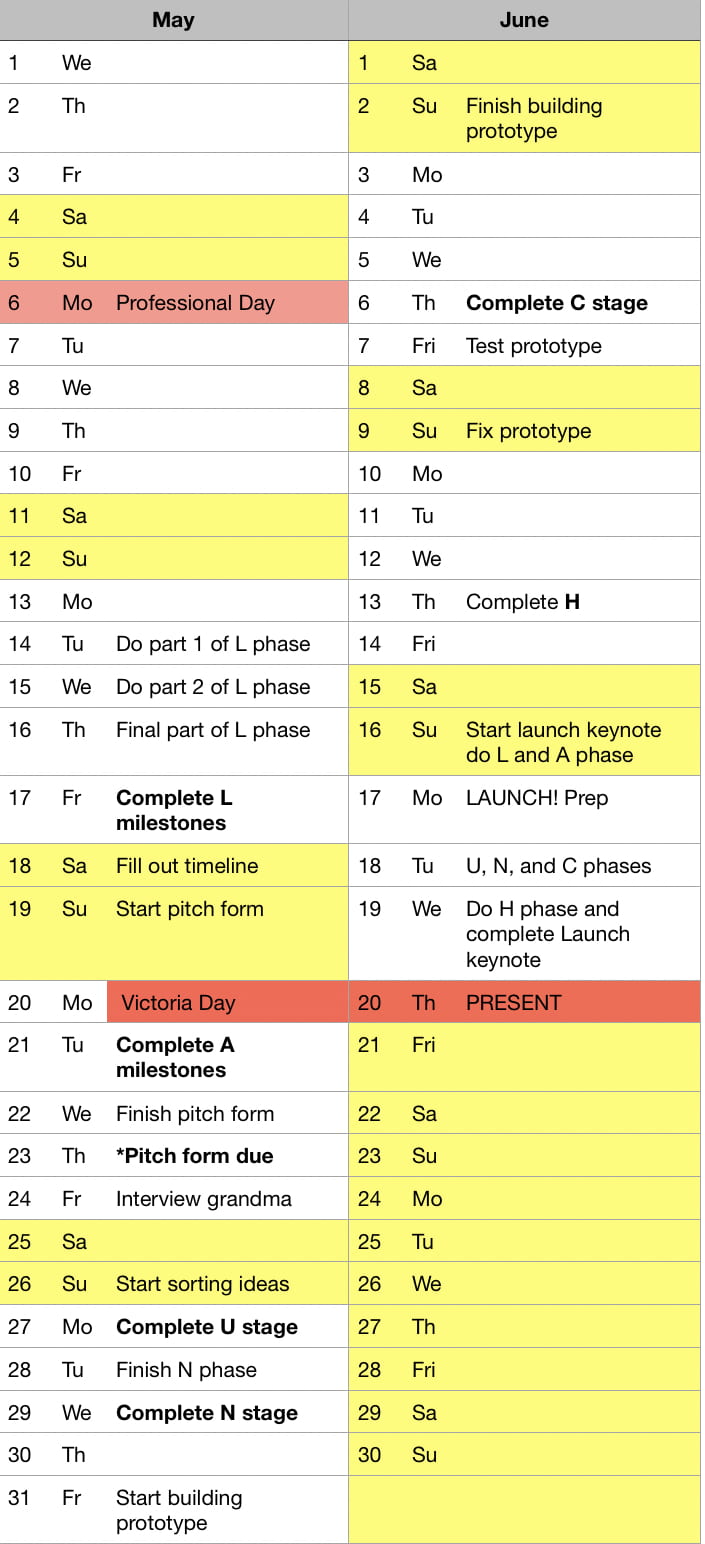
In this phase we had to ask questions about our idea. By this time I still hadn’t come up with an idea yet. But I made a timeline so that once I had an idea I already layed out a plan to comeplete it.

U – Understand the Problem

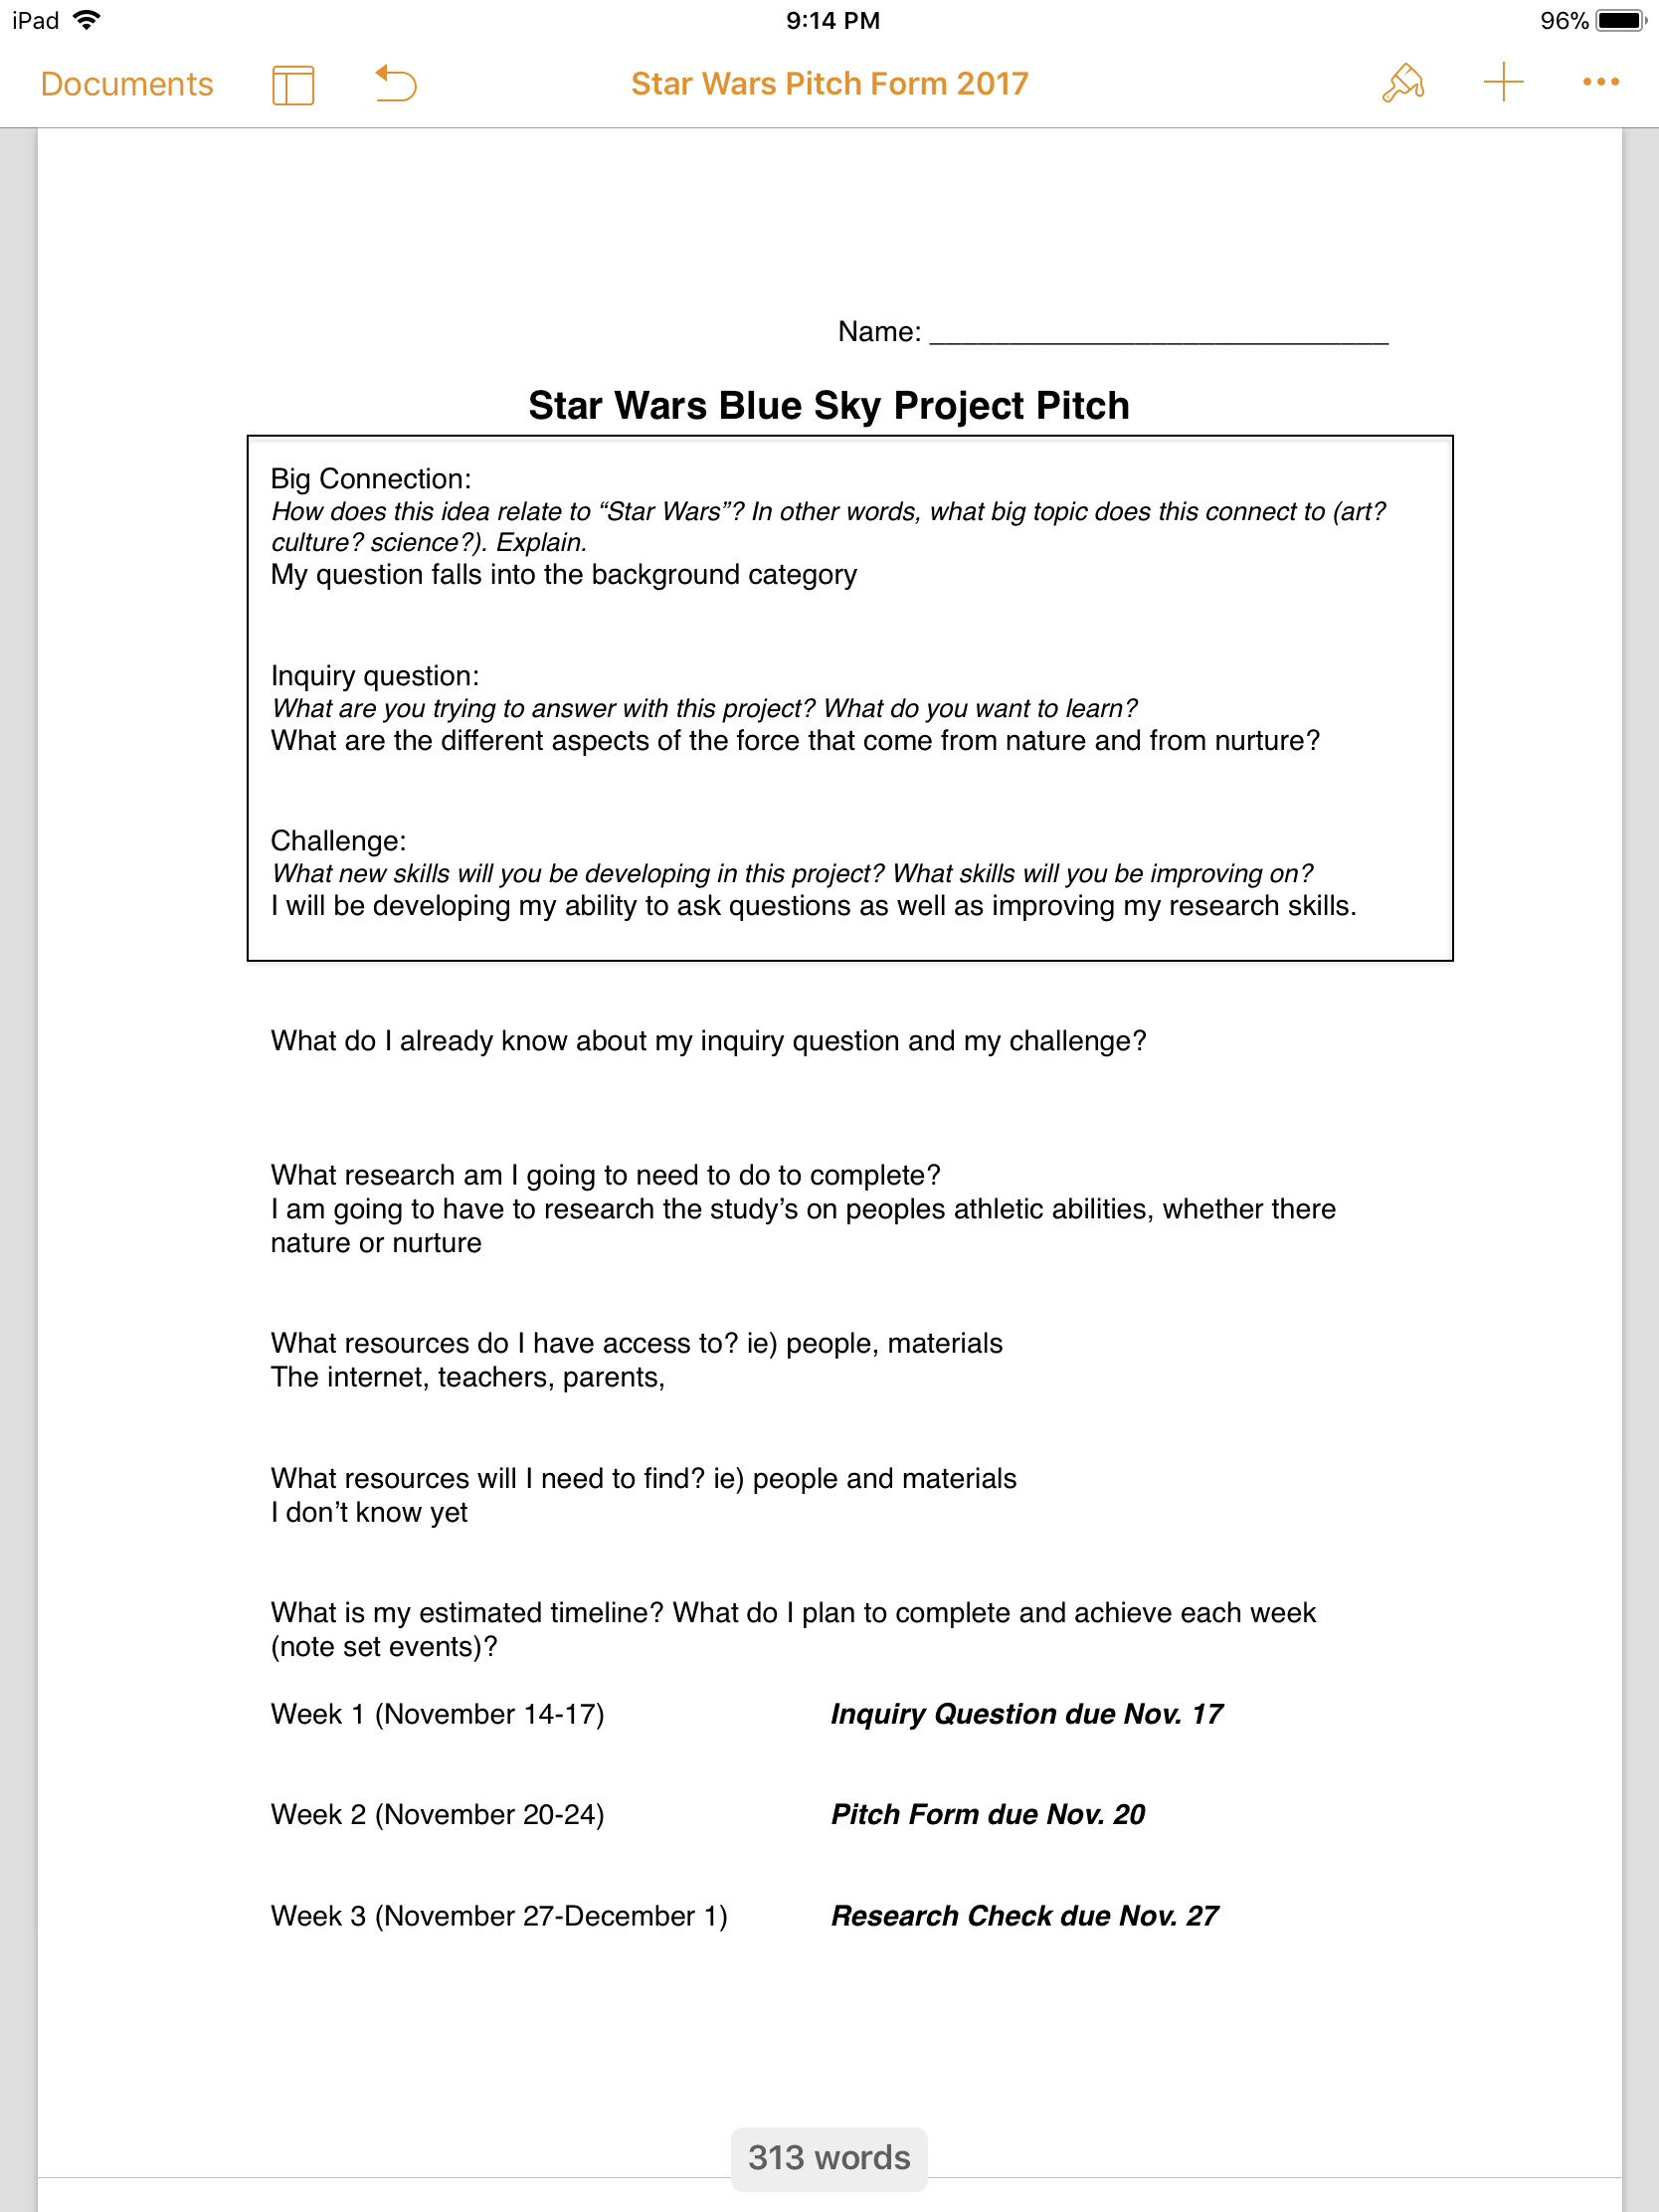
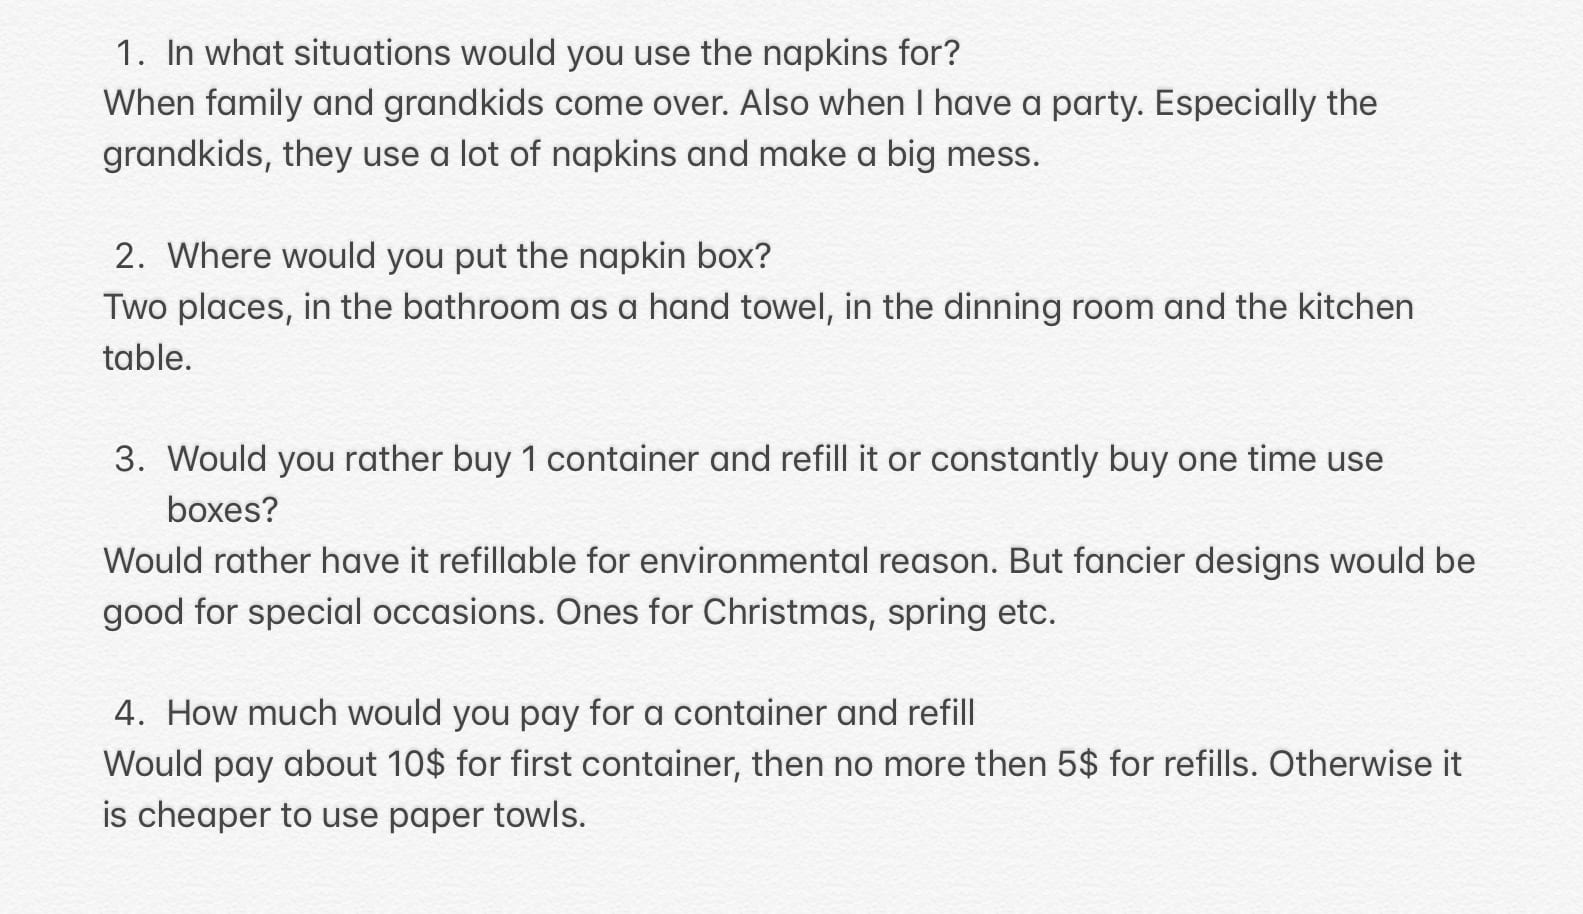
It was right around here that our project pitch forms were due.  Fortunately I had finally come up with an idea. My idea was to make a napkin box for tissue to reduce the amount of tissues that parents had to pick up from their little child. I completed the pitch form and soon after interviewed my grandma for her input on my idea.

N – Navigate Ideas

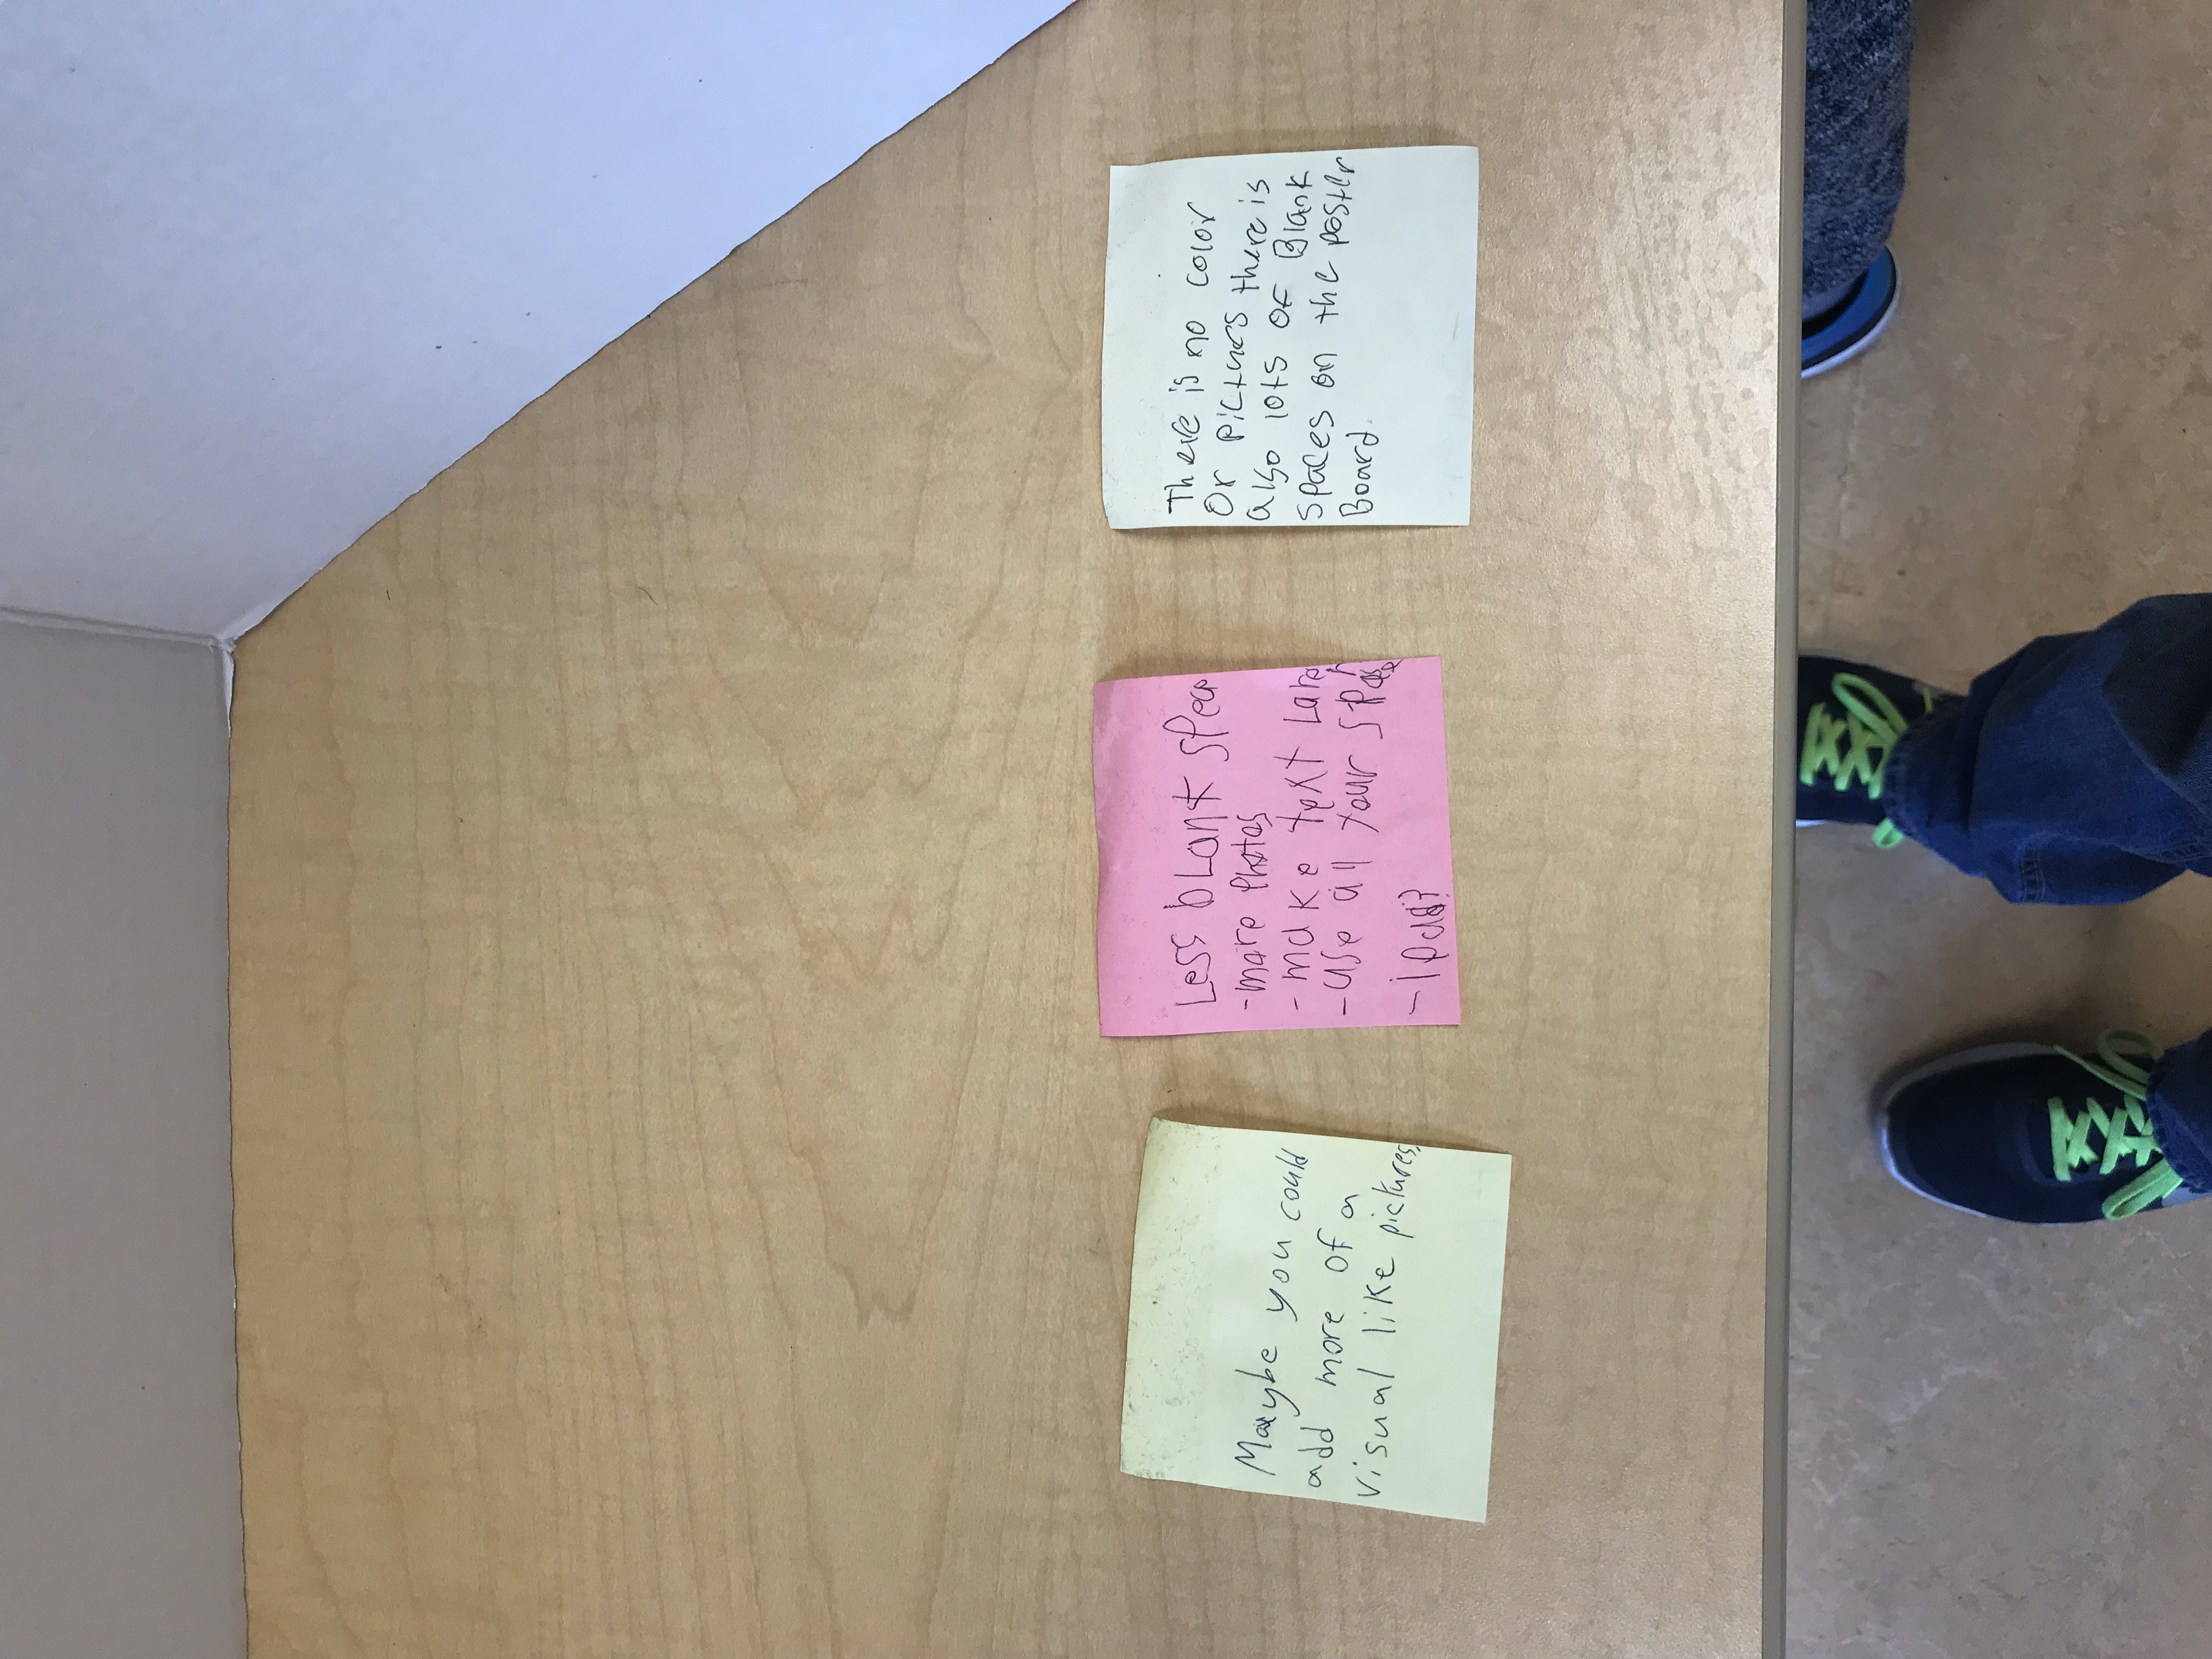
This phase was about organizing my ideas. The idea of this phase was to help you sort your ideas out if you had a lot. Unfortunately for me I already had a very clear idea of what I wanted to do so this phase is hard to show. I used post it notes to help organize the few different ideas I had.

C – Create a Prototype

We were supposed to do 5 different types of prototypes but my time management was quite off and I had some major things back up. So I didn’t get around to doing this stage until 2 days before the exhibition. So I only had time to create 1 prototype and fix it the next day.

H – Highlight and Fix

This phase was the final one before presenting my product to a live audience. The only major change was that I added ribbon to the box to make sure it stayed closed when you would withdraw napkins from it.


Night of

As with all exhibitions we were put into groups based on our products. We had to have a running theme throughout our area that tied in with all of our projects. I was put into the home products section. We attempted to turn the hallway into a house and our project were all supposed to be the different rooms of the house. I say attempt because it did not go good at all. But it wasn’t that bad as we had the best food out of everyone there and our projects mattered more then our room theme.

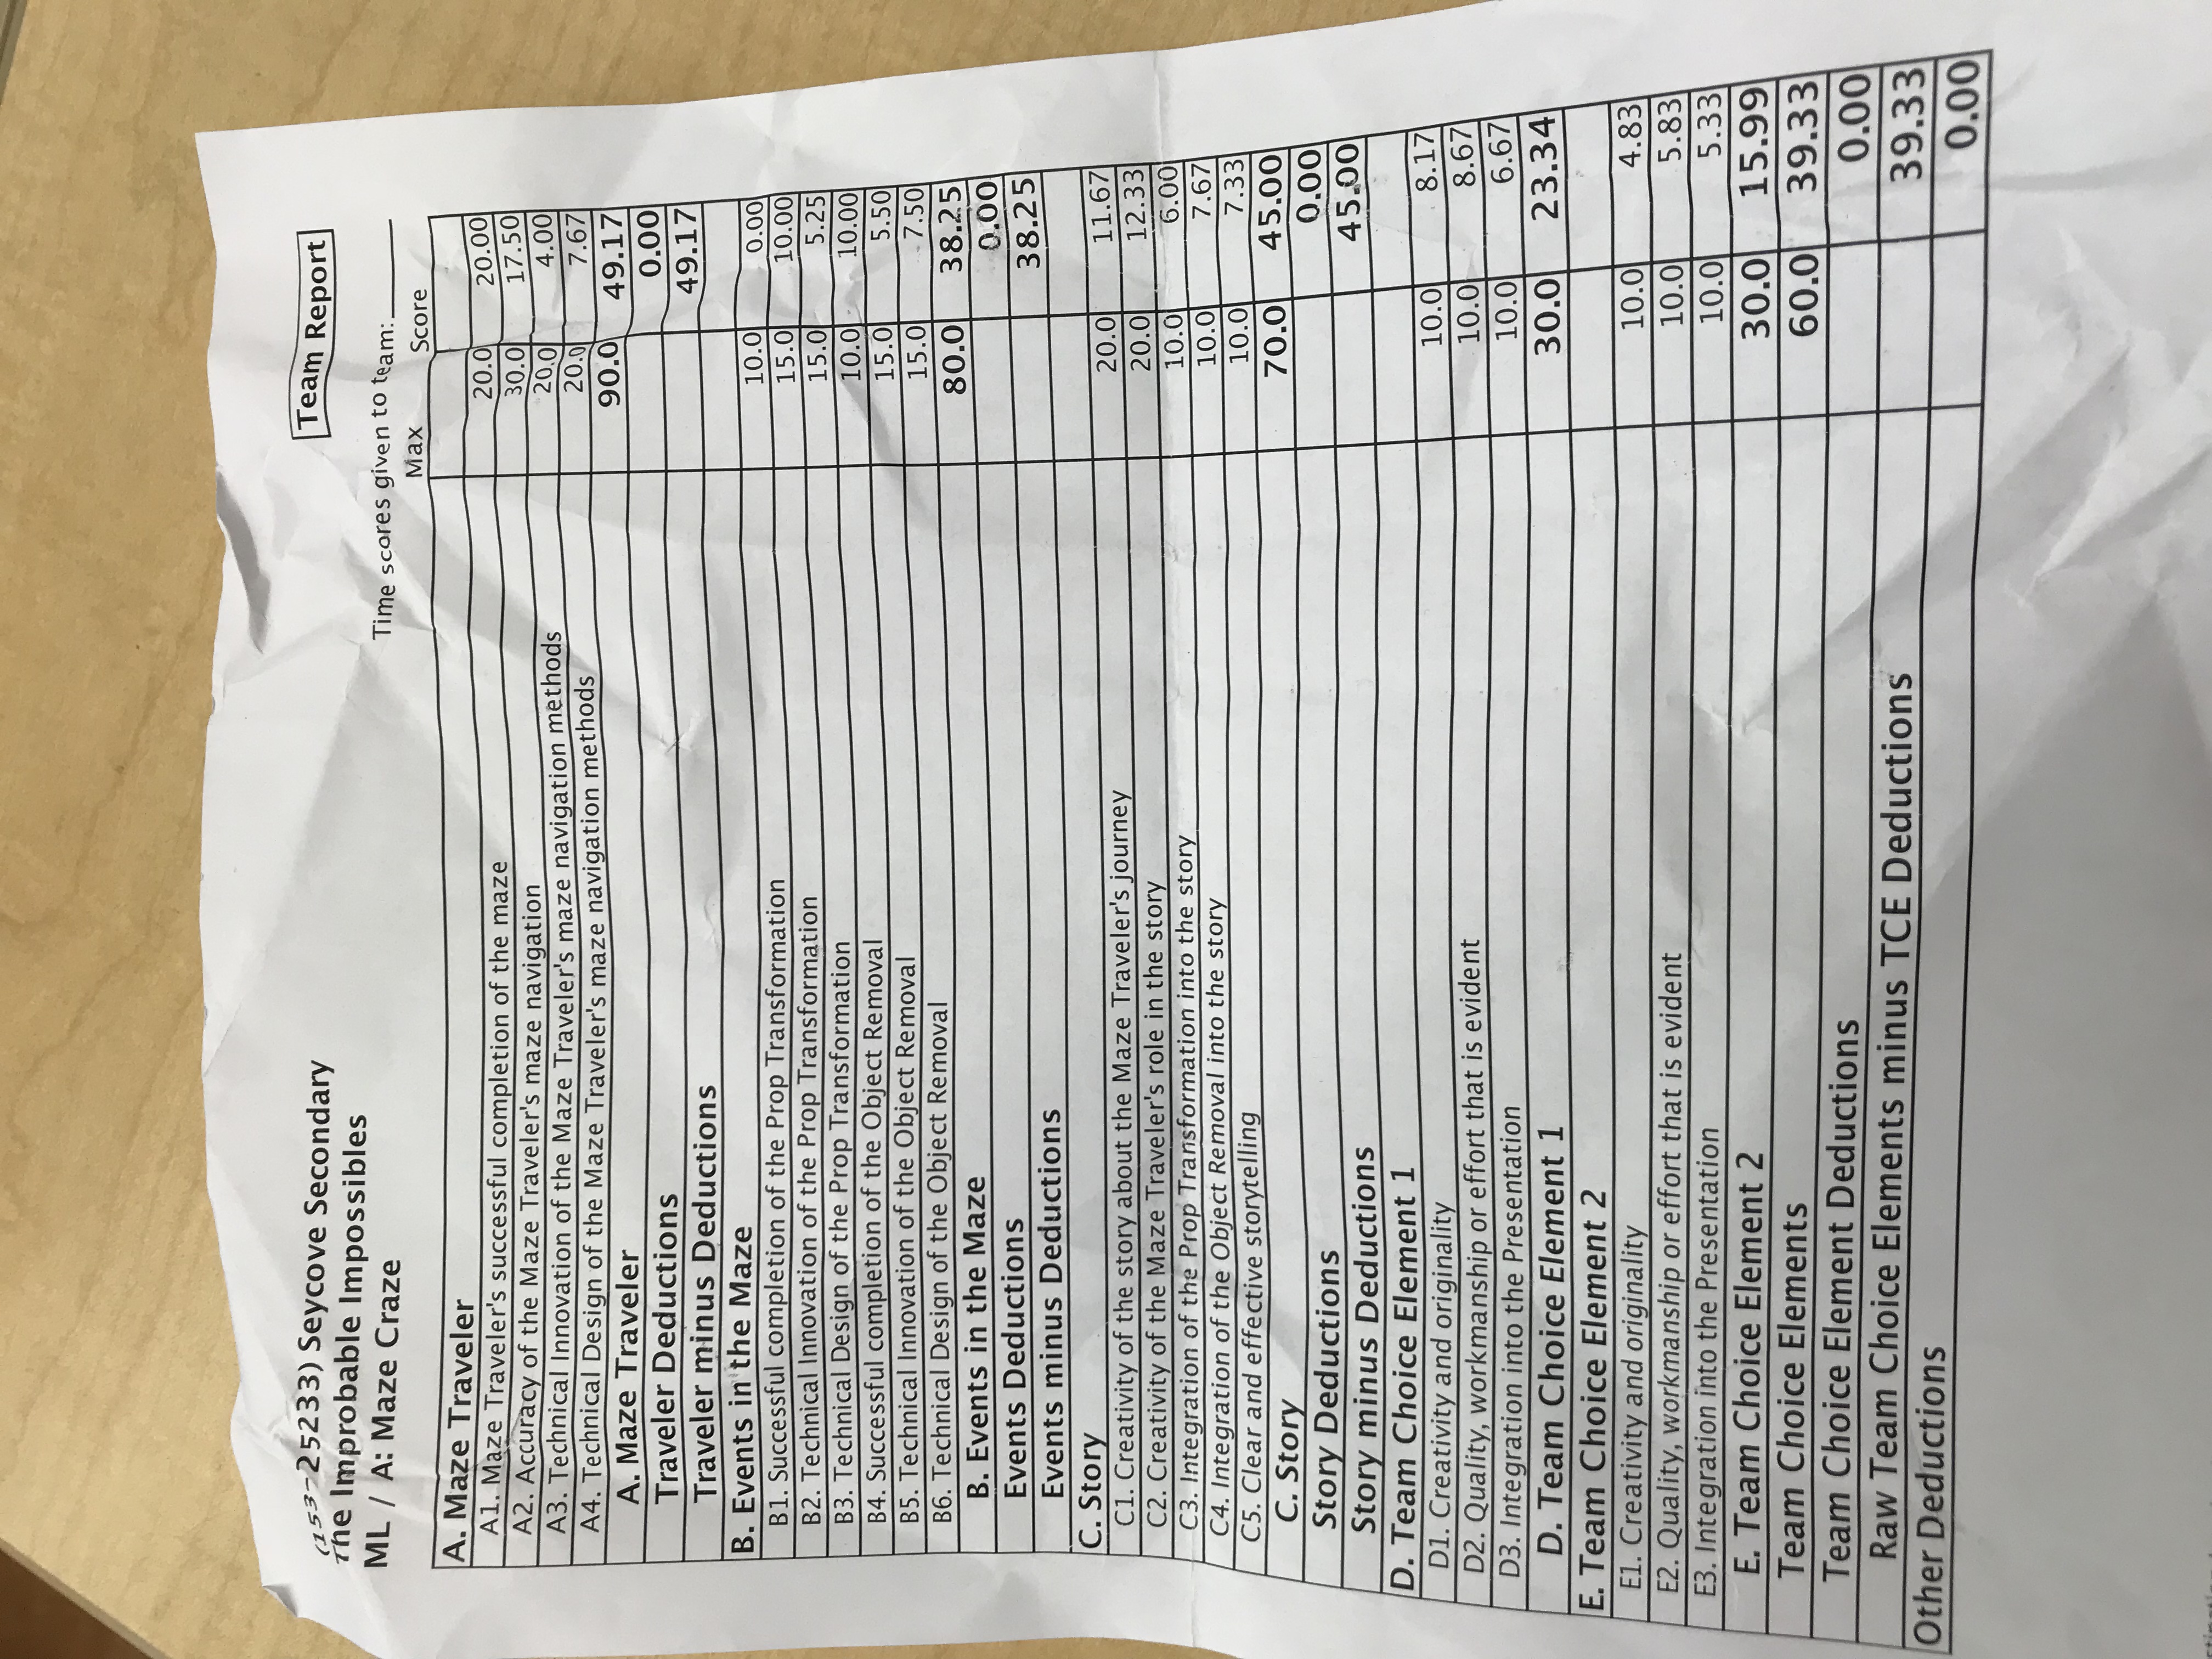
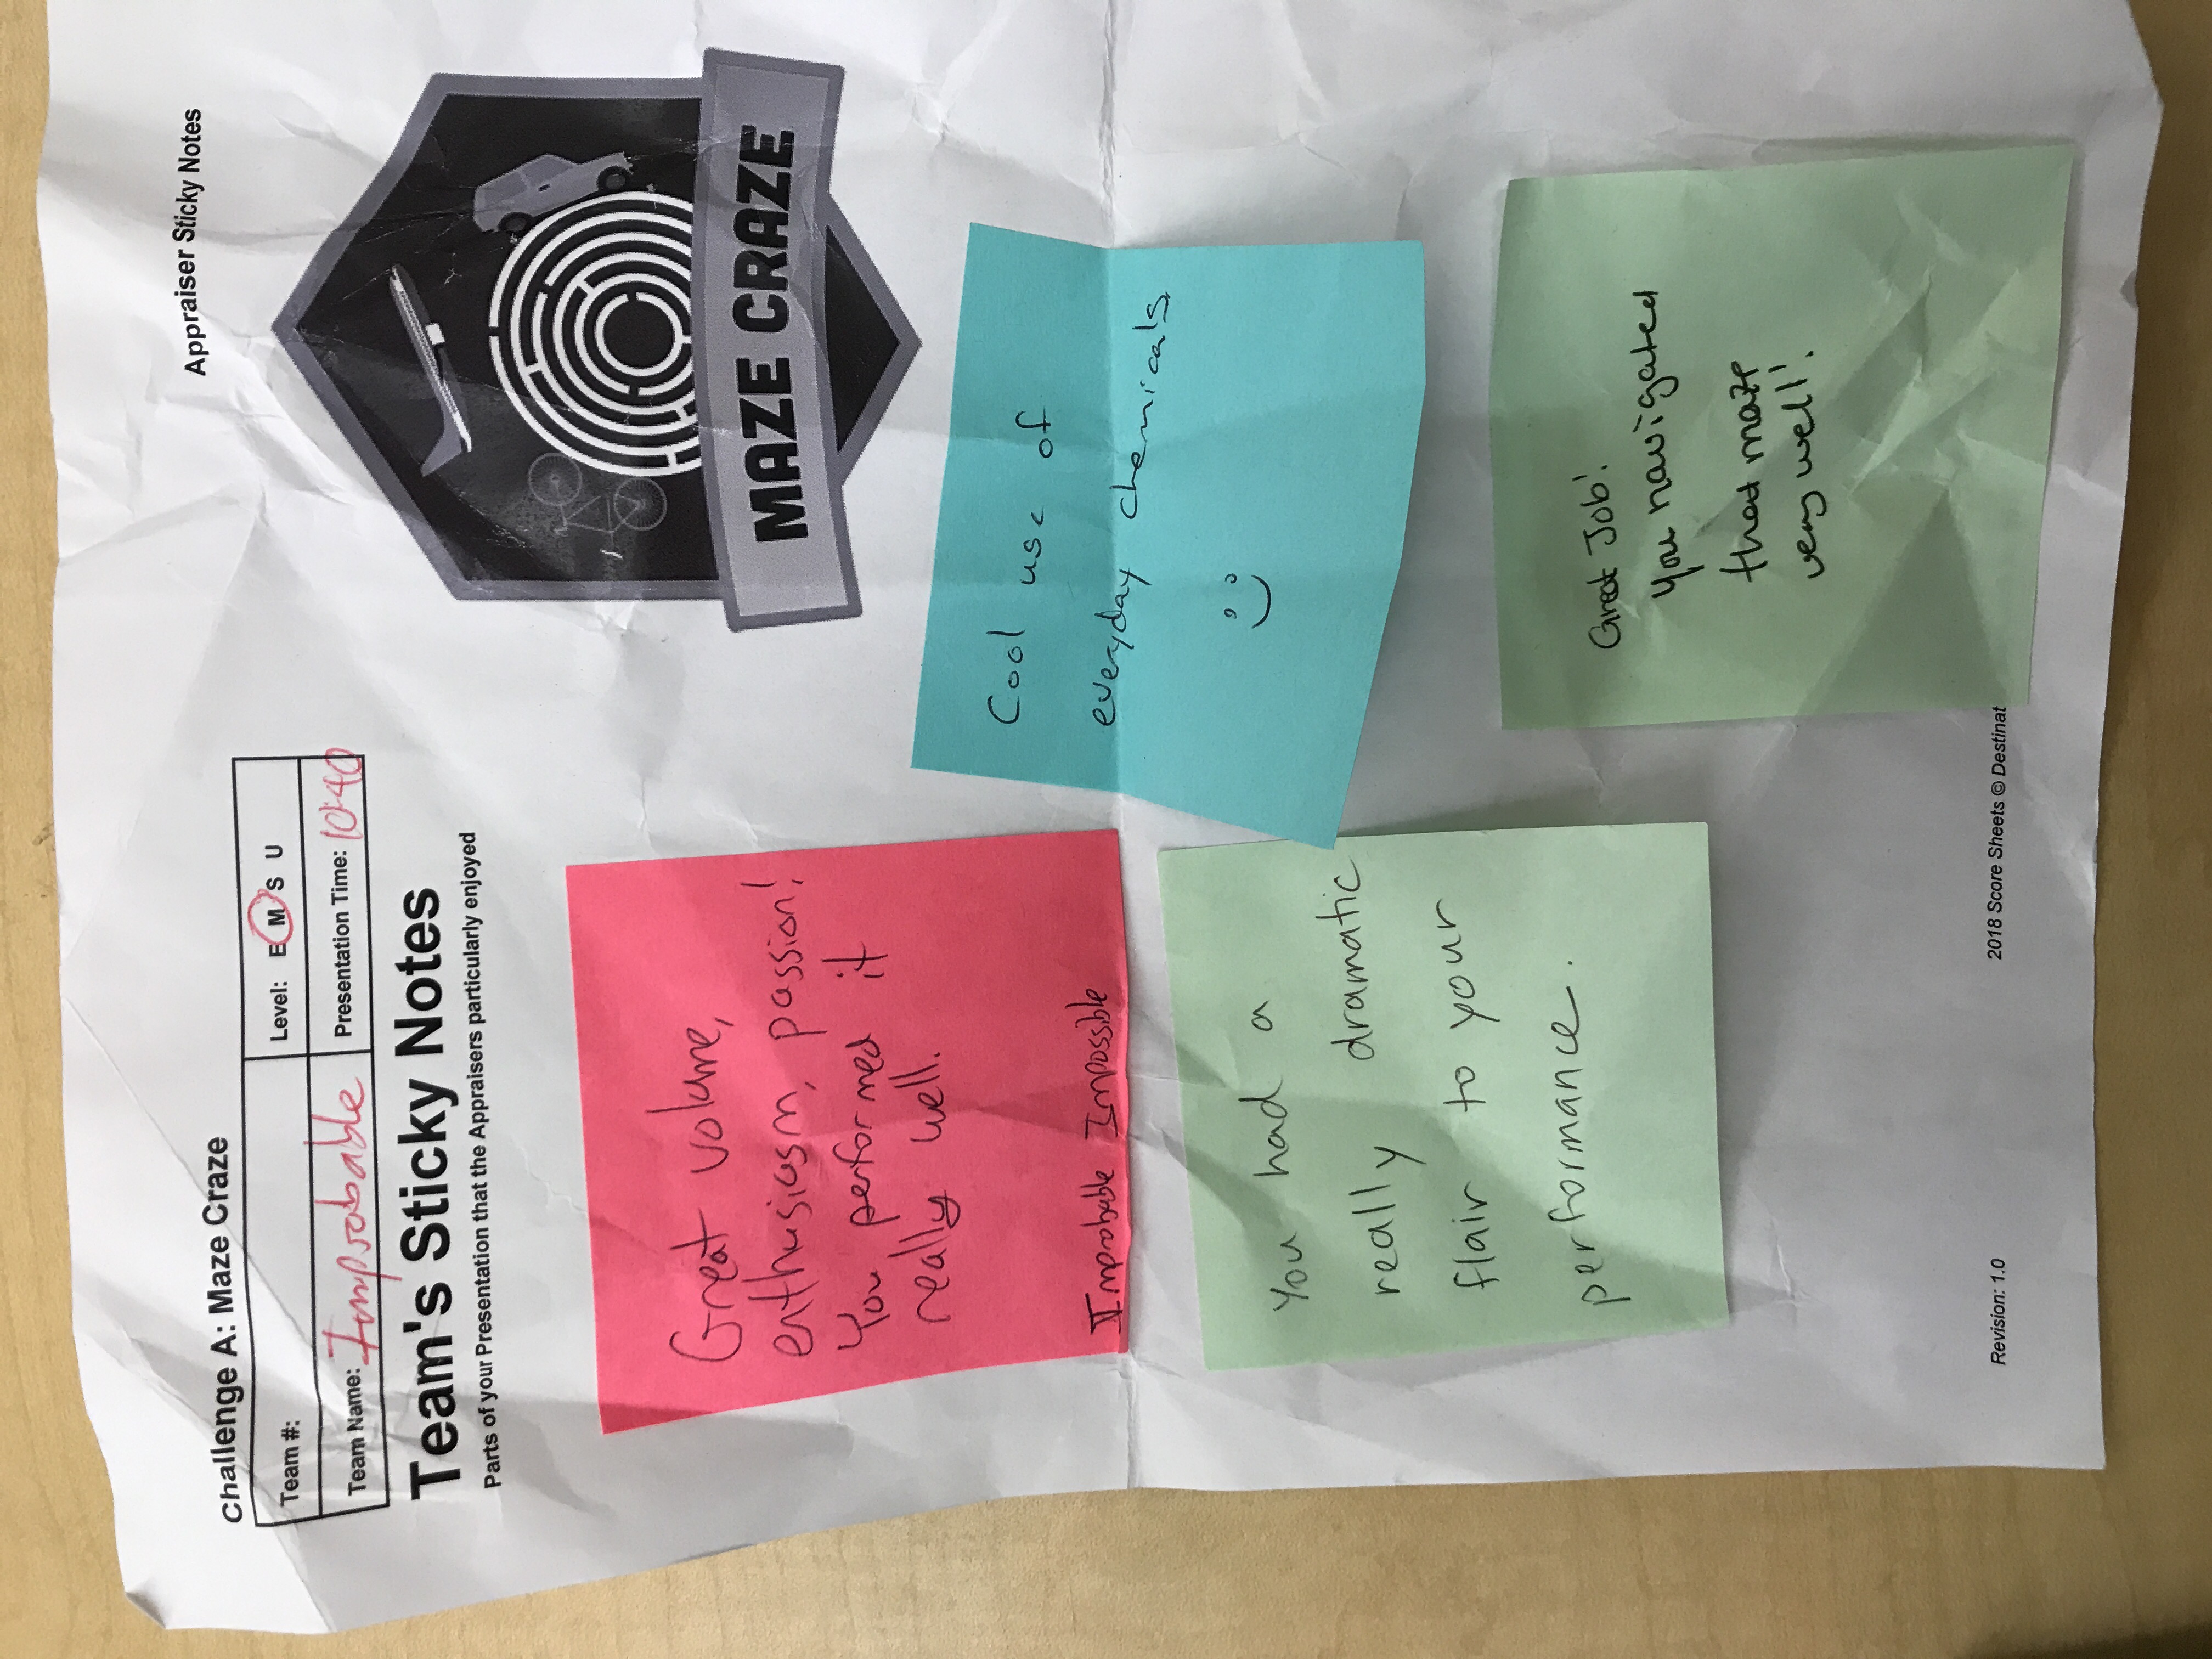
If you would like to see my launch portfolio, the thing I presented on the night of the exhibition it is right below.

Reflection

It definitely helped this year having 3 exhibitions of experience under my belt as we also had to take charge and lead the gr. 8’s in the setting up of our rooms. I once again need to manage my time better as I should of made more prototypes. All in all I thought this blue sky was the best one yet.

Thats all for now. See you next year!
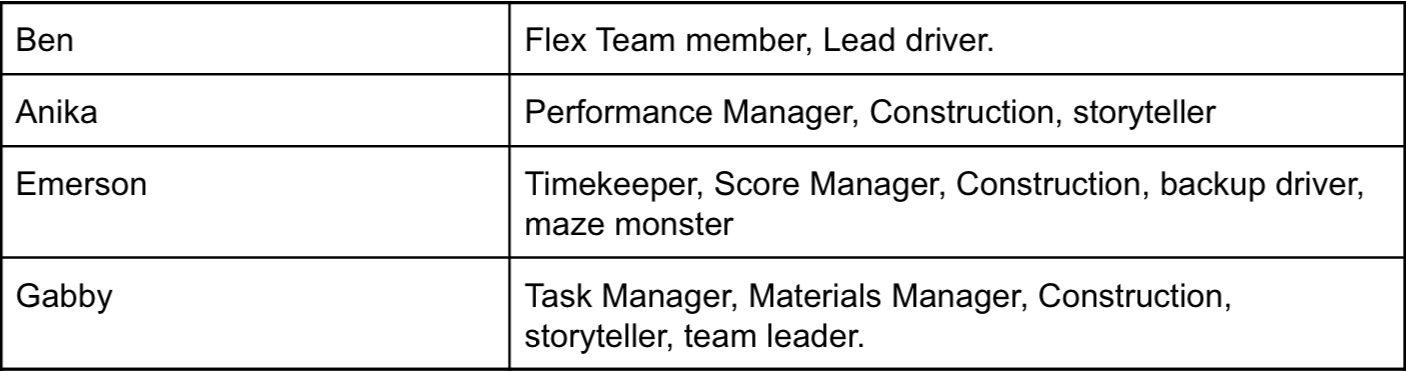
-Emerson

What makes a good video!

Hello everyone and welcome back to another amazing post! In this post I will be explaining the process of video making and reflecting on all the videos I’ve made so far this year in Maker.

There are many things that make a video great so lets get into it!

1. Planning

The first step when making a video is planning. In this stage you should plan out everything. Some of the more important parts what to plan out are, your shots (what are you going to film and from where), who’s going to film it (wether its you or one of your friends or family), what your going to say (will you speak in your film).

One project that we did this year which was crucial that we planned was our Take Your Kid to Work Day video + post (which you can find here). It is important to plan out ever video as the better planned out your video is the better it will turn out.

2 ish. Scouting

What I mean by scouting is scoping out the place(s) you are going to film at. I have found scouting to be quite helpful if you are only going to a place once because then you can find out what’s there and what’s not. I would consider this an optional step as some times this will make it harder for you to make your video. e.x. If the images you are using to look at the site are out of date.

I used this particular step and found it quite helpful in the making of our ghost town video as we weren’t sure what places were in the town, so we used google maps to look it up.


3. Filming

Now we move on to the most important part of making a video, filming. One important thing to remember in this step is film 10 times more footage then you think you need. If you are making a 2 minute video, have enough B roll (extra footage) to make sure you don’t run out. Also making sure you have the right shot, take the time to ask or wait for people to move out of your shot and do your best to have a steady camera.

My Alberta post (found here) really shows that you need lots of B roll to make a good video. Remember that half of a great video is making sure you have great footage.

4. Editing

Now your probably asking yourself what is the other half to making a great video. My friend the answer is EDITING! Editing can be split into three major sections.

First up we have audio; audio is very important because without it you can’t really understand what’s going on.

Next is music; make sure to keep in mind that music basically sets the mood of the video so fining the right music is very important for a good video

Last and definitely not least is make sure everything lines up and makes sense; I know that sounds very confusing so let me put it this way. Re watch your video multiple times to make sure, the audio lines up with the images, your music achieves the mood that your going for, listen to make sure you audio is not drowned out my your music, and look for any errors in the footage to make sure everything looks right.

One video that shows all of this very well is the enchanted forest video that we made in Alberta. As it was very hard to check all of the editing parts off.

Ending

Looking back at all the videos that we have made so far in all of our subjects I realize how far I’ve come in completing these steps. I have leaned so much from making these videos and I’m so glad you took your time to read all of these steps. Even though we are writing the blog post now, this video unit has yet to officially end as we will continue making videos following this formula.

Lastly I leave you with a comparison of two videos. The first was made at the beginning of the year and the second was made just before Christmas break.

Enjoy!

Until next time

-Em

Time to L.A.U.N.C.H. Llama ball!

Hi everyone welcome back to another amazing post! In this post I will be talking about something very interesting and something you probably have never done.

One thing in PLP that we do a lot is projects and in some of those projects we use something called the L.A.U.N.C.H. cycle. Launch stands for

L stands for look, listen, and learn about the project

A stands for ask questions about the project

U stand for understanding the problem

N stands for navigate and brainstorm ideas

C stands for create a prototype

and H stands for highlight the good and fix the bad

The project we have been working on in maker the last 2 weeks have helped me understand the launch cycle a lot better.

Now the project, our task was to make an interesting sport with the materials of 2 racquets, string, duct tape, 6 balloons, 5 cups and a wiffle ball. My group made up of Jason, Grace and Taylor had some interesting ideas about what we could do with the supplies.

One of the first things we did when we were creating our sport was to make a survey to see what aspects of a sport our other classmates liked. My question was, What body parts do you like to play sports with? As you can see in the survey below most people in my class like to use multiple body parts when playing.

The next step was to brainstorm questions that people might ask before they play our sport. We made a web on a piece of paper and went around the group writing any questions that we had even if they were really obvious. After we did it as a group, we then went around to the other groups webs and added anything they might of missed. After everyone went around to all the webs ours look like this.

The next thing we did was we got to play around with the materials to get a better idea of what we wanted to use them as.

Once we had our concrete idea we had to make a video about rules and how to play the game.

Once we did all that it was time to launch to an audience. Our audience was another group that designed another sport with the same materials. We set up and started to play our game. It was lots of fun and the inspiration for the name came from Taylor.

Some images when we were playing.

And that was our sport. I hope you enjoy playing llama ball and I’ll see you in the next post 👋

Almost a DI-saster

Hello again, it’s me, back with another post and guess what? this one’s about Destination Imagination! Ok, before I officially start this post, there’s one thing I’m not going to explain: what Destination Imagination is, because it’s really hard to do in text. If you want to learn more about it, click here.

Now, I’m going to officially start the post. Hopefully, you’ve clicked the link and found out what DI is. If you didn’t, go do it now!

First, Ms. Maxwell and Ms. Willemse put us into groups of four. I got put into the Maze Craze challenge and it was so much fun to work with my group members Gabby, Anika, and Ben.

Once we got to understand our challenge better, our next step was to create our team name. After a lot of brainstorming and careful consideration, we decided on the name The Improbable Impossibles! Now, the explanation for the name is, it is improbable that we won’t complete the impossible.

Hopefully, you watched the video that’s right there ⬆️. If you haven’t, you should now. Anyway, the next thing we did was decide how we were going to solve our challenge. Just before I do this there is something very important that you should see before you read on, and that is our team roles.

Team roles are very important because if two people in the group are having an argument about something, we can look to the team roles chart we made to see who has the final decision. If you would like to see my groups chart it will be right there⬇️ for you to look at.

Our first idea was to build a remote controled car but no one in our group knew how and unfortunately for us YouTube wasn’t the most helpful in this situation. So our second idea was to buy a remote controlled truck and take everything off so it was just the chassis and then use that. Lucky for us this idea worked! So once we had that all figured out it was time to start.

I’m going to take a minute now to explain something called an instant challenge. Now I can’t say to much as I’m sworn to secrecy but I can explain the jist of it. So an instant challenge is exactly what it sound like. You show up on the day of the competition and try and complete the challenge. You don’t know anything about the challenge except that it’s either going to be a performance based meaning you have to act or sing, tasked based where you have to build something or a mixture of both. So on top of having to solve our main challenge we also had to practice the instant challenges

If you watched the video you would know that we also had to include a prop transformation and an object removal. Our idea for the transformation was the use chemistry and make elephant toothpaste. To make this even cooler we decided to design the maze traveler to set it off.

Our idea for the object removal was to use magnets. Our object was a key and we glued a magnet to it and then glued a magnet to the maze traveler.

Now to explain the title. You know how I said that we designed the maze traveler to make the elephant toothpaste. Well on the day of the competition the shovel we modified to carry the liquid started to leak when we tested it by pouring water into it. Our first solution was to duck tape up the holes. Once we did that, we tried the water again but the tape didn’t cover the holes because we had moss hot glued to the sides of the shovel. So we decided that I would just pour the liquid into the container to trigger the reaction. Now if you want to watch our entire performance you can see it right here ⬇️.


The appraisers gave us some sticky notes on the things that they liked, and on stuff that they think we can improve. We also got raw scores, which are the exact amount of points we got for each bit of the challenge.

Our raw scores

Sticky notes

To rap this up we ended up getting third place out of 7 teams, which, when you think about it is pretty good.

Third place ribbon

This is the end of the post thank you for reading, peace out

-Emersson

An exhilarating exhibition


Hello dear readers I’m back with another blog post and this one is about the Star Wars galaxy. So every year PLP has two exhibitions. One in December and one at the end of the year in June. So being in grade 8 this was my first exhibition. Every exhibition there is a new topic, as you might of guessed this one was Star Wars.

So as it turns out there is a tested step by step process to follow when making these exhibits. It is called the inquiry star.

The star is a very easy way to understand the process that you must go through to come up with an amazing exhibit. So here we go.

The first thing we did was learn more about exhibitions because we had never done them before. After we knew all there was we started making a list of open ended questions that we had about Star Wars.

Here are all the questions that I came up with. The next step was to narrow it down to the three that we liked the best. My three favourites were numbers 3,4,and 7. Then we had to submit our three favourites into Showbie. As you can probably tell right now it was a very gruelling process. Anyways the next step in this part was to get feedback from our teachers. Ms. Maxwell my teacher said that number three was the closest one to what they wanted. My final question was, What aspects of the force are nature and what are nurture?

The final step was to fill out a project pitch form. What it was, was a bunch of questions that we had to answer.

So this was my project pitch. The reason why it wasn’t filled out all the way is because I didn’t really know what we were doing just yet.

The next step was to investigate my question. To do this I researched the long standing argument about nature vs nurture and I learned that it’s not just nature or nurture, its really nature and nurture.

As you can see here I found a ted talk on nature vs nurture and it gave milk for its example.

Now it was time for construction. To start this step we had to fill out a what do they see sheet which was basically what someone would see the day of the exhibition.

So this is my exhibition construction and from there we went right into building our project for the exhibition.

Now me being a procrastinator I left it to the night before which was the worst idea I ever had. So three days before the exhibition when we were supposed to bring in our projects for a critique my project looked like….

I know, I know it’s possibly the worst piece of work I’ve ever done but lucky for me it was not the day of the exhibition because if it had been Mrs Willemse and Ms. Maxwell would not have let me present my project. Good thing this was a critique because I needed to make drastic improvements to my project.

So the main critique I got was to much white space. Which I already knew but it was still great critique.

Now for the makeover I had less then 72 hours to turn this train wreck into a  presentable project. So I basically learned nothing from earlier and I pretty much left everything to the last night again but it was ok because I already had a solid image of what it was going to look like. As well as I already had most of the information I needed.

Now on top of all of that we also had to decorate the rooms that we were using to fit the Star Wars theme and just to make things ever harder we also had to wear costumes that we had to make and guess what they had to be Star Wars themed as well.

So it was Alivia’s idea to do famous skits from the Star Wars saga every fifteen minutes so a lot of our costumes were chosen of who was acting in what skit and who the skit involved. So I decide to be Chirrut Imwe from Rogue One and Emily dressed up as Jin Erso so we decided to re-enact the scence when they first meet in the busy market.

So the night before as well as finishing my project I was also putting together my costume and of course Chirrut is not complete with out his staff so I also had to make that as well.

Now you might be wondering how I made the staff. What I did was I took a broomstick handle and wrapped it in brown duct tape and then to make the bumps on it to make it more realistic I put small balls of masking tape on the stick and then taped over it to make it more stick like.

Focusing back in on the project the deadline was getting closer and I still didn’t have a fully completed project so I had to work fast. The first thing I did was add pictures to the poster to fill up some of the white space then I redid the title so it was easier to read. Next I did some more research and added some new parts that I think really added depth to the project. So on the day of the exhibition my completed project looked like this…

So as you can see drastic improvements to everything. So what I did was I compared Anakin to Luke and then Luke to his actor Mark Hamill. I also add a bunch of photos to fill up the white space and re did the title so it looked a lot better.

Now earlier in the post I mention that we also had  to decorate the room that we were presenting in.

So we decided to turn the room into the rebel base on Hoth as we were the light side and I believe that we did a pretty good job of that.

Now its time for the one thing that never changes in each post my reflection on the unit.

The first thing I can tell you right of the bat is that I HAVE to work on not procrastinating everything to the last minute. One thing that I think I did really well was the presentation it self I believe I excelled at that part of the project. Something I was surprised about was how stressful it can get. I mean, I don’t get stressed out easily so when something gets stressful its got to be stressful. Now I’m excited to do my next exhibition which in June because now I know what it’s like and I probably won’t get as freaked out as this time.

Thanks for reading                                                                                                      -Emerson