For this science project we had to figure out how we can capture and use renewable energy from nature.
Fist we learned about the different types of energy
Kinetic: the energy that it possesses due to the motion of an object
Potential: the energy possessed by an object because of its position relative to other objects, stresses within itself, its electric charge, or other factors
Thermal: the internal energy of a system
Chemical: Energy stored in the bonds of chemical compounds.
Solar: radiant light and heat from the Sun that is harnessed using a range of ever-evolving technologies
Electric: the energy newly derived from electric potential energy or kinetic
…And lots more
From this we figured out that we need to capture kinetic and potential energy then transfer it to electrical.
Next I created a list of questions I need to learn for this project
How do you capture kinetic energy?
What basic materials are needed?
What is the difference between kinetic energy and potential energy and how can we use both?
What are the project requirements?
Does the amount of energy produced matter?
What are the structure requirements?
If we need a expensive material do we get it?
How does energy transforms?
How do you measure energy?
To understand some of these questions we made diagrams.
This diagram represents the conversion of potential energy (Ep) to kinetic energy (Ek)
This diagram depicts heat energy comes from the sun being converted to multiple types of energy then being transferred from a water weel to our homes.
We also did multiple labs to understand this concept
The first lab we did inside was testing if we can use motors to power LED lights
Next we went outside and tested how much energy could be produced from two solar panels
solar panel power and energy production
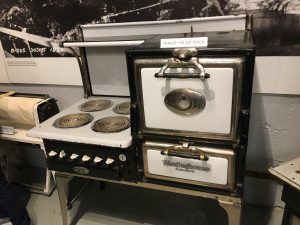
In this Unit we went in a field trip to the powerhouse at Steve Falls Visitor Centre. Here we learned about water wheels, turbines, and how you can transfer energy to household items.
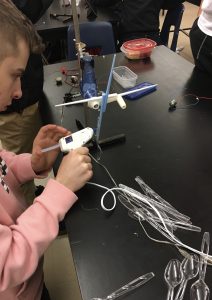
My group Sam, Robbie, Adam and I decided to create a Waterwheel for this project. We first wanted to use just a motor for our waterwheel because that way we would be only using the energy that was transferring through the stream but our idea didn’t work very well so we used a hand generator. Our only other materials for our product was chopsticks and spoons! We hot glued them to the hand generator so that they would catch the most water and voila the Spoonbine was created.
Now now that we created the beautiful Spoonbine it’s time to test it out at a near by creak. We put our LED lights in parcelled so we could power multiple and still have them light up. We measured the Voltage and the Amps to get the Watts. Then we created an equation and graph.
Finally we created a video.


