
Give me an L (L!), Give me an A (A!), Give me a U (U!), Give me an N (N!), Give me a C (C!), Give me an H (H!). What does that spell….. LAUNCH!!!!! This is Space commander Jordyn, back with another intergalactic post about the Launch process. This was our latest expedition into the great galaxy on the planet of Maker. We explored the planet in depth learning about this new topic, it was very interesting. I think it’s about time I tell you the story of my amazing journey into space, so 3, 2, 1, BLAST OFF!!!!

Ok, Ok, I have to admit, that intro was a bit….. cheesy, but it’s true, we just completed a new unit in our class maker. Maker is a class, ummmmmm, well it’s a class that’s kind of hard to explain. It includes topics that are important to PLP, but that we don’t learn in other classes. The first post I ever did in maker is called “I can’t do it… yet!” You can learn more about maker in that post. The newest project we have just completed was called L.A.U.N.C.H. Launch is a process in which you can create a project, it takes 7 stages to get to the final product. It could be called flexible framework, a set frame but you can fill it in how ever you want and it can be used for any age group, any subject, and any setting. Here’s a quick video to describe it:
So, in that video, you probably realized that the challenge/project that we had to create through the launch process was we had to create a sport out of these materials: A roll of duct tape, two squash rackets, a whiffle ball, a stack of cups, a bag of balloons and a spool of string. In my group was, Kyle, Izzy and Ben and we created an awesome sport called cup ball. Cup ball is kind of like tennis, there are rackets with cups tied to them and you have to hit a ball back and forth in to them. Now that may sound pretty simple, but it actually took a lot of work, many different stages and steps, that’s where the launch process comes in. I’m not going to get to far into explaining the sport because I will explain it more at the end.
L: LOOK, LISTEN, LEARN
The first stage is kind of about recognizing the challenge, getting an idea of our target audience and what they are like. It’s a time to become aware of the challenge idea, wonder what you can do. We did a few activities to set off on our launch journey, the first being to just jot down a few thoughts about the video and just get our brains going which didn’t take to long. Then we moved on to thinking about questions that you could ask your audience, questions that will help generate your sport which we eventually narrowed down to four and divided them among the four people in our group, each person getting one. Now for my favorite activity for all of step one, we got to go around and survey all 20 of our classmates! My question was how competitive are you on a scale from 1-10? Most people said somewhere between 7-10, showing that our class was very competitive. We then turned this data into a graph making it easier to process.

A: ASK TONS OF QUESTION

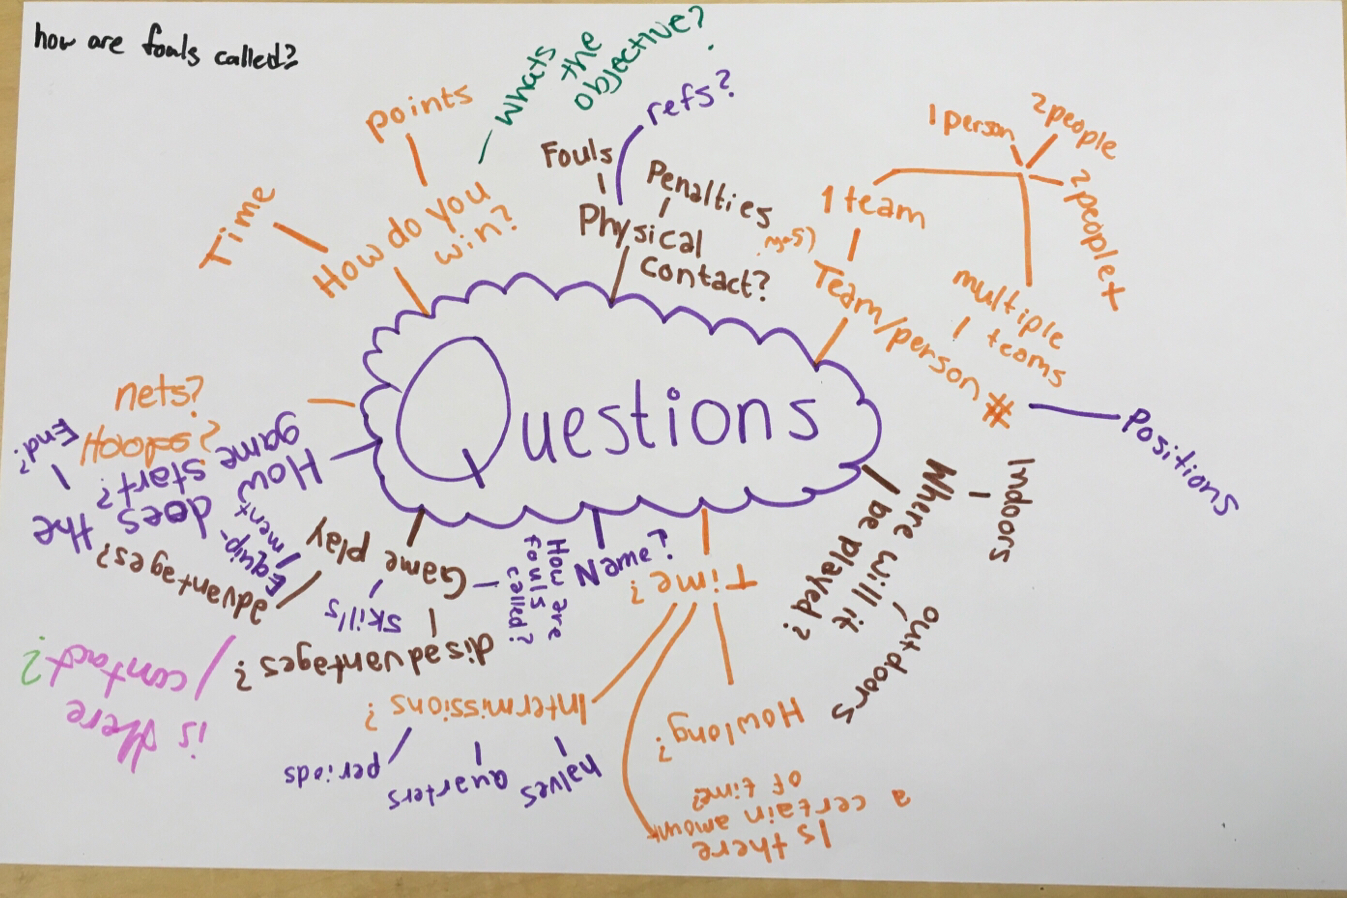
In this stage, stage 2, our job was, as I said up in the subtitle, to ask tons and tons of questions. First things first we just had to brainstorm a bunch of questions someone could have about our game, things like:
. How do you win?
. Is it a team, partnership, or individual game?
. Is there physical contact?
And many other questions like that. Then we had to meet with our teams and write down all of the questions and thought we had about our sport on a piece of paper in web or mind map form, making it organized and easy to look at. We gallery walked around the classroom and checked out everyone’s web, making sure we didn’t miss anything on ours.
U: UNDERSTAND THE PROBLEM/PROCESS

This title is very self-explanatory, the goal of this stage is to understand the problem/process. To help you understand you can do things like watch videos, read articles, and do some interviews. In this stage, following our LAUNCH notebook (a notebook where we did a ton of work on the project), we made a chart making all of the fun and exciting parts of sports, and all of the boring parts. We did this because we have to, of course, create a sport that people will actually want to play. Following this, we did a short but sweet activity in which we had to draw a labeled picture of an athlete that is engaged in a sport, showing symbols and having labels that add to it.

N: NAVIGATE IDEAS

The fourth stage of the process is to navigate through your ideas. We generated and brainstormed ideas, meshed them together through out this stage. A few activities we did to help us organize and sort through all of our ideas was to create a mind map showing the must-haves for a sport, make a chart containing the criteria for a sport and then going into more specifics of it, and then we started brainstorming ideas of sports we could create and play.

C: CREATE A PROTOTYPE

Then it was time, what we had all been waiting for, we had chosen our sport and now it was time to create our first prototype. This stage was SUPER fun! The first thing we worked on was a sketch of what our sport would look like being played. Then we got to actually make our rackets, we made them with, obviously, the rackets and then we tied a cup to each end so it ended up being a racket that you could catch the ball in a cup with instead of just hitting it.

H: HIGHLIGHT AND FIX

The kind-of last stage was to highlight and then fix the problems we had with the sport. We did our first run through somewhere between the last stage and this one, giving us he chance to figure out what was wrong with it. To do this, we created a chart and jotted down what realized, just so we could remember.
LAAAAAUUUUUNCHHHHHHH!!!

Now it’s really time, the grand finale, it’s time to launch our sport. Our final sport was called cup ball. Cup ball is played by teams of two, one person on one side of a court, and someone on the other. (those two people are on the same team) You have two minutes to get as many points as you can by hitting the whiffle ball with one side of your racket (preferably the one without the cup on it) and then the other person catches it in there cup. Bounce and catch=1 point, no bounces=2 points. Also if you get 15 successful catches in a row, that’s an extra 20 seconds for you! So, if you want to learn a bit more about cup ball and how it’s played, please check out the video below.
The LAUNCH process was a brand new way of thinking about a project, it was something I had never done before. I really loved how organized it was and all of the different stages to guide you through. This process really worked for me and I will definitely use it again in future projects, I will probably even use it in future jobs to help me through tough projects. LAUNCH is a great alternative to the regular project set up, research, research, and more research, there are tons of different activities you can do to help. So whether you are an engineer, a student, an artist, or even a zoologist, you can use LAUNCH, just 6 simple steps that lead you to success. This is Space Commander Jordyn, here to let you know, that will conclude our journey to the planet of Maker and amazing discovery of….. LAUNCH!!
BTW, here is a video that shows one of our groups, not my group, showing us there sport and all of us playing!
~Jordyn
June 12, 2018 at 9:44 pm
Good post!
I like how you layout the post
Link can be embedded properly
Might be good to link to your team members blogs
overall really good post