
3D modelling…
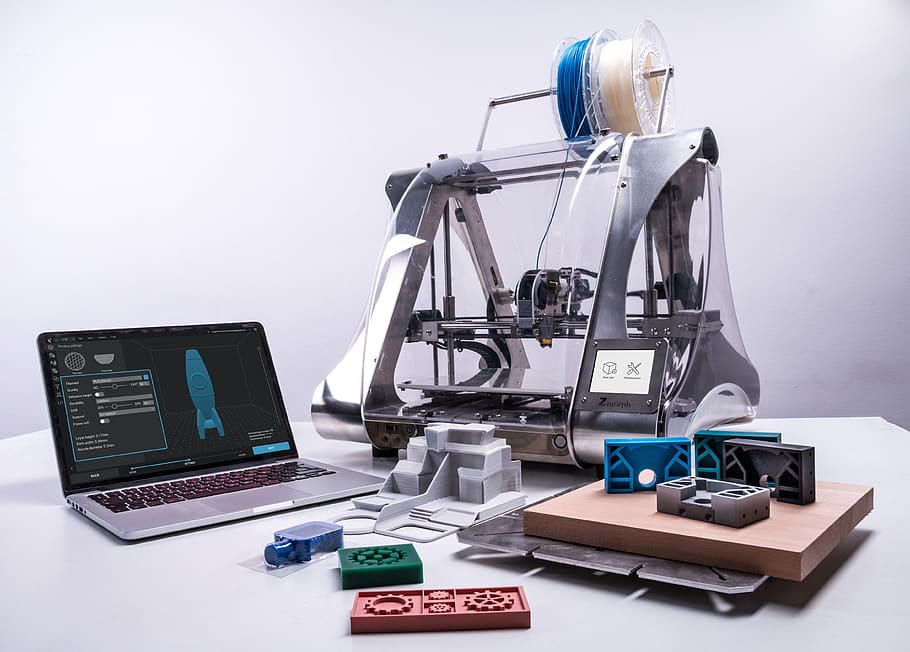
As the last project in this term for our Sciematics course, we took an approach into the world of engineers and designed our own 3D object and even 3D printed it. I never knew designing an object took so much math, but as I am learning in high-school, almost everything involves math. We took mathematical formulas to calculate the surface area and volume of our object. Our object also served a specific need, but before I get into that, lets jump back to a couple months ago when the project first started.
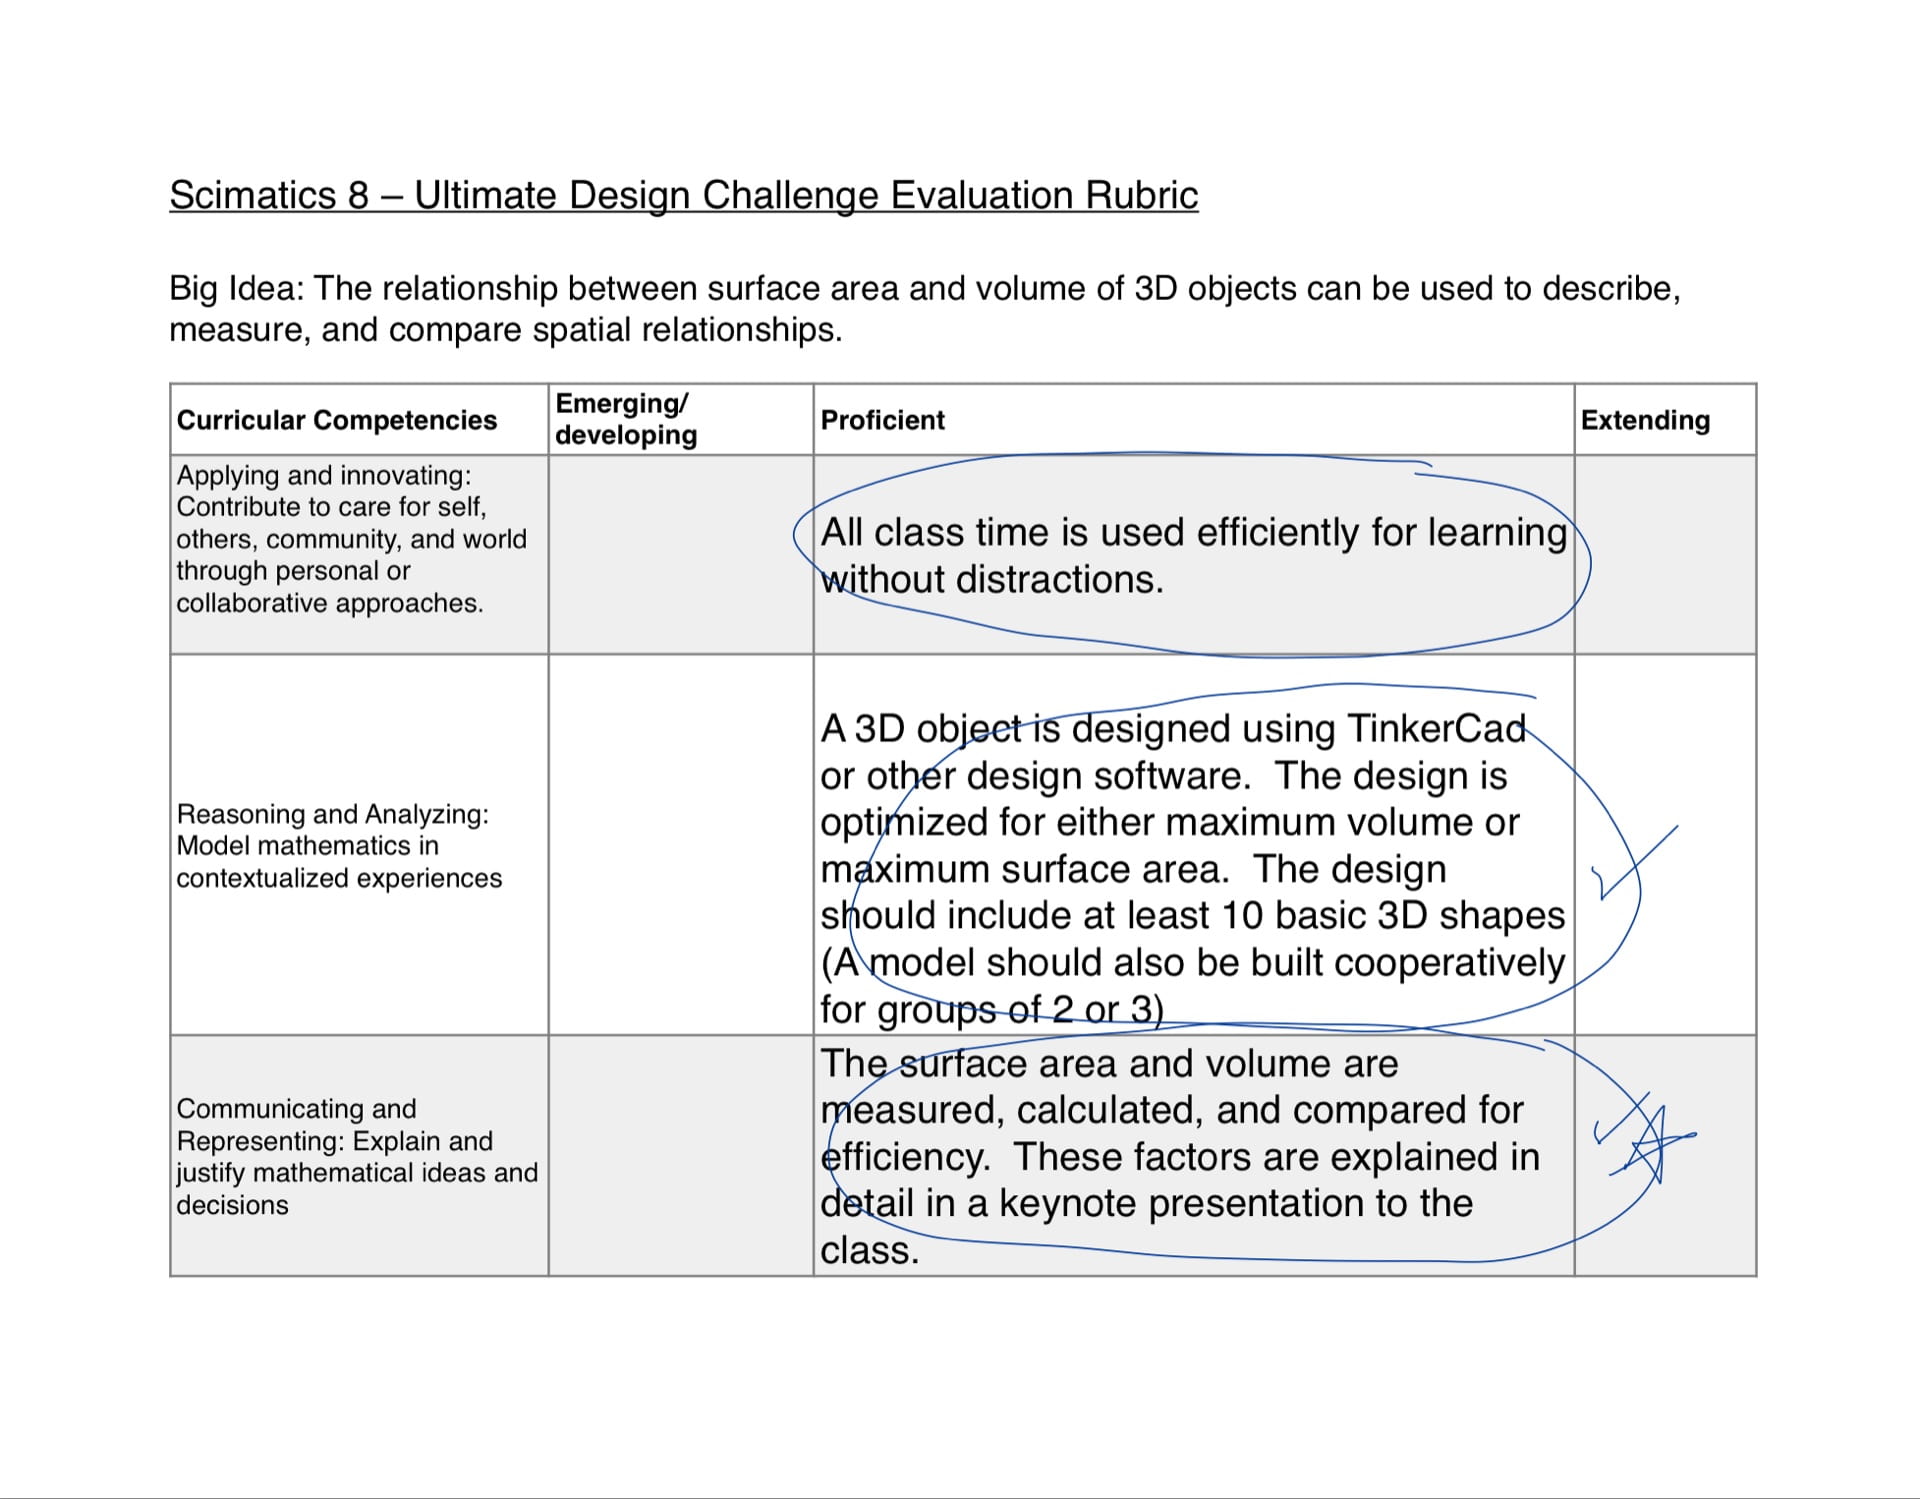
At the beginning of February, right after our Coding Chemistry project, we initiated a project called “The Ultimate Design Challenge”. Throughout this project, we would obviously be guided and assessed by the standard curricular competencies, mentioned at the end of this post.
The end goal was to 3D print an object designed by ourselves. Before this, we had to learn how to calculate the volume (V) and surface area (SA) to evaluate our SA to V ratio of our object and calculate it’s overall V and SA. We worked through a workbook learning the formulas and tricks of the trade for finding SA and V. Finally we formed into groups to create our very own 3D object. The 3D CAD program that I used was called SHAPR3D. Our group first had to decide what object we would create. We came to a consensus that we would each create 3 hockey related items. My group member NATE would recreate the hockey rink for maximum volume to decrease the amount of times the zamboni would have to cross the ice. My other group member CAMERON wanted to create a goalie stick designed for maximum surface area so the puck would have a lesser chance of crossing the goal line. I decided I would create a goalie pad made for maximum surface area so that the pad could be overall more comfortable.
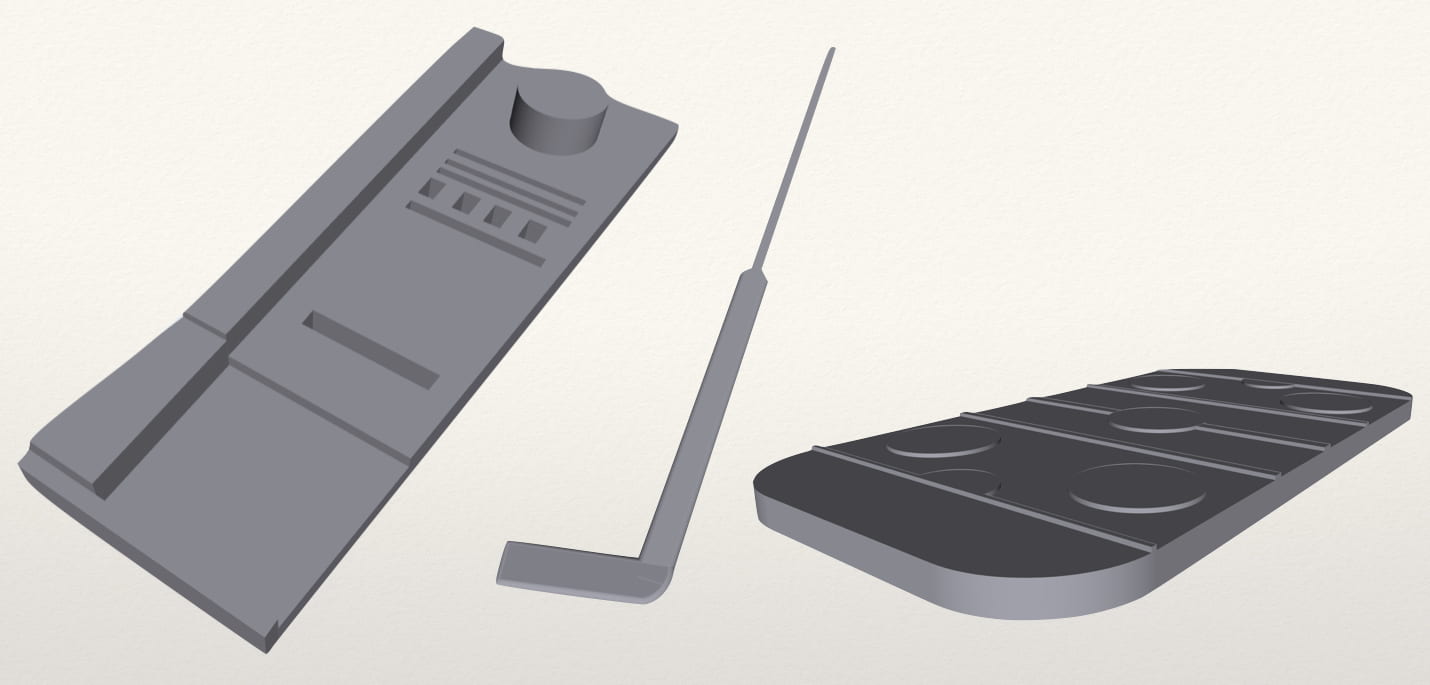
Next, we actually designed our object in the 3D modelling software. At first, I made my pad really complex and detailed. Later, I realized that I would not be able to calculate the SA and V of my object if it was so complex, so I dumbed it down and made it drastically simpler. Once our 3D design was complete, we sent it to our teacher to get 3D printed. After it was printed we started a keynote presentation basing it of of the formulas we used, our calculations and our 3D object! As you can see in my keynote below, it shows all my calculations, my 3D object, my formulas and my SA : V ratio. Then we presented to the class and the project was finished.
Overall, I enjoyed this project as I love 3D modelling and shaping. The project felt very short, as it was. In the future, I hope to do more projects that incorporate 3D modelling and math. Honestly, this unit didn’t really feel like a math unit as it was really fun and if you know the formulas, it was really easy. I hope to have more projects like this in the future.
CURRICULAR COMPETENCIES
The curricular competencies have been the same throughout each project, so you might know them by now. The first competency is Applying and innovating, or in other words not getting distracted in class and keeping a sustained interest in our learning. I think I demonstrated an accomplished behaviour in this competency as I was always interested in the learning and I worked well in class.
The second competency is and always has been reasoning and analyzing, or in other words, creating, designing and calculating our object. I believe that I demonstrated an extending proficiency in this competency as myself and my group created 3 detailed objects and accurately calculated the volume and surface area of each.
The third and final competency is communicating and representing, or in other words, the overall presentation of your work. I also think I deserve an extending mark in this competency as I shared my thought process and thoroughly explained my project to the class.
Leave a Reply