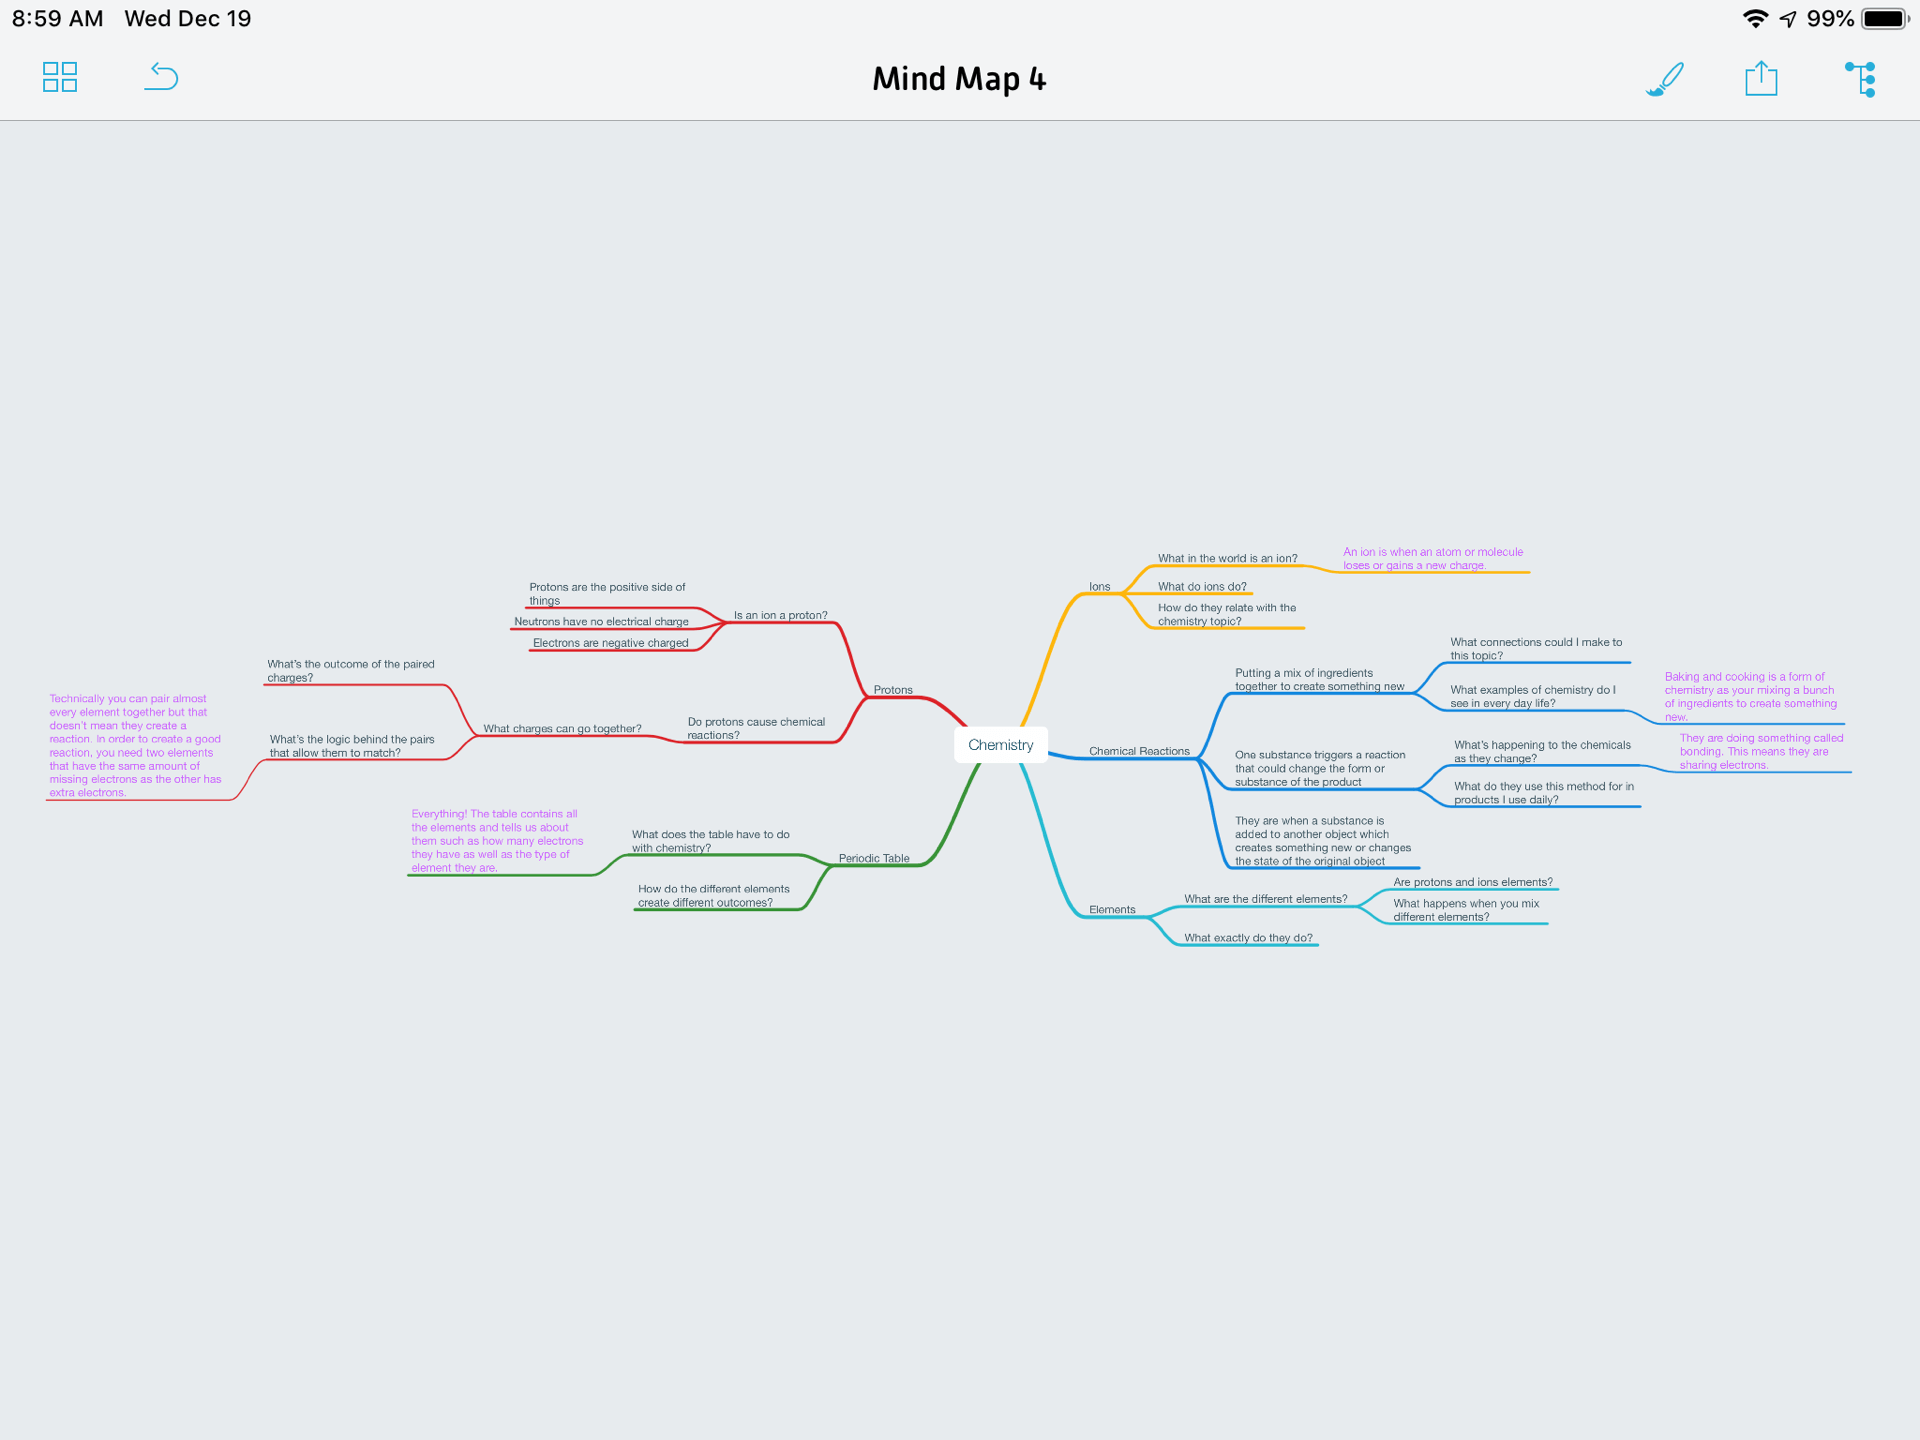
Have you ever heard the term Like-Term? Haha got the pun there? Ok, moving on, I’m sure you’ve heard of algebra before. You know, the weird looking math equations with a mix of letters and numbers? Yeah that. But what the heck is a Like- Term? Well, before diving into the answer, I had no idea what it was either before starting this unit. I didn’t even know what a polynomial was. So, if you’ve been following along in my Scimatix adventure, you might know by now that before starting each project, we are required to create a project start mind map. And, because I knew nothing of this project, my mind map was nothing more than questions upon questions. Below, you can see that my original statements are in black and everything I learned is written in purple.
So yeah, I obviously didn’t know much. But, that’s ok because the point of school is to learn. Right? Let’s just quickly explain what a polynomial and like term is. Basically, a polynomial is like a group of algebraic equations such as r2. There are many forms of polynomials depending on the number of terms in each problem. So what is a like term? Like Terms are used to simplify polynomials. So if you had a number with the same variable(s), they are “alike” so you can put them together and create a simpler problem.
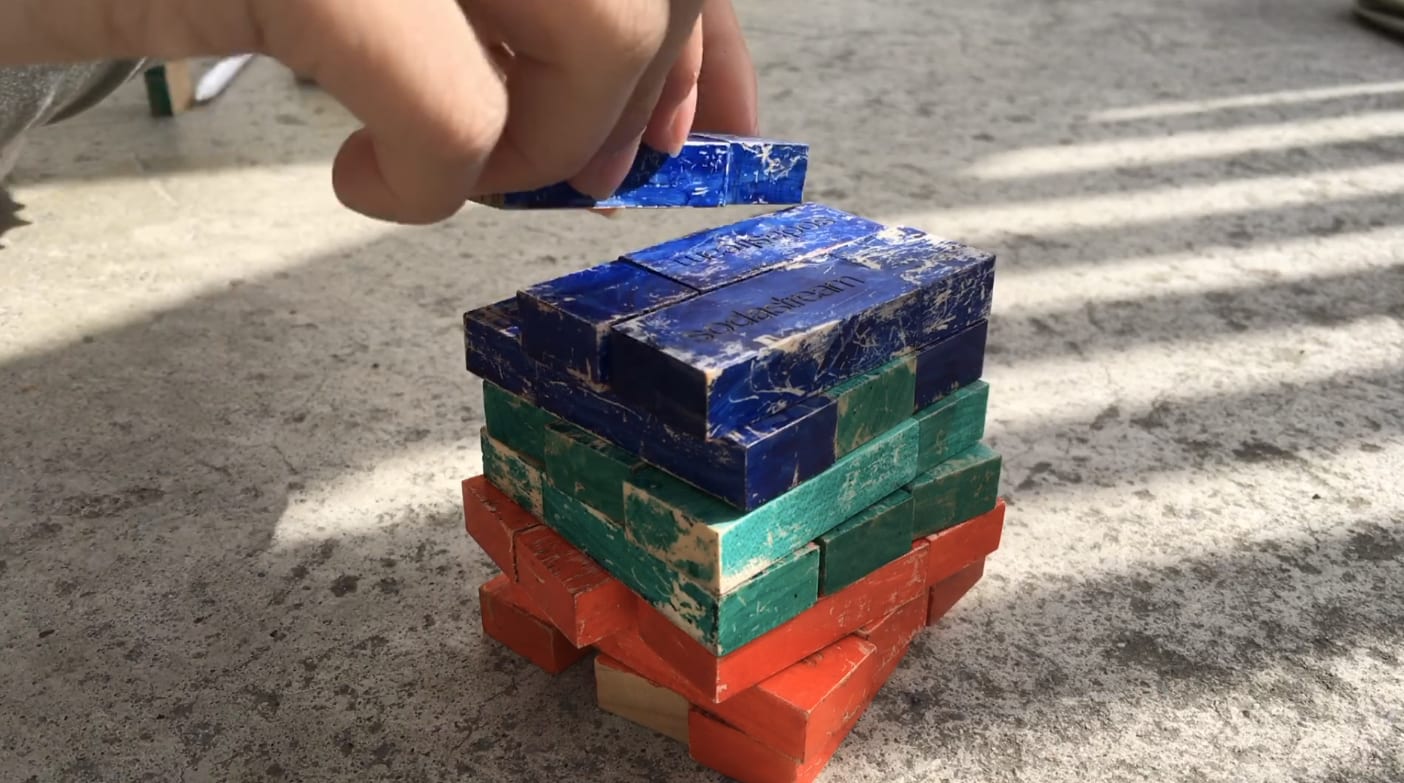
To summarize and show what we learned and our understanding for this unit, we were each paired up to create our own creative project to represent polynomials and like Terms. Unfortunately for me, I was left to do this project on my own so I decided to create an iMovie trailer. I included both charts to show my equations and used coloured blocks to show different variables and terms. The thing I really wanted to focus on for this project was creative thinking and innovative design. We had a lot of freedom in this project so we could create anything we wanted. I personally thought that doing an iMovie trailer would be both fun and unique! This was a great learning experience for me to work both independently and show off some of my video making skills.
Unfortunately, even with my hard work, my video was still a F.A.I.L. Now I’m not talking about a giant F on my assignment, but a F.A.I.L. in PLP simply stands for a First Attempt In Learning. Yes, Incompletely missed the mark for this assignment, but I still learned about polynomials and Like Terms. And so, to demonstrate this, I completed the last 4 pages of a workbook.
Although my Video didn’t work out as planned, I feel that I demonstrated the following curricular competencies: Reasoned and Analyzed the equation and used technical methods (iMovie and video apps) to complete my solution and present my project. I used apps on my iPad such as Keynote and iMovie to create a trailer and write out an equation. I also showed my understanding and solving abilities while completing the workbook pages. I may have screwed up my original project, but in the end, still proved that I learned something and showed my understanding of the polynomials concept.
So, that’s about it for this little post! Thanks for reading!
If you’re of a certain age or brought up during a certain time span, you’ve probably heard of the Travel Vlog icon, Rick Steves. If you’ve never heard of him, don’t even worry, before starting this project, I’ve never heard his name or seen his face before. Basically, Rick is a writer and travel video figure that many girls (like my humanities teacher) can’t keep their eyes off of. He is well known for his travel guide videos and his books to help visitors and tourists get the best out of their trip. Rick Steves was used as a major inspiration for this project. From his cheesy introduction sequence to his informative script, our goal was to make Rick proud. Or, in my words, PLP 9 vs Risk Steves.
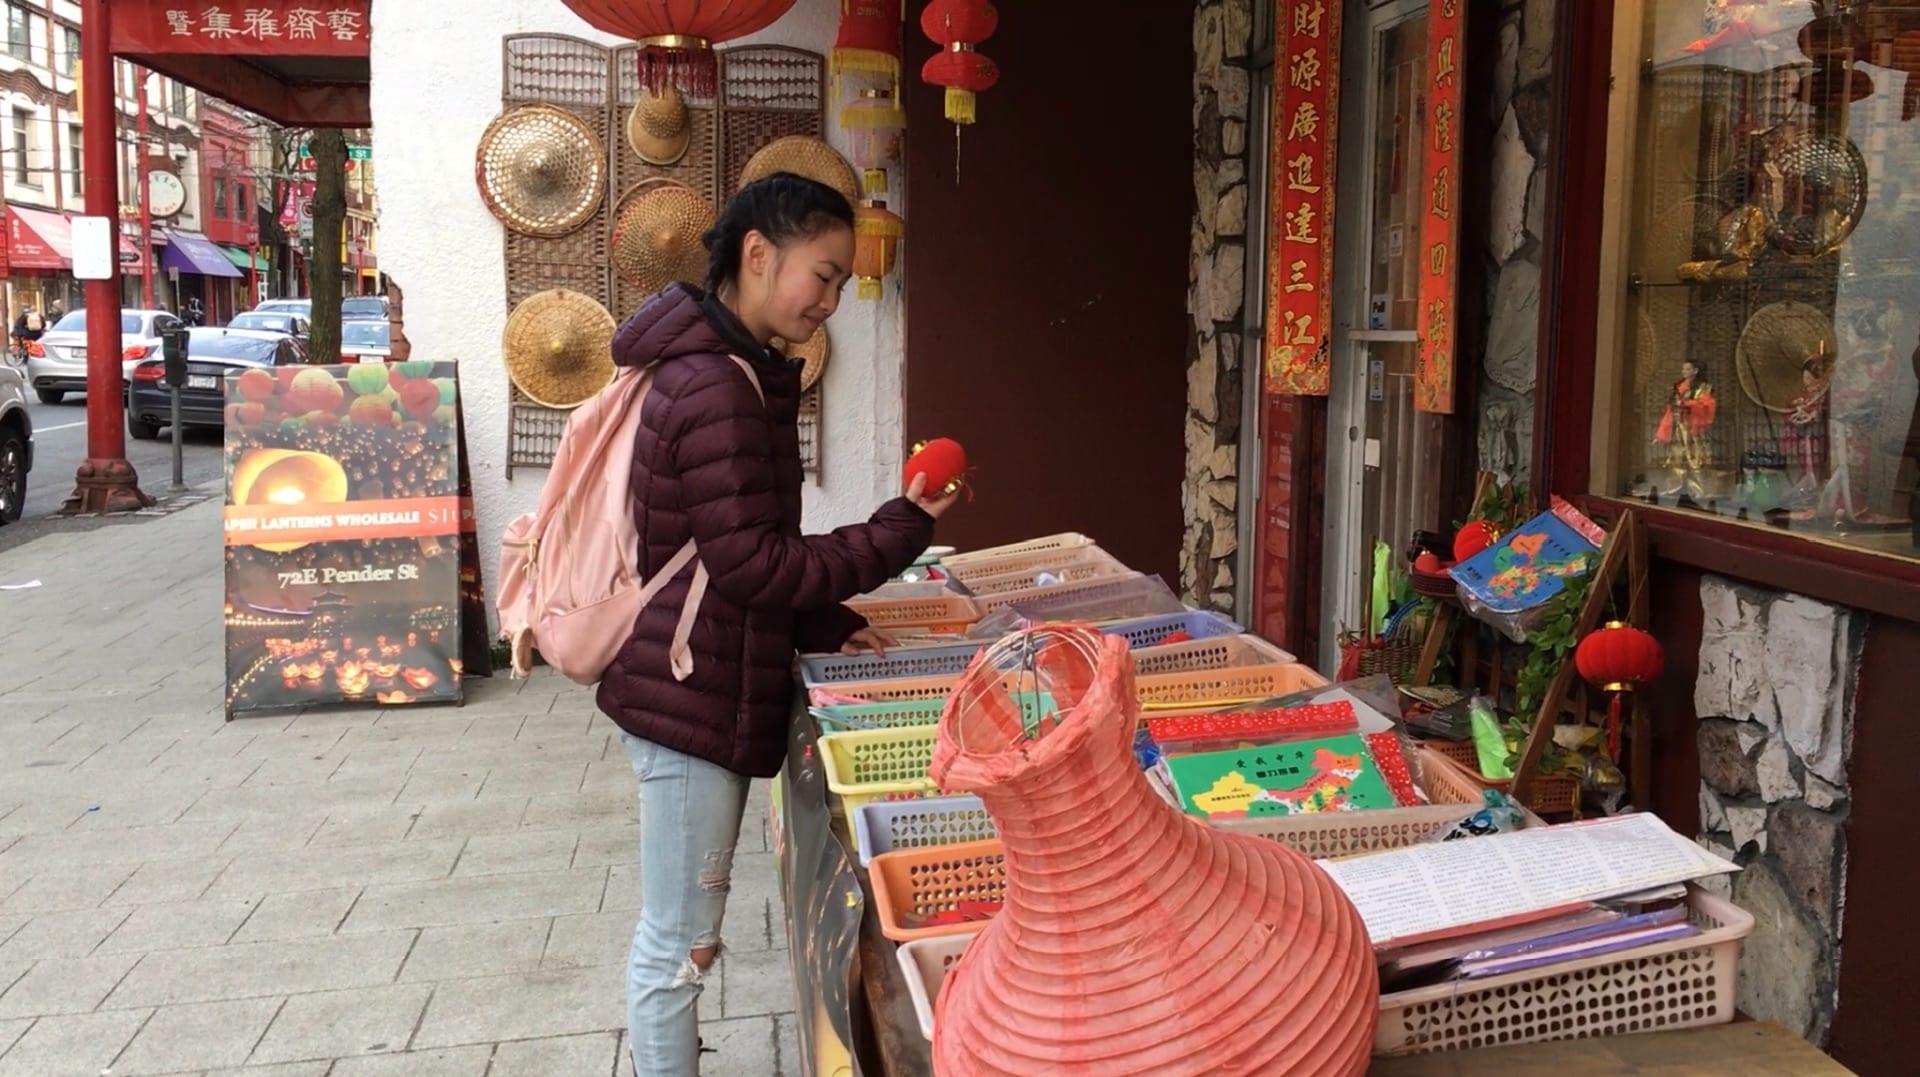
So you might have guessed the project just by how I introduced the post. But for this assignment, each of us were asked to research and create a travel guide video about a historical site either in Victoria, Smithers or locally here in Vancouver. I was assigned the well known and visited Chinatown Vancouver where history and modern day meet. Like most projects, the teachers will ask us to reflect after and in this case, write a blog post!
While I’ve made countless films and videos in the past for other assignments, I’ve never really made a travel guide video before so this project was a great opportunity to learn a few new film techniques! To start the project off, we were required to do some research about our location before even thinking about hitting the “record” button. Now, before my teachers start bugging me about telling you what I learned, let’s dive right into it. I’m pretty sure I can call myself the Chinatown Vancouver expert by now 😂.
The story of Chinatown Vancouver, although very interesting doesn’t end in a happy ending. Chinatowns were originally created as almost a “hang out spot” for new Chinese settlers and immigrants alike. Think about it this way, if you went to a party but you only knew a few of the people who were there, you’d probably feel more comfortable hanging out with the people you know and get along with. Right? Well, it was no different for the Chinese. They were kinda the outsiders in BC so they created these towns or villages so they could all be together and still be able to celebrate and share traditional Chinese customs and beliefs. Vancouver’s Chinatown began to grow as more Chinese people were brought into the area during the construction of the CPR Railway. The place reached its peak in the early 1900s as during this time, Canada was more focused on the over population of Indian immigrants in the country. During its peak, Chinatown took up several blocks and featured many Chinese businesses such as theatres, restaurants, schools, libraries and basically anything else you have in your neighbourhood today! This however all took a turn when the country signed what is known as the Chinese Exclusion Act. A costly head tax was billed to any Chinese person wishing to immigrate to Canada in hopes of lowering the population of Chinese immigrants. So, going back to the party visual, imagine the other people at the party (not your friends) started being mean to you. This could be for whatever reason. Perhaps you tripped and everyone laughed at you or you didn’t wear fancy attire, justimagine that the other people there were being mean. But also imagine you going off to hang with your friends. They become a sort of escape from the other people. A sort of sanctuary. Well, during this hard time, Chinatowns also became a sort of sanctuary for the Chinese people too. It was a safe place where they could still be accepted no matter their race.
Anyways, regardless of the racist laws and head tax, the Chinese population in Canada continued to grow. However, Chinatown Vancouver never quite rebuilt its once thriving community and th e majority of its buildings were knocked down in order to create more housing.
Well that was whole ton of history for one day. Let’s cut to the chase, filming techniques and angles and all that cool stuff.
Doing a travel video isn’t as hard as one might think. Sure you see Rick Steves looking all smart and fancy as he casually walks through exotic streets and locations looking like a know-it-all. But really, it isn’t that different than other videos I’ve made in the past. One fairly similar video would be my Alberta Identity film about how land impacts identity. Both include info about certain places that are worth seeing in the area. The video also consists of many voiceovers, on location scenes and scenery shots to show the setting of the video.
This travel video has taught me much about different filming techniques such as how important it is to have a consistant audio throughout. Using a microphone or headset is extremely essential for good clear audio and voiceovers. I used this technique for my video and saw great improvement in the quality of my voice on camera!
Now this should be a no brainer especially when you see it with your own eyes, but camera angles can play a big role in how your film turns out. While on field studies, we’ve gotten pretty good at filming and capturing scenery angles and nature but, everyone in our class definitely needed work when it came to filming a person.
Part of this project was trying to learn and capture a person or object using the rule of thirds. This is a photography term used to try to get an angle that is visually appealing to the audience. To practice this, we partnered up in pairs and took both a closeup photo and another photo of our partner from a distance using the rule of thirds.
Besides learning different film techniques, I also learned to take leadership and learn how to direct people so that your instructions are clear and easy to follow. In a way, it’s like directing a movie. I had to learn how to be firm but kind, patient and specific when it came to giving directions. In the end, I ended up with a pretty cool video that showcases everything I’ve learned up to this point.
I’m extremely proud of how I was able to add in all the details and video making skills I’ve learned this year and be able to pour it all into what I think is one of my best videos yet!
Another unit come and gone! We studied the brave, Louis Riel. A Métis leader and hero who fought for the rights of his people right t’ill the end. Let’s pretend that we’ve stepped into a time portal together and, for the sake of the exercise, we are both Métis.
We’ve just stepped outside of the time machine and have entered a world where Canadians are trying to take out the Métis by hunting them down and taking over their land. As a Métis, your living off the lands natural resources, but as the buffalo supply begins to shrink, the Métis need to come up with a solution to fight the Canadian government and secure their rights. Therefore, we turn to a man who shares a similar goal in mind, Louis Riel.
Currently living in Montana, Riel returns to Canada to help lead his people, they strike multiple attacks on Canadians and return victorious with the triumphant feeling of killing some of the government’s men. However, their bullet supplie starts to run dangerously low and Louis comes up with a solution. He decides to give himself up to the Canadians for the sake of his people. Riel is then tried and found to be guilty of high treason and was therefor hanged by the neck until dead.
To help us understand the full story of Louis Riel, we all read a Comic Book written by Chester Brown about the life of Louis Riel from when he became an interpreter for the Métis and Canadians to when he gave his final prayer as he was about to be hanged.
Now that you have a brief overview of Louis Riel’s story, hopefully you can see how power can influence people for good or for bad. The Canadians at the time held most of the power and were therefore able to create laws and buy up most of the Métis land in exchange for simple things such as horses and pemmican. However, Riel also held power. Unlike the government, he used it to inspire people to fight for what they thought was right. To fight for equality and fairness. For this unit’s project, we focused on powerful people such as Louis Riel. Each of us then chose one powerful person in history to research about and, eventually create a short animation to explain their story and who held the power. I decided to choose the Komagata Maru Incident, and, although not a person, the Komagata Maru went through quite a bit to fight the powerful government.
The process of the animation creation started with a few days of intense researching about my character and their story. I learned about Gurdit Singh, the man who owned the Komagata Maru as well as the Continuous Passages Act which stopped many people from immigrating to Canada. After taking multiple notes and researching my topic, I then wrote a paragraph in the form of a short story before creating a storyboard to plan out my animation.
I’m really proud of my story board because I put a lot of effort into creating it and added a lot of detail to my drawings to get an idea of how I wanted to animate the people. Finally, it was time to begin animating my story. I used the apps iMovie and FlipaClip to create the film. The actual animation creation process was long as it took many many drawings to make a character simply do a quick move and I did three different drafts before coming up with a good finished product. Below is my final video about the Komagata Maru which summarizes all my research about the incident and what happened. The video may be short, but explains who held the power at the time of the even, the Canadians. I hope you enjoy!
I spent a lot of time and hard work on this animation project. Although, if I were to change one thing for next time, it would be to redo my voiceover so it is t so muffled.
Well, another successful project done! Thank you so much for reading and stay tuned for more updates of my school life: Flow Through School, My Journey Through The Process.
Numbers after numbers after numbers. This to the power of that times that to the power of that=confusion. Welcome to the occasionally fun and confusing world of exponents. We’ve officially dived into the mathematical side of Scimatix and started off the math year with studying exponents. To add some extra pizzazz to the fun, our project assignment was to create a unique card game that focused on the Exponential Laws. We were paired off (I was partners with Fraser) and we began to brainstorm a card game.
Now, to create the game, we first had to understand the different exponent laws and how we could incorporate them into a card game. Below, I’ve attached a photo of all the exponent laws. I searched up quite a few charts but found this one the easiest to understand.
After understanding these laws and brainstorming multiple ideas for a possible card game, Fraser and I created a game called Bankrupt. Basically, the goal of the game was to be less in debt than the other opponents. Below are the rules to the game and a few photos of the cards we created!
The Bankrupt card game is a great party game as it can be played by multiple players at once as long as you have a good supply of cards. Fraser and I demonstrated different laws and math skill by creating a short and simply math problem or situation on each card. This could include having to pay your total balance to the power of a certain number or so on! We did our best to ensure that the game had a clear points system and a clear winner at the end and that it demonstrated all the different exponent laws.
The card game went great and we got to present it to the grade ten PLP students as well! The only thing I would change for next time would be to clearing a few of the cards so that they’re easier to understand. At the end of our card game Presentation, Fraser and I filled out a rubric form to ensure that we met all the competencies such as creating a clear card game with clear instructions, visuals and winner and that included all four exponent laws.
Lastly, to wrap up this math unit, I created a unit end mind map to summarize everything I learned and the original questions I asked.
Yup. It’s that time of year again. The dreaded Midterm Presentation of Learning or in short, it’s MPOL Time! So what is an MPOL you may ask? Well, like I mentioned earlier, it stands for Midterm Presentation of Learning. This is where I have to take the time to write a super long detailed post to explain my learning so far in the year and what I’d like to improve on moving into the second half of grade 9. At the end of the school year, I have to go through this all over again and write something called a TPOL which is my Transitional Presentation of Learning. Anyways, here goes nothing as I publicly share my midterm journey through grade 9. Here’s my MPOL 2.0.
Ok, to kick things off, let’s take a quick and rather embarrassing look at some of last year’s work. This is just a small glimpse to show how much I’ve grown as both a person and learner. Below, you might remember me referring to this chart as the River Cycle or “My Happy River Life”. Basically, I thought of my life as a River. Everyone’s River might look different. For example, I pictured mine to be filled with unlimited sunshine, rainbows and happiness because I like to be joyful. Although everyone’s River may look slightly different, every River has the same skeleton form. There are rocks, and waves and waterfalls, but each river also has beauty and light and love.
Below are a few other projects from various parts of last year.
So now you’ve seen a few of my projects from last year and know my theme I lived by. So this year, I challenged myself to find a new theme. One that still shared my values but also motivated me and represented who I am. So this year’s inspirational quote I made for myself is “choose joy and smile often. Trust in Jesus and he’ll guide you.” I believe this is really the only saying I need in life. And for those of my friends out there who are constantly asking me, “Kiera, how can you be so smiley all the time?” Or things like, “Kiera, life isn’t all happiness and rainbows!” And yes, I know it isn’t. In fact, there are many imperfections in my life. I can give you an example right now. When my brother was born, I wanted more than anything to get rid of him. You see, I really wanted a sister and the fact that Cameron came out as a boy really disappointed me. This may not seem like a big deal now, but believe me, to three year old Kiera, it was.
Im sure we’ve all had something in our lives that well, wasn’t the most positive of experiences. Last year, my MPOL revolved around my happy river life and the question of “how can I take my failures and work hard to learn from them so that I can recognize them as just another opportunity to improve and try again?” This was something I still work on even this year and since, I never really answered this question from last year, I plan to show you how I’ve worked at this sentence this year as well as what I’d like to focus on moving forward into the sencond half of grade nine.
Let’s begin with my personal favourite subject, English or in this case Humanities. We started the year off learning about land, culture and the identity of different areas and people. All this information helped us learn the answer to our driving question: How Does Land Impact Identity? This unit also included our amazing field study to Alberta where we got to experience the different landscapes and types of people. Besides the fact that I was “exposed” to much more than I was used to (couch couch, Burning Man), I really was amazed by the creativity and thought that was shown at Beakerhead. People really shared their passion and interests through these amazing inventions, sculptures or works of art that were on display. Honestly, when I was younger, I would never have appreciated any of Beakerhead and would have thought some of these people were crazy for even thinking of attempting something so strange such as painting with bacteria. I mean, I always learned that bacteria was nasty and gross, but seeing people turn something like bacteria into works of art, was very inspiring and reminded me of how I could express myself in class and at home without worrying what others might think. It also reminded me of why I dance, to express myself! Going back to earlier this year, I was scared of what a certain friend thought of me. And although we were such close friends, I never wanted to share a specific side of me in fear of what she might think. It was the same for class last year. I hated asking questions in the middle of class because I had the fear of people judging me for what I had to say. But seeing so many people at Beakerhead who were so enthusiastic about the science and logic they learned from their creations really inspired me and I think that’s the main thing I took away from that trip. So, with this newfound skill and knowledge, I can’t wait to take on D.I. Hopefully, my creative side will come through!
On the more educational side of the Alberta trip comes our Maker Video skills. This unit was probably one of my favourite units so far in PLP. Last year, we focused much on still images. We showed our knowledge of these still images in the form of ads, posters and infographics and it was about time we learned to make them move. Now, anyone can make a video. I mean really. You just video tape a bunch of scenes and shove them all together into one longer video. But, to make a good interesting film is quite difficult and capturing the eye of the audience is key. Over the past few months, I’m sure I’ve created at least 10 videos including the multiple drafts and shorter minor films we created. The process of creating a good video is fairly long. There are many things to take into account such as a storyboard, theme, setting, characters and more which usually are written out ahead of time before even thinking about filming a scene. This past Maker Video unit has taught me so much about videos and the importance of some aspects such as sound, music, camera angles and more. I’ve also learned some pretty cool tips and tricks on apps including iMovie along the way! Below, I’ve attached both my Alberta Identity Video, my Ghost town movie and even my PLP application video from before I even joined PLP! You can really tell how much I’ve learnt about the process of video creation based on the work that I’ve provided below. Keep in mind when watching that I had no idea how to use iMovie before entering PLP and had no clue how to trip or add anything extra to the video.
The valuable lesson I learned from this video unit, and although it may sound a tad cliche at the moment, this saying does apply to many of my life situations and is one of my center values. This cheesy saying is “look at things through a different perspective.” Just like in photography or in videography, when you look at a certain situation through a different perspective, your idea of the scenario will likely change. There’s good to everything and even though every day may not be a good day. There is good in every day. Just some days, you might have to look a little harder.
The next PLP subject I’ll be covering is Scimatix. Now, in my past MPOL/TPOLs I haven’t talked much about this subject. So, let’s begin by diving straight to the recent event of the Winter Exhibition 2018. This not only was a blast of a night but also had great learning opportunities as well! I got the chance to work with some people that I haven’t worked much with in the past, and, along the way, learned some rather interesting things about them.
So for this year’s exhibition, we were grouped into small groups to create a story featuring chemicals, hence the name, Chemical Stories. Obviously, this unit was centred around chemistry and all the elements that go with it. Now, for those of you who don’t know, Scimatix was always my weakest point and I had to work extra hard to keep up with everyone else. And if anyone ever asked me what my greatest fear was, it was failing. Whether it was not making a sports team or not landing a role at an audition or simply failing a math test, I HATED the thought of failing. So, like I talked about last year, Chemistry was definitely a bumpy waterfall ride for me. I, for the first time ever, failed a test. Yes I said it. I failed. Not only did this damage my ego and confidence, but I thought that everyone in the class would then see me as a failure. But what can you do? Honestly, at the time, it felt like I couldn’t do anything. However, I remembered what I wrote in my Selfie Project last year and realized that failing a test wasn’t the end of the world. In fact, it wasn’t even what was most important. It was what I learned from it that mattered. And then what? I would persevere and try again! Knowing that my friends and parents would still be proud of me no matter what really helped me get through it. I tried again. I studied the formulas and elements I needed to know for the exhibition and got through it. At the end, I was left with an amazing result. The exhibition was a success and it was definitely an experience to remember.
The final subject to cover is PGP. Now this was a new river ride for me because I’d never taken this course before. I wasn’t sure what to expect or what this course even was. We were each given a small notebook we call our “Goal Tracker”. This is a safe little place for us to write down private ideas and steps to reach our goal and record the process as we journey to achieve it. We also had to do something called a weekly review. This was where we could write anything to summarize the week. For me, I wrote one positive thing that happened such as an accomplishment or simply seeing the sun peek through my window when I woke up (because, honestly, how often does that actually happen in Vancouver?) or as big as becoming an ambassador for a brand. Every week, we achieve our own little goals. So why not write it down and celebrate? I also wrote down one negative thing that happened. Perhaps it was my friend being sick, or having Scimatix first block or having a dentist appointment that week. Whatever it was, I wrote it down. So the final thing I’ll be sharing with you today is my dream board. This is a collage of things that are important to me and in the corner, you may notice a small silhouette of a happy couple. Now, although I may be known as the “little sister” or the “five year old”, I still have big dreams too. And one day, I hope to find love, just like my parents did and their parents before them. I see happy couples all the time, and I hope for that to be me one day…
So, to wrap things up, I want to end this with a questions. “How can I make the most of every experience? How can I learn from them to make things better next time?” So that next time I take a test or do a project such as DI, how can I improve from last time based on my past experiences? And lastly, when my friends ask me, “Kiera, why are you always smiling?” My answer is “Choose Joy and Smile Often, Trust in Jesus, and he will guide you.”
The year is 1819. The place is an abandoned cabin north of Mountain Valley Village. There’s been news that Ona Ozone (me) has gone missing and know one knows why and where she’s been taken. It’s now up to the detectives (Alex and you) to help find the missing Ozone and return Pho Phosphorus’ (Emerson) lost love. Can you solve the mystery intime and find Ona before psycho Ali Aluminum (Taylor) finds you?
Ona Ozone and Pho Phosphorus
This years exhibition was rather different from the one we did last year. Last winter, we as grade eights were paired with the grade nines to create a Star Wars themed experience that allowed guests to take a scientific and artistic look at the all time popular film series. This year as grade nines, we were split into groups of four. Mine included myself, Emerson, Taylor and Alex. Although the exhibition was a project on its own, the pre-exhibition process began with Taylor and I being a pair and Emerson and Alex being a separate group. We than created a short animated video (which you can read about and view in the link above) about two chemicals forming a bond and therefore a chemical reaction. This, we called, ChemicalStories.
Ali Aluminum
From there our groups of two were made into a group of four or more. That’s when Emerson and Alex joined Taylor and me. Our task was to combine our two stories and create one epic tale which would then be transformed into an immersive experience. This meant hours of decorating a classroom to make it seem like part of our story. This process wasn’t at all fast or easy and our team actually fell apart early in the decorating process. This was due to us not listening to each other and trying to talk over one another. Lucky for us, after a brief team meeting, we pulled it off and our room turned out to be a fun interactive experience that was both exciting and mildly scary!
Now, before diving nose deep into the actual exhibition, let’s rewind a bit and go to the planning stages when the story was created. The two boys had written a love story using the chemicals aluminum and phosphorus and Taylor and I used humans to represent our chemicals, ozone and einsteinium. My team brainstormed many stories and ideas before deciding on a murder mystery and love story. We combined characters and decided to base this story off of Ali and Pho which were originally characters from Emerson and Alex’s story and Ona from our story. The writing process came together well and while I was writing the book, Taylor and Emerson started to draw up our room plan for the night of the exhibition.
Once the story had been written and approved, my team and I gathered together to see what each person would bring. We also decided on food and who would play what character as well as costumes.
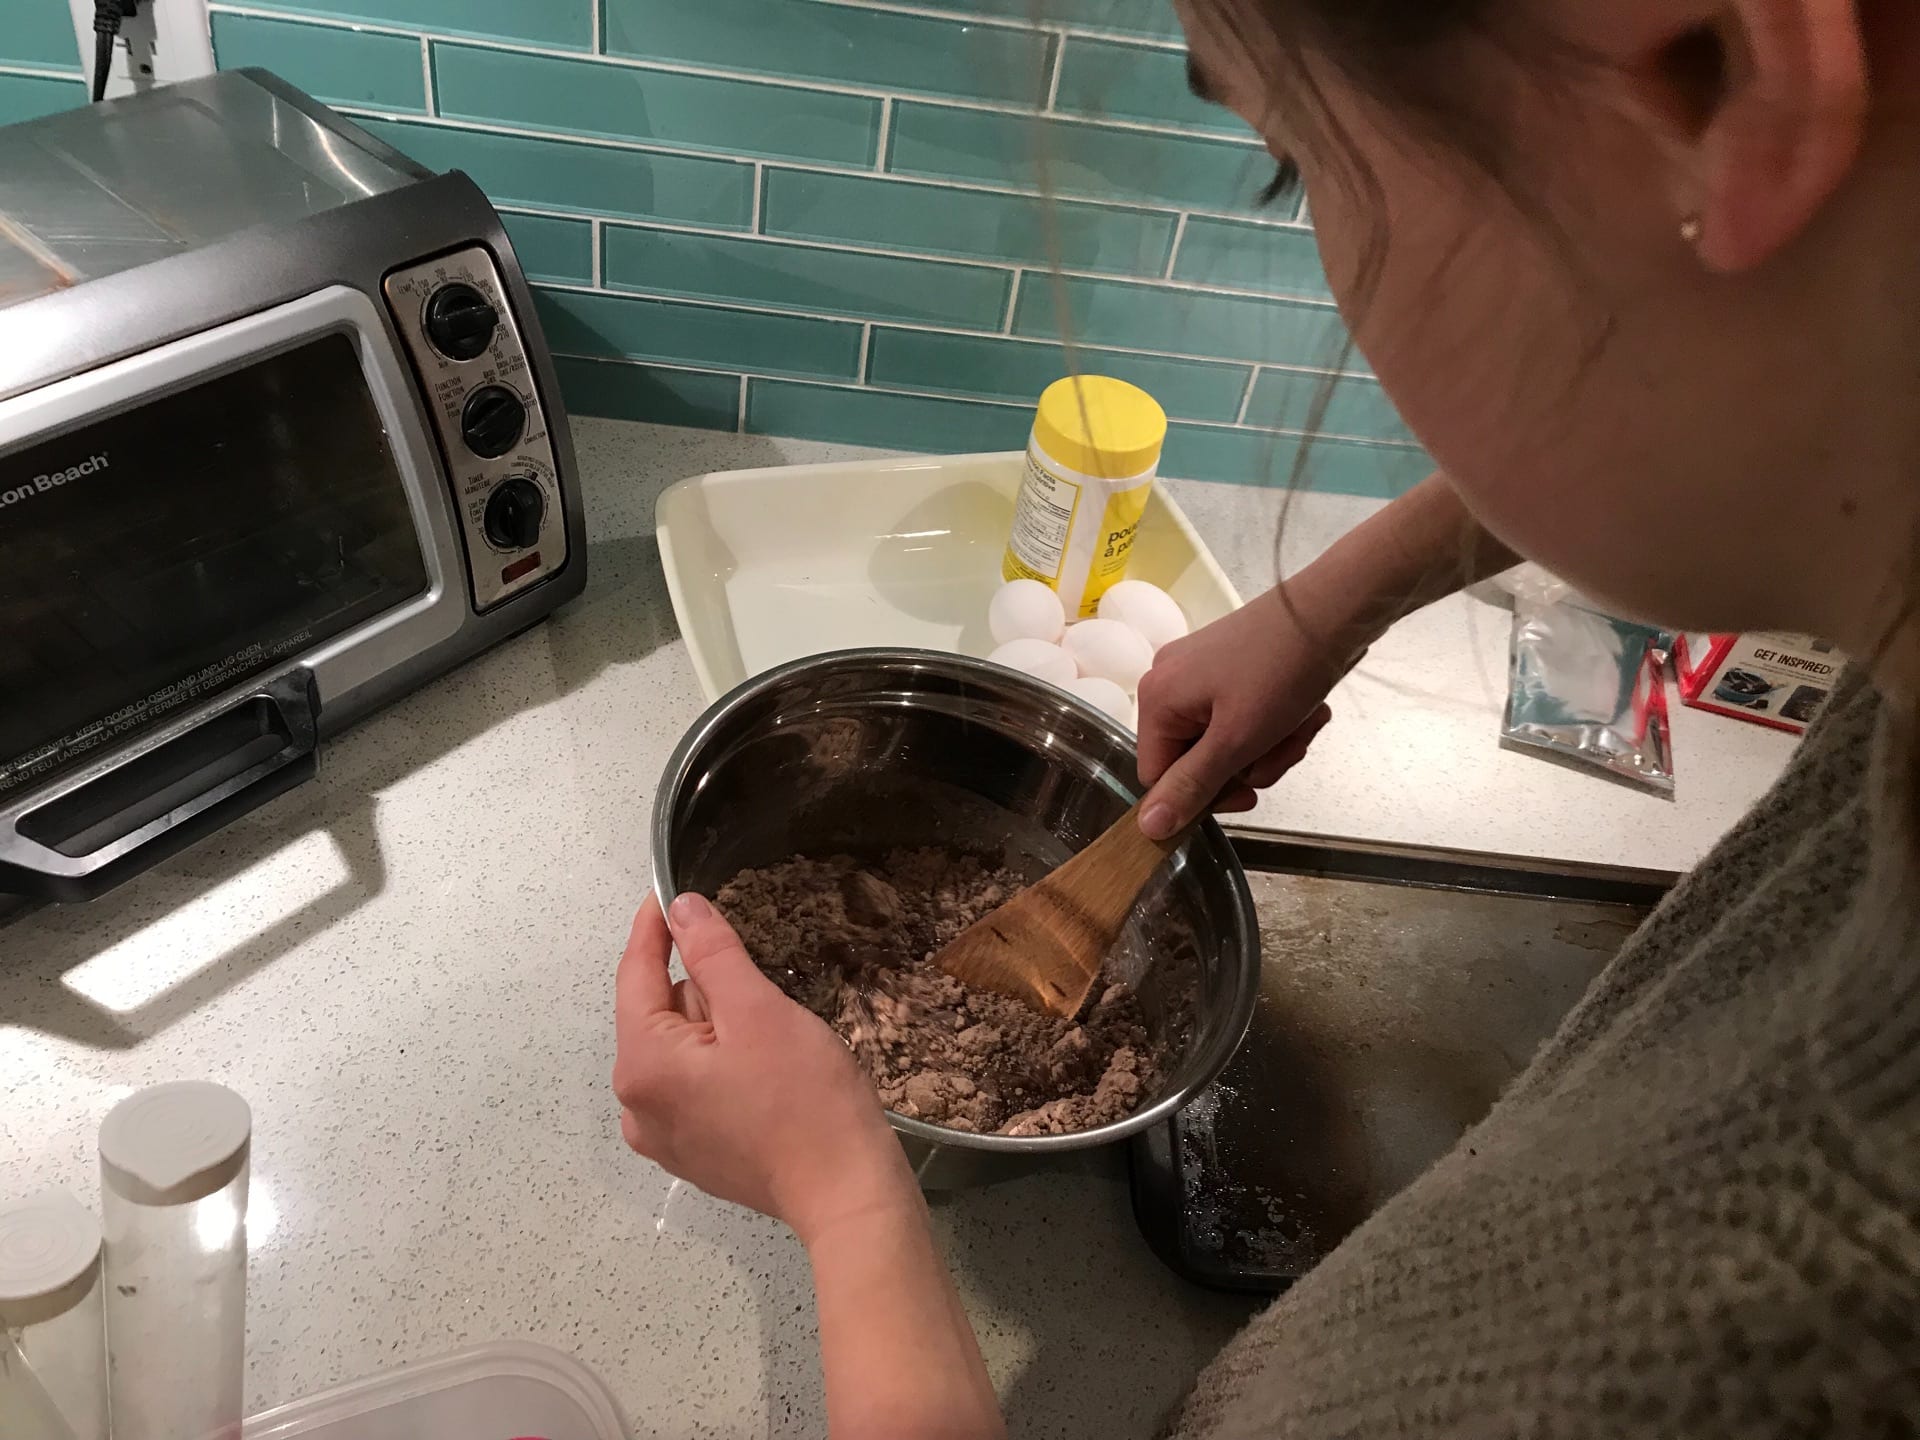
A few days prior to the exhibition, Emerson and Taylor came over to my place to bake some food for the big night. This would be placed on a decorative table in the Center of our room and guests would be able to enjoy the snacks. The three of us decided to make a batch of brownies and many many batches of shortbread cookies. Below are a few images of our fun day baking!
It was finally the day of the exhibition and I walked into the classroom to a big surprise. A giant dog cage was waiting for me in the Center of the room and, turns out, I would have to sit inside it and pretend to be trapped in it for about 3 hours! Of course I’d get breaks, but still! The humiliation and discomfort it’ll bring.
Taylor setting up the outside door and entryway
Emerson adding some cobwebs to lamps and things
Alex hanging with his new friend
Me putting some snow on the window sill
The room set up went fairly well thanks to everyone for bringing the things they were told to bring. Once the lights were shut off and the candles turned on, you were really transformed into the world of Mountain Valley. With the creepy music constantly playing throughout the night, the room really held a special magical effect on its audience.
I always think the worst part of things is the cleanup. Once the last guest departed, the room instantly fell apart. Paper was torn, the lights switched on, music stopped and the fake snow was thrown back into its packaging. I was very proud to be the first room cleaned up. With the final piece of tape undone and the last paper thrown away, the scary haunted cabine slowly turned back into a not so scary classroom.
Cleaning up
Overall, the night was really fun and I got the chance to see different immersive rooms from my classmates as well as the grade 8 booths about religion and the grade 11s walk through of the 1800s. Although at first, we had a few difficulties regarding us listening to one another, the story line, room, decor and experience went really well! My group really came together as a team to make this such a great project for everyone. Everyone did their part and tried their best no matter the circumstance. Alex brought in the lamps and snow, Emerson found the music, Taylor stuck to costumes and I brought in all the props as promised I would. The night was truly a good reflection of the hard work and dedication we all put into this project. There was nothing about the night I would change…well…except perhaps, next time, I’d rather not sit in a cage😂
So for those of you keeping up with my blog life, first off, I definitely need to say good on you for actually reading through and looking through my posts! You guys are truly amazing. Second, you may know by now that many of my posts contain videos. This is because in our Maker Class this year, we’ve been buried nose deep into video skills and creating quality videos and films. This post is like me bridging the gap between all my videos from other posts and creating one last unit wrapping post on video skills. So let’s begin! 3.2.1…Action!!!
Now that I really think about it and look back at all my videos from the beginning of the school year, my first video this year would be my Passion Video. This was a short clip we individually created about our passions. This kind of relates to my original entry video when I applied for PLP. Both these short films are centered around my passion of dance and we’re filmed early on in the year. Because the two films are fairly similar, I hope you get the chance to watch both of them and compare how much I’ve grown since the beginning of last year when my application video was made. The Passion Videos really taught me how to express myself with the use of voiceovers and how to properly incorporate them into a video. This tool comes in handy for most of the videos we create in PLP especially educational ones and it’s very important to have a clear voiceover to catch proper information. While this video is t one I’m exactly proud of considering the multitude of films I’ve made now, it was a great stepping stone in the video tool kit process. I hope you enjoy!
Ok, now you’ve seen probably the most embarrassing and cringey part of my video making career. Fast forwarding a bit, many of my videos from this year were filmed during the PLP Class trip to Alberta. Along our trip we stopped at a ghost town in Three Valley Gap where we filmed a short silent movie. This meant that there was no sound or talking allowed. To add to the fun, many of us even added a cool old timer filter giving the video a pioneer days feel. If you’d like to read more about our trip to Alberta and the process of creating this video, please click on the link above!
This video really taught me how each clip has a special significance and meaning o the overall story. With us not being able to use sound for this film, it showed us how effective actions, expressions, music and titles can be and how much, music especially, can add to the mood and feeling of the film. Our ghost town movie below contains very emotional music. As you watch, I challenge you to try to imagine this film as well as perhaps one of your favourite movies without music. How would that effect the overall experience?
On our way home from the Alberta trip, my class stopped by something called the Enchanted Forest. As “enchanted” as it may sound, this place was basically an ordinary forest filled with very creepy and quite frightening concrete fairy tale figures. Our task was to create a movie that incorporated these stone figures. These could be props, characters or whatever our group decided them to be! I actually played the high pitched voice of a stone pig! This video really was so much fun to make and taught me the use of special effects. This was a whole new element for me as I’ve never really bothered to use computerized effects in my past films, but I have to say, they added a whole new level to this film. The effects allowed me to do things I’d never be able to do otherwise such as shootings and explosions which are shown in the film below. Enjoy!
During the Alberta trip, we visited a museum in Drumheller. If your familiar with Drumheller, you probably know that it’s famous for Dinosaurs so of course that was the main topic of the museum. For this video, we simply had to pick any artifact in the museum and create a short video about that artifact. I chose the Ammonite which was a squid-like creature living around the same time as the dinosaurs. This animal caught my eye due to its beautiful lustre and shine. To learn more about this beautiful creature, click on the video below!
The final film we created in Alberta was our unit end Identity video. This was filmed in Alberta but created at home. Basically it was about how the lands Identity affected and impacted us and those who lived there. The main video skill I learned from this video was the use of transitions. The video required us to cover three examples of how the land can impact our Identity. We also had to include photos and interviews so smooth transitions were essential for this project. I used both fades and iMovie transitions but also learned that transitions can be done while filming by simply shaking the camera or darting in and out of poles and walls. I’m very proud of this video because I truly think that it showcases everything I’ve learned from both my Identity unit and video creating unit.
Transferring to the less educational side of the scope, another video I created this year was my live event video. This required me to document a live event that I was either attending or being a part of. The only cool event that was happening that week was dance class. So, I documented that! Get on your tutus and pointe shoes because your about to enter the world of Ballet at Seymour Dance.
This video really challenged me to incorporate interviews into a video. This was a challenge especially for this project as this video had a time limit of no longer than three minutes and interviews are about three minutes on their own! The challenge was to cut down footage and get straight to the point. To do this, I made the intro rather short and went straight to the important part of the film which was the ballet footage and interview.
Another fairly short video, similar to my live event film is my take your kid to work day video! This was filmed on BC’s annual take your kid to work day where all grade 9 students from across the province would shadow their parents at work for a day to gain the experience of a normal work day. To read more about my personal experience, click the link here.
This was another great chance to incorporate interview skills as this video required us to add in an interview. I got to learn so many new things about the stress of adult work life and what an average day in the life would look like. By the end of the day, one thing was for certain, I NEVER want to be an eye doctor when I grow up😂
The final video I’ll talk about in this post is my Scimatix Chemistry Story Video. I made this with my partner Taylor. This was very different from the other films I’ve done. Like my Ghost Town Story, this vidéo had to be a short film and tell a story. Our main characters had to be chemicals and the plot had to result in some kind of ionic or covalent bond. I’d never really done much animating before this project so this was a great opportunity to learn some cool skills for animation. Using magic move, I was able to move objects and characters around the screen. I even learned how to make a person’s mouth move using this cool app called FlipaClip. I’m so proud of how this video turned out and had so much fun making it.
Thanks again for reading my blog! I hope you enjoyed watching my videos. If you have any comments or feedback, please leave a comment below!
Who could actually relate chemistry to baking?! I mean, I love to cook and bake, but when it comes to studying chemistry and electrons and atoms and all of that complicated stuff, I completely blank out because, to be honest, science isn’t my thing at all!
To begin with, I had absolutely no idea what ionic or covalent bonds were. What was the difference between the two? I didn’t even know what an ion or compound or even what an electron or element was. All of which I’ve now learned and know thanks to the very unimportant and stressful animation project my teacher assigned. I got to understand how bonds were made when a number of elements make a deal with each other and trade electrons to stabilize one another and I learned about different bonds such as an ionic being a metal paired with a non metal or metal paired with metal and a covalent bond being two or more non metals paired together.
Having said that, as much as chemistry and science aren’t my favourite subject, even I had questions about this topic. Below is a chart with all my original thoughts when we first began this unit. My knowledge has expanded so much since and I’m very excited to share with you what I’ve learned. Below is my original mind map of all the questions or info I had for this year’s chemistry unit.
It’s finally time! The 2018 Edublogs Blogging Challenge is over. This means it’s time to review everything that I’ve learned from this experience. It’s time to rejoice and reflect!
This was my very first time participating in this annual blogging challenge and I have to say, it wasn’t at all what I expected it to be. While I was picturing more of a competitive atmosphere, this challenge was really just a chance for people of all ages around the world to learn about other cultures, religions, people and interests. It was amazing to be able to read all these amazing blogs from all over the world! Some of which were quite similar to mine in design, style or interest, but others were very different then what I’d ever think of. It was incredible to see how one could express themselves through nothing more than a webpage!
The Edublogs Challenge also allowed me to see how my peers and friends interpreted the challenge in their own unique way. Each week had multiple tasks that we could choose from and even if each person chose the same task, everyone’s blogs would still reflect them and their personalities. Below, I’ve linked each of my classmates names to my favourite post they’ve written for this challenge. While there are so many of us, I encourage you to have a quick look at a few and try to guess what that person may be like in real life.
Ive written each of the names using the person’s nickname that I gave them (I’m a huge nickname fan!)
Now for a very brief and quick recap of this very long, fun and intense 10 week challenge. Each week had a variety of activities we could choose from and required our own personal touch and creativity to complete it.
This was my first ever activity for the Edublogs Challenge. This task was quite simple and only required us to create an « about me » page on my blog. Fortunately for me, I had already previously done this during school and only had to update the page and submit it. Very fast and simple!
For this week’s task, I had to create either a poster or infographic about commenting and how to write a constructive, kind and helpful comment on someone’s blog. To show off our new skills, I then commented on a number of people’s blogs.
How often do you use images for blogging or for work purposes? In this activity, we had to create a poster or infographic about proper image use. This means using non copyright images and how best to find them. I created an acrostic poem with the word « IMAGES » to write an educational poem about different ways of finding or creating non copyrighted images and photos.
Probably my favourite challenge! For week three, I had to use my creative and artistic thinking to create some kind of art or game using emojis. This was a fun experience and I really got to show my personality through this challenge as of course, I made a ballerina emoji!
After focusing on ourselves and what our interests were, this challenge was mainly about other people and cultures. Each person participating in this challenge took a quick survey about different things the liked. Then, it was our turn to create one! I made a slideshow with a few images. These were of objects to create a “this or that” game. I also made a survey using google forms! Click on the link to my post to try it out for yourself!
For this challenge, we were allowed to write about anything that was related to science. Perhaps it was a question we had or a topic we were interested in. For me, I wrote about my love for owls and how they fly so silently compared to other birds. To learn more, please click on the link to my post! I am also so proud to say that this post made it into the Edublogs flip board!
Free Choice meant we could write about whatever we wanted! It could be about an event we went to, a special place or vacation or perhaps about a person or object that’s important to you. So, for this week’s challenge, I wrote about something almost every dancer looks towards during this particular time of year, the Nutcracker! This is a very popular ballet around the holidays and includes bright costumes and an amazing story! Read more about the Nutcracker Ballet by clicking the link above.
For this activity I wrote about my post about a special ornament in my life. To accompany this, I paired up with Jordyn to create a DIY ornament video. This was so much fun to make and do and I’d love for you to click the link above to watch it!
The task for week nine was probably the hardest for me. One of my biggest weaknesses is coding. I just was never able to understand how it works or why someone would devote their life to coding and typing numbers and letters onto a screen. Nowadays, most coding is done for us and anyone can launch their own website within minutes. While this task was not the most fun for me, many of my classmates found it rather enjoyable. I’m happy to say though, that after a few days of procrastination, I completed the task and received my coding certificate!