
This post is going to be talking about our latest Scimatics project in which we learned all about electric circuit and how they operate. In this post I will be sharing what I learned and how I incorporated it into our final presentation which was a Rube Goldberg machine. the project name is the Metephor Machine and the reason this is the name is because the machine has to be a metaphor for the scientific method. Learning all about electricity and incorporating it into our machines was a difficult process, but I feel I have a full understanding now.
To start the project we had to learn more about electric circuits so my class was given some conductors( wires because they are material made of metal which means they are great for transferring electrical energy through them), loads ( something that can convert electrical energy like another source of energy), and batteries( multiple cells attached together) and we had to figure out how to get the load to work. We had to use background knowledge in order to activate their circuits, I think this was good because it showed us where our individual knowledge on the subject was and what we needed to know for the rest of the project.


We also learned some more through textbooks, from there we learned what the difference between series circuits and parallel circuits were and how they operate in different ways. With this knowledge we could decided what would be the most effective circuit for our machine.
The next big part of the project was actually designing our machine. The hardest part about this was scaling our design from real size into something that could fit onto one page in notability. We had to do a small course on kanacademy to learn how to accurately shrink our design onto the page. I found that this took a lot of effort to do but once I had it down it was a lot simpler than I thought. After that we could start building our metaphor machines.
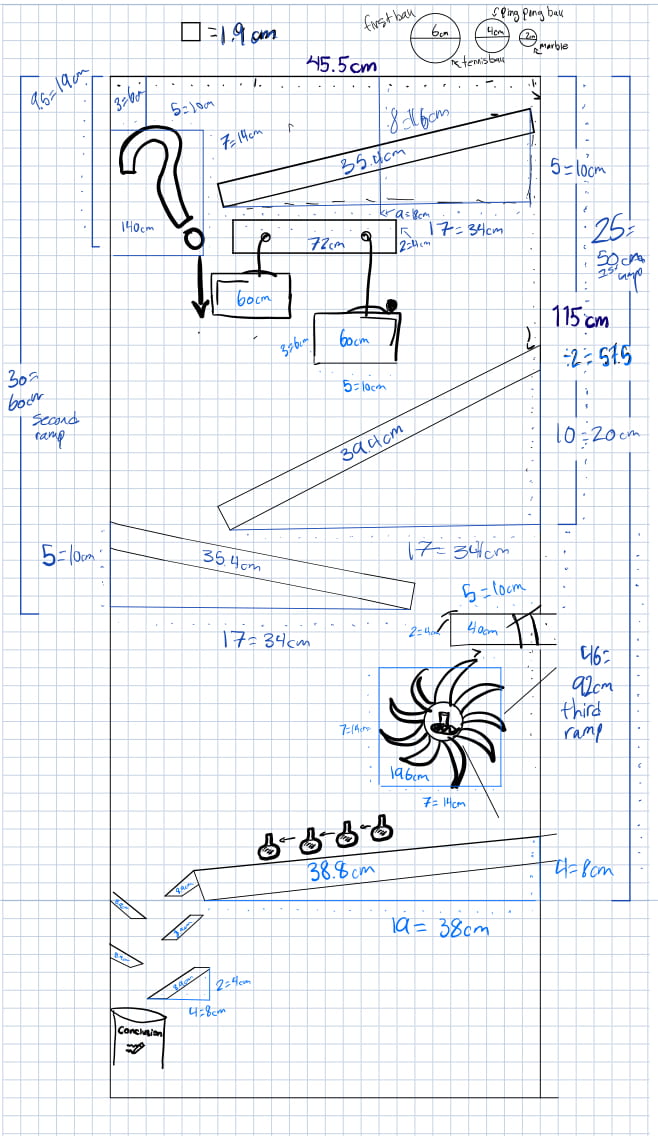
My group and I ( Alex and Felix ) collaborated our ideas together in order to create the best possible machine. Felix had an idea of creating a wheel to show the transitions between experiment stage and conclusion stage. Then Alex had a good idea to represent the different stages using cardboard that we could draw things on, for example we had drawn a pair of binoculars to represent the observation stage, and a question mark to show the questioning stage.


The building process also took some time because not everything turned out as planned. Somethings we should have looked through twice was the pulley system that transferred our marble to the planning stage. The cups that the marbles were placed in was in the wrong order so to fix this I rearranged the cups and angled the pulley system lower down so that it was easier for the ball to fall in. Other smaller adjustments were added later to make the machine as functional as possible.

The last part of the building process was attaching lights and create a circuit that would activate when our marble passed through the circuit. We used small lights that we soldered to a copper wire, this created a parallel circuit, here is our diagram for it.

Parallel circuits were highly effective because unlike series circuits they can evenly send electrical current through multiple lights at once, this meant we could activate all of our lights at once.
Overall our machine worked very well and completed the task of demonstrating the scientific method. I think my team worked well together to find interesting ways to show our knowledge on this topic, and we also found ways to build our design so that little bits of everyone’s original design were incorporated.

That’s all for now.