A Rube Goldberg machine, it’s a completely overcomplicated chain reaction of events to accomplish a simple task. Now you might ask, what does that have to do with science. Well what if we make the machine a metaphor for the scientific method! Welcome to metaphor machines, the project where we learn all about electricity, the scientific method, and build a completely over-engineered machine to go along with it. Let’s get started
To start the project, we built a junkyard machine, in which we used anything we could find to build a working rube Goldberg machine. Here was our attempt.
Not only was it great fun, it was also a good way to get to know and collaborate with our partners for this project. I ended up with creating our awesome machine with Alicia, and we merged with Patrick and Julian later in the project for the final machine. this first attempt at collaboration during the project, of which I feel I did not do the best. I could have listened to my partner, asked more questions, and overall be more co-operative. However I believe I improved in this regard a lot throughout the project. During the creation of the first rough draft, I worked and combined ideas from all my teammates. Throughout the project we really worked together to build the machine, come up with new ideas and workarounds when things didn’t workout. Ultimately I feel collaboration was my biggest improvement throughout the project, and I thoroughly enjoyed work alongside others.
Questioning and Predicting
After the intro event we put together a Mind map, to map out all of our knowledge before and after the project.
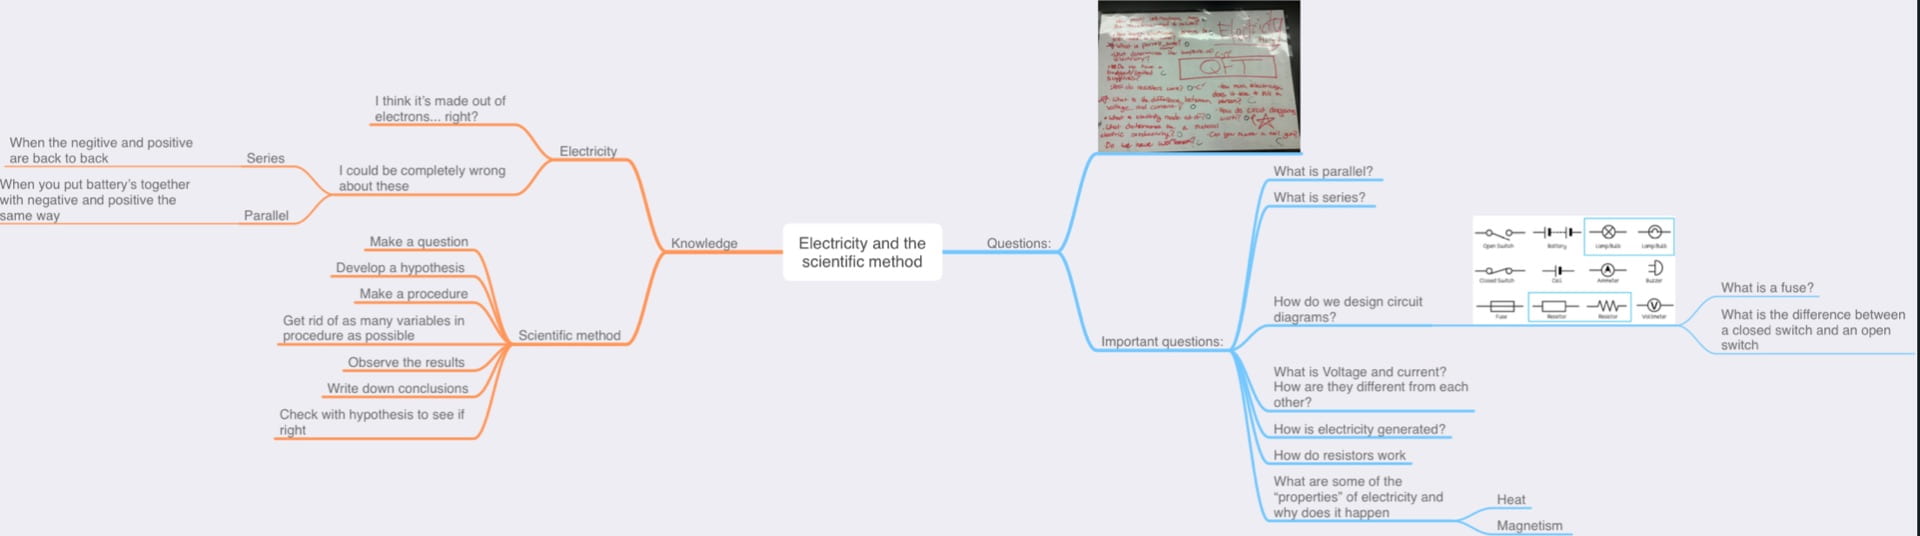

As you can see I had a lot of questions, and learned a lot throughout the project. Most of this learning came from the workbook sheets and experiments that we did in class. I managed to complete most of the workbooks in class, and also contributed in all of the experiments we did, which helped me gain a good understanding of the material, and left more time to get ahead on other pieces of the project
Planning and conducting:
Once we got our intro knowledge down, we started learning about all of the concepts we needed to know to finish our project. This included learning how to draw circuits, the difference between parallel and series circuits, as well as ohms law. We spent quite a lot of time on ohms law and did two experiments on it, in which we had to predict the resistance of a circuit using ohms law and a voltmeter.

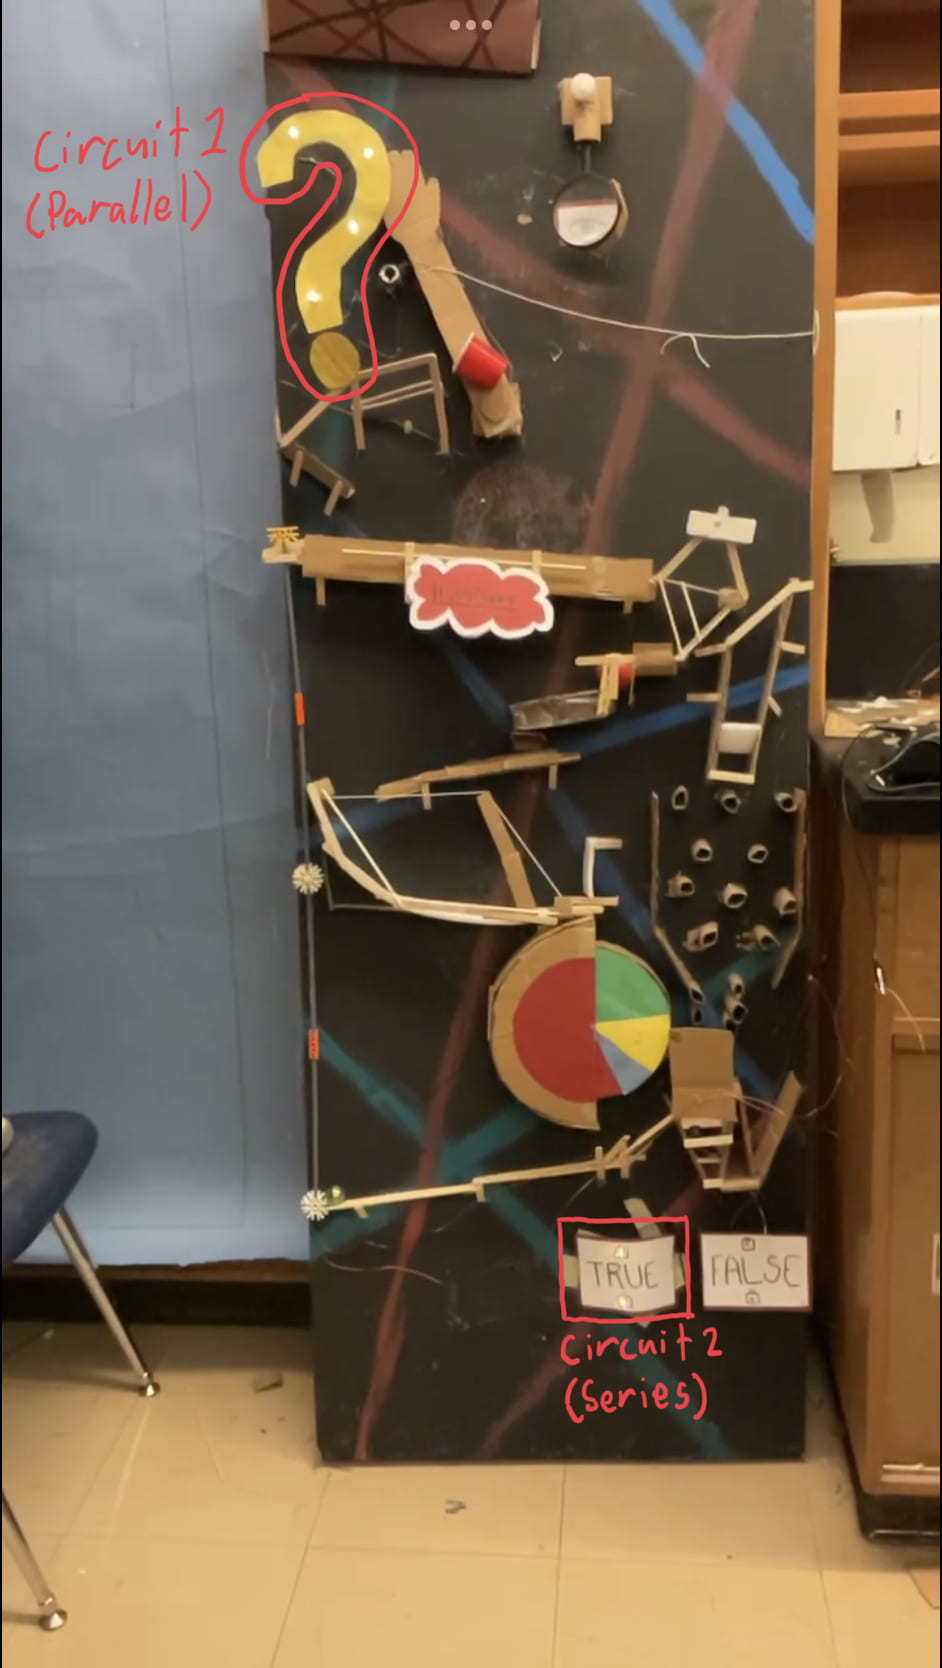
These all prepared us to create two hand build circuits in the final Rube-Goldberg machine. Overall, this wasn’t the biggest challenge. The hand built circuits were quite fun to make, you just had to make sure nothing touched short circuiting the system. If I were to do it again, I would put a bit more planning into the diagrams of the circuits. They weren’t the most organized and could have been more clearly labeled with the current, voltage, and resistance. We also could have planned to more creatively incorporate the circuits into the machines, and using the different properties of the circuits to our advantage. In the end, we could have been better in our initial planning, but quick revisions and decisions meant that we still ended up with something pretty cool.
Reasoning and Analyzing:
Speaking of planning better, that also carries over to our final blueprint. Throughout the project, our blueprint was always very rough, as we were constantly deviating from it as ideas were changed . This meant at the end of the project, our final blueprint had to be rushed as it caught up to the actual machine. This resulted in the end blueprint not being the most accurate scale diagram that we could have created. Lines could have been measured better and some small ramps are entirely missing although for what it is, it does the job. It’s easy to read, I just wish I had a bit more time to measure and make it as accurate as possible.
 My Blueprint


Scientific communication
Finally we had to record the machine in action, and explain how each part represents the scientific method.
You can see our final video here:
I think our video turned out pretty well. One of the big challenges with this project was balancing complexity with time. Our machine ended up being quite complex, which means that our metaphors were also quite complex, interesting and are good representations for the scientific method, however it also takes a lot of time. For this reason, the other aspects of the project like the blueprint, or the voice overs in the video were not at the highest quality as we simply did not have enough time. Not saying that they were terrible, but they could have been a little less brief, and the editing could have been a little cleaner.
So after all that, what did I learn?
How can we represent the scientific method?
Well you can represent the scientific method in many ways. In our case it was through the use of metaphors that the Rube Goldberg machine goes through. Overall I think our representation of the scientific method was quite good and well thought out. For example, revealing data after a ball rolls out of a test tube for analysis, and having a plinko maze to show how you won’t know whether your hypothesis is right until after, are both creative and interesting ways to represent the scientific method.
What factors affect the function and efficiency of electric circuits?
Many factors affect how well electric circuits work. The amount of current, voltage and resistance are all important in creating a functioning circuit. Too much current and the entire circuit could burst into flames, to much resistance and there won’t be enough energy to turn on the lightbulb. There are also parallel and series circuits which greatly affect the efficiency and function of your circuits as well. Use a series circuit and any break in the line causes everything to shut off, but using a parallel circuit might cause too much current and could heat up. Both have their advantages and disadvantages, and it was interesting to learn how to create each one.
Anyways this project was really fun, and we got pretty carried away with building our machine. Either way I think the end result looked awesome, used circuits to their advantage, and successfully showed the scientific method from start to finish in a pretty cool way.
See you next time,
Nolan⚙️