Going to DISNEY WORLD??!?!?!!

Ever heard of Walt Disney? Or just Disney in general? Me too. Let me tell you about this project that we just did on Disney world. 

The Beginning 

We learned about Disney’s history, how Walt Disney came to create the whole franchise, and how his vision is being lived out today. To capture and sort out of of this new knowledge, we each started a PKM (personal knowledge management) system. My PKM consists of fleeting notes and summaries that I wrote about all of the different texts we viewed to help us understand Disney. You can find those at the top of the page on this link here.

Driving Question + Project

How do Disney theme parks shape and influence the cultural, economic, psychological, and social experiences of visitors?

Once we had gathered some basic knowledge on the origins of Disney itself, we started looking at answering the driving question. To help us solve the question and create the final product, we were sorted into groups focusing on different topics. My group was focusing on “the magic of Disney entertainment” and how the magic relates to the answer to the driving question. We then proceeded to do some research on our specific topics and put them into our PKMs, mine are at the bottom of the page here. 

The product of this project is a video answering the driving question that we made with our groups while in Disney World. So as with any project that involves a video, there was a lot of story boarding, scripting, and call sheets to fill out. We split all these tasks up within the group so that we could divide and conquer but still all be involved with what is going on. We also decided that we all would have to record a voiceover for the final video so that we could all be represented in the final product.

And then the real test finally came, the trip to Disney World.

The trip got off to a rough start with out flights being delayed by a few days but eventually we lifted off from YVR and set sail for Florida. There was a lot of filming to do throughout the week because we also had to do filming for our maker project that I just did a blog post on here. Overall I think we were not as organized as we should have been when we were filming in Florida and it shows in our final video, especially as we start out the video with Sepaus filming the intro in the hotel bathroom. 

The Video 

I now present to you, the magic of Disney and how we answered the driving question;

Our video could have been way more succinct and we definitely didn’t need that much information on the history of Disney, but eventually we did get to the point and answer the driving question. Disney brings nostalgia for America’s past, utopian fantasies of the future, and their world-building stories to life in their immersive performances, character interactions, and parades using highly trained cast members, themed costumes and sets, and engaging light and music.

Conclusion

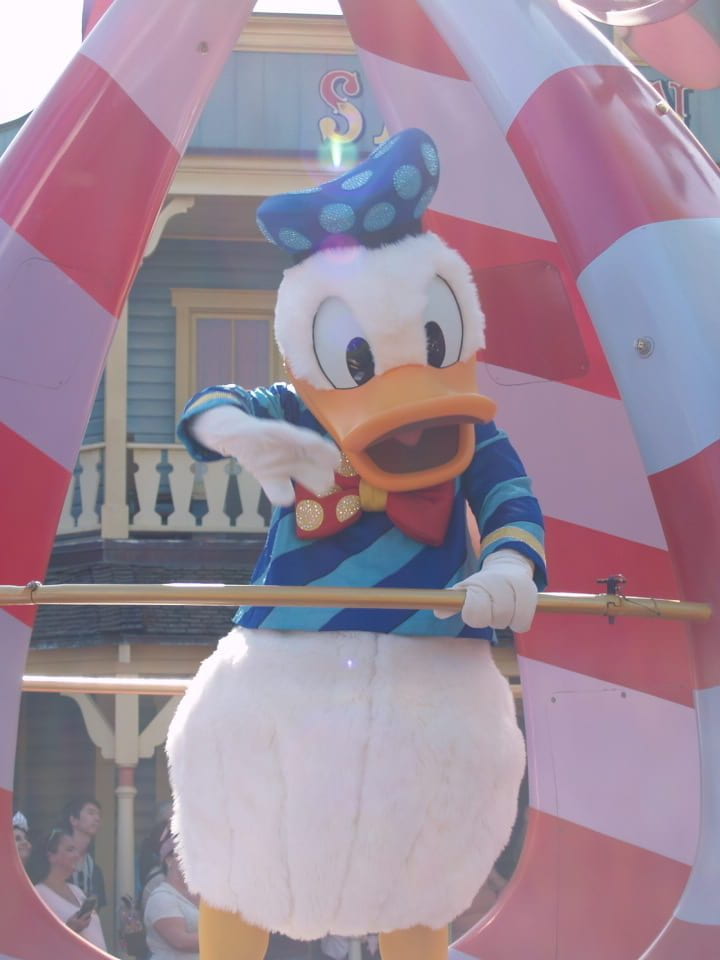
Obviously it was really awesome to be able to go to Disney world for this project and this is definitely one of the best trips I’ve ever been on. I think my group did a pretty good job with our video and everything that led up to it. I’ll leave you here with some photos that I took during the trip, see you next time!

As Always, Brooke.

One of the Most Toxic Relationships I’ve Ever Seen

Heyo wanna hear about the PLP 10 humanities project that I did last semester? Well you’re in luck because this is a blog post just about that. What is the topic you may ask? Its a doozie for sure. For never was a story of more woe, than this of Juliet and her Romeo.

The Project

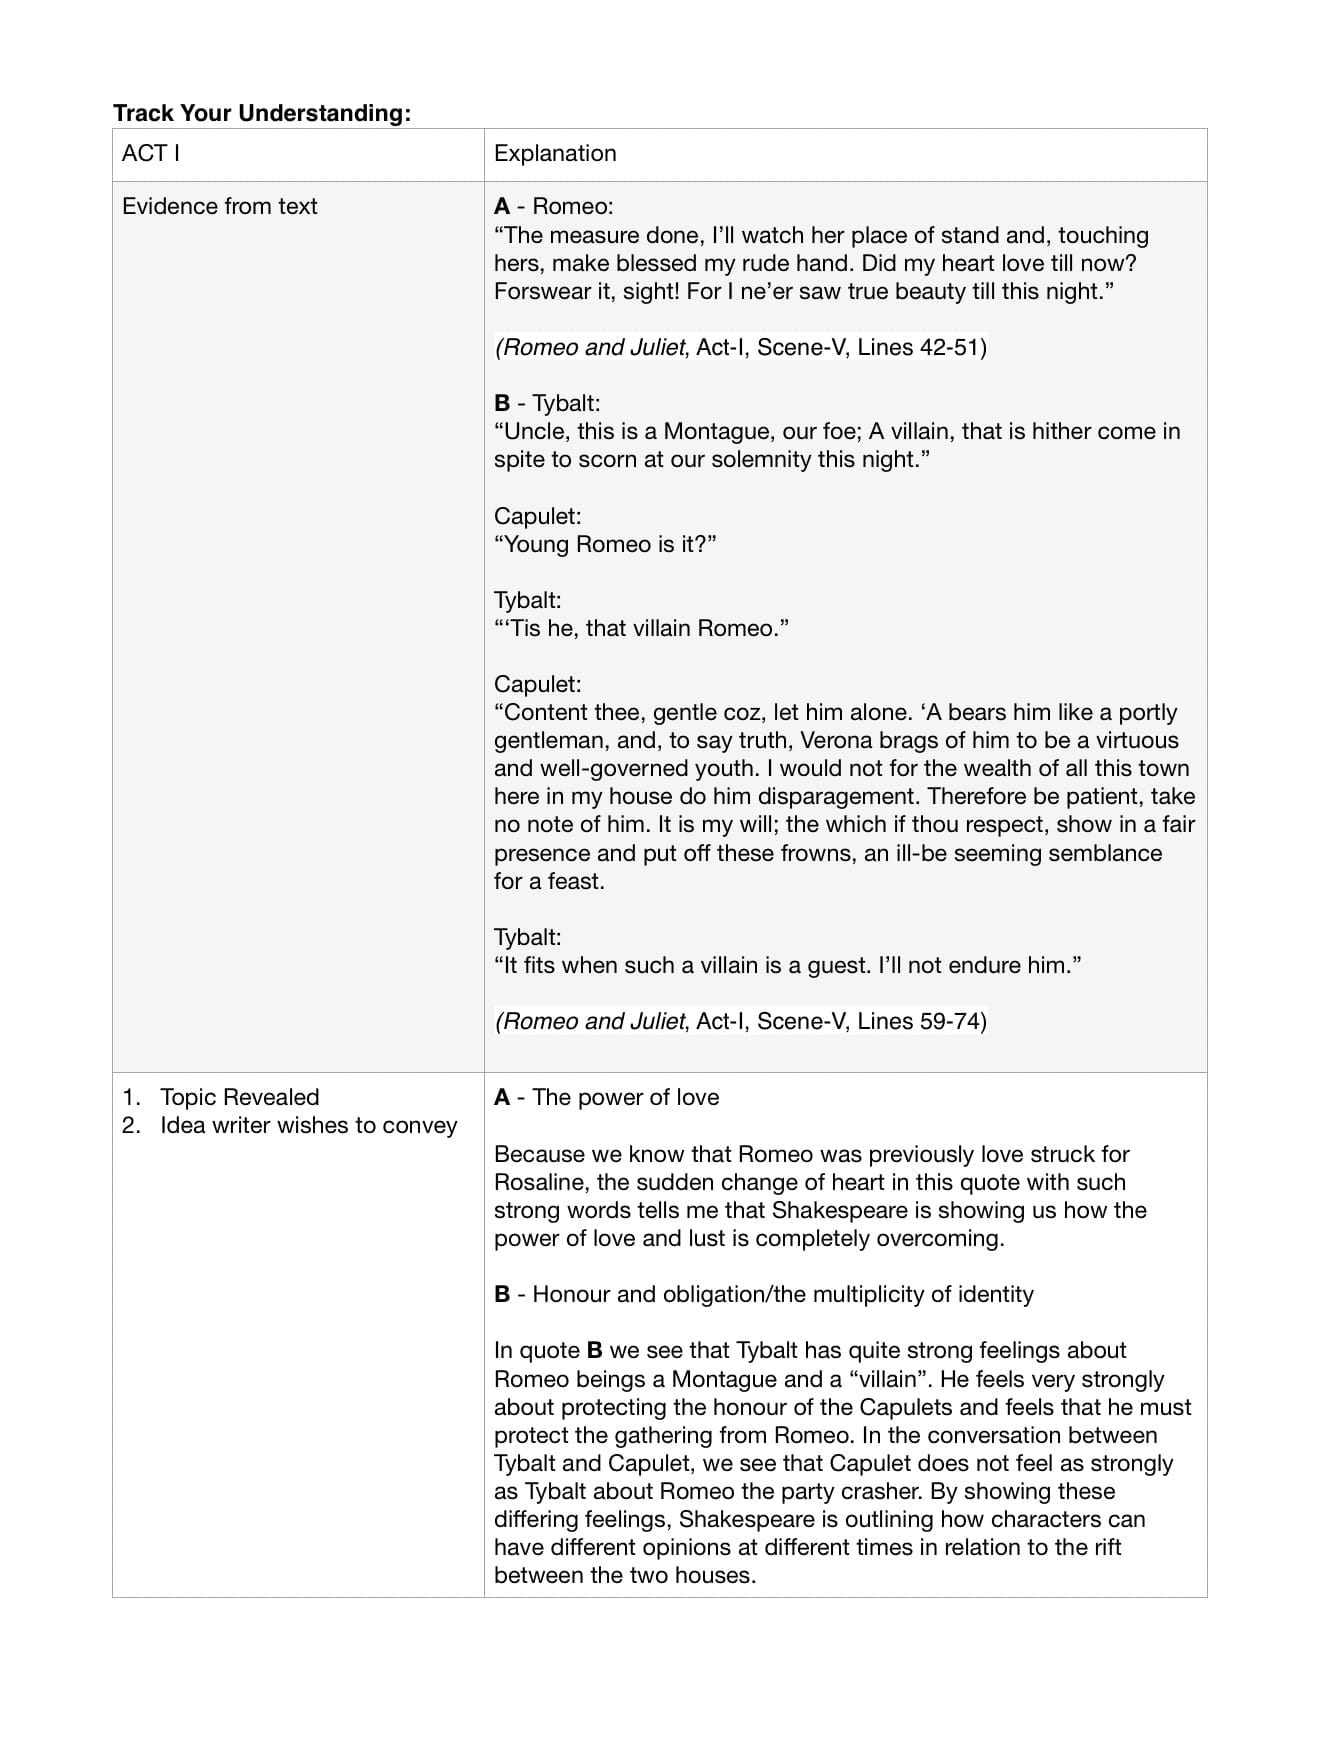
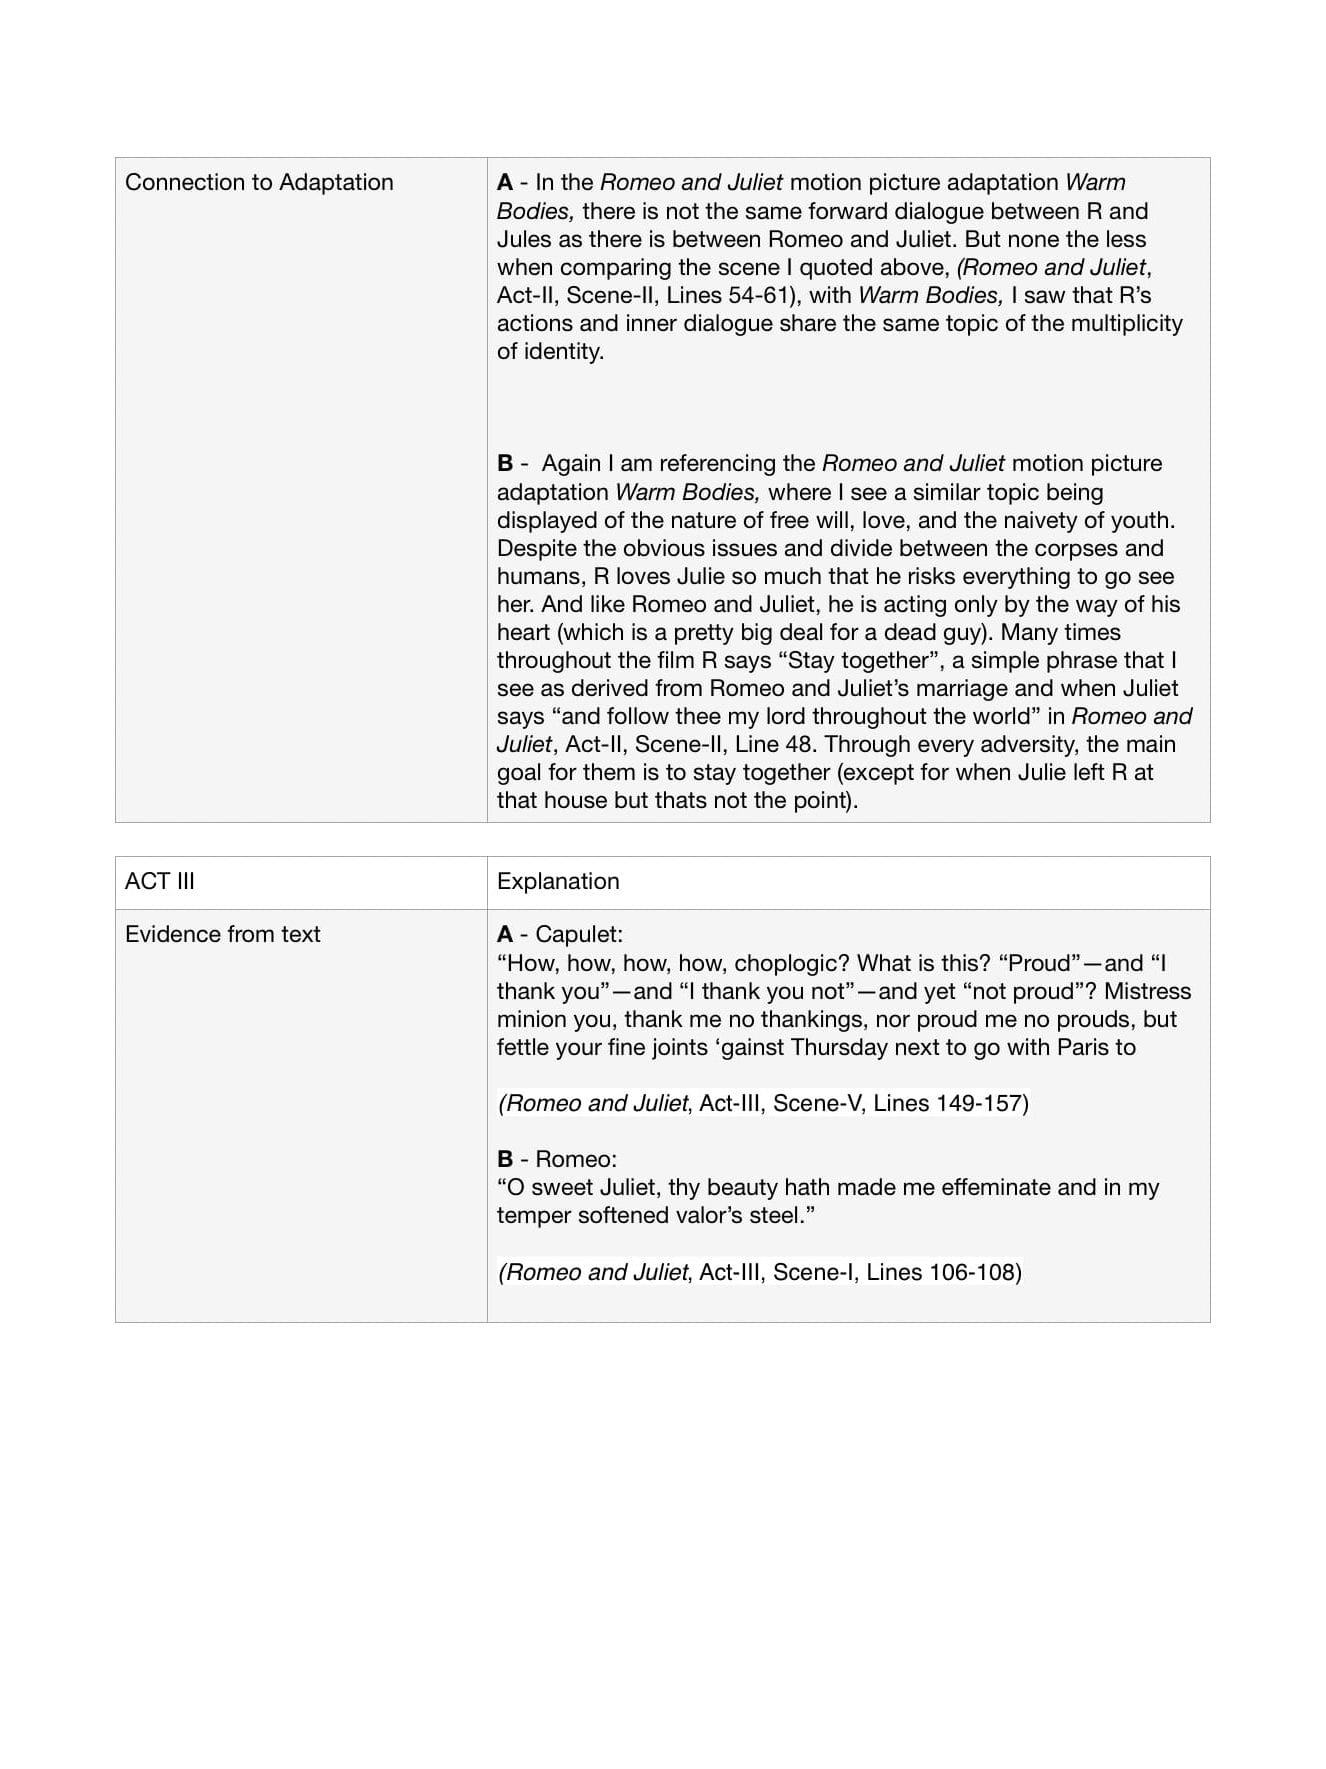
So obviously if we’re doing a project on Romeo and juliet, we need to actually know what story we are talking about. To help us understand the concepts and themes discussed in the sometimes hard-to-understand world of Shakespeare, we created a theme book to identify a topic within an act, include evidence as quotes from the text to support the topic, and connect that theme to one of the film adaptations we watched in class (I’ll talk about that last part later). We did this knowledge tracking twice for every act, so 10 different quotes and entries in total. As we read aloud certain scenes from every act, readers theatre style, we would make note of any quotes that we felt represented common topics in Romeo and Juliet such as; The Nature of Free Will, Honour and Obligation, The Naivety of Youth, The Power of Love and Hate, Violence and Death, Gender Roles, Revenge, and The Multiplicity of Identity. We would then write about how we thought Shakespeare was trying to convey that theme in the scene. 

My themebook  

The Product + Driving Question

How has William Shakespeare’s Romeo and Juliet remained relevant to contemporary storytelling?

So remember when I previously mentioned connecting identified themes to film adaptations that we watched, and then I said I would talk about that later. Well this is later because the best answer to the driving question is the film adaptations we reviewed and lead us to create our own. Yes we actually watched movies as schoolwork and were encouraged to watch more movies as homework. The films all were somewhat based or modelled off of Romeo and juliet (hence why we refer to them as film adaptations). My group re-enacted the balcony scene for our video, with myself playing Romeo and Ines playing Juliet. We chose to film it in a pseudo-Maury Povich/The Office/reality tv style with a hint of Taylor Swift. It was really fun to create and I think the final product is pretty good. So here it is!

Conclusion

Overall, this project was really fun and I actually really loved learning about Shakespeare and his magnificent play, Romeo and Juliet. I also enjoyed being able to read aloud in class and gain confidence on video. I think I did good. Thanks for reading!!!!

As Always, Brooke.
The Vibrance of Video

It is time for another Maker blog post. So welcome back to this blog of mine where I explain things I did in school. This project was called Vibrant Video and it was all about making videos and learning film history. This was not a very long project so this post may be rather short. But in the end its not about the length of the post is it. So I hope you enjoy and lets get right on into it.

The History of Video 

There is a lot to learn about the evolution of film and movies. We learned about the first moving images and the beginning of the film industry, which I found to be quite the interesting topic. We also learned about early special effects and how they added colour to film. I got to practice using my note taking skills in a keynote doc and I must say that I got pretty good at it. 

Videos

We of course got to practice making videos/movies in this project, with each video focusing on a different aspect of film making. We learned how to use all of the features of iMovie and Clips and how to use a storyboard, logline, and treatment. 

Our first video was a story about one of our favourite hobbies. It was supposed to show a blend of pictures and videos, have a complementary soundtrack, and have a beginning, middle and end. Here is the video I made;

The next video was a silent movie. It again was supposed to tell a story, use the “GASP” poster, aged film effect, and again have an appropriate soundtrack. I told the short story of a girl on an egg hunt and I think it was pretty good. Here is my silent movie;

Our next 2 skills were going to be creating a DIY video showing the audience how to do something. We had to create a treatment and logline for the first time and we were also in groups. My group wanted to show how to tie your shoes and I think that our treatment and logline are quite comical. 

——————————————

Logline

Are you still a loser and still wearing Velcro shoes? Well worry no more because in this tutorial you will learn from professional shoe tie-rs on the best methods to tie your shoes.

Treatments

At the beginning of our journey a young fellow does not know how to tie his shoes. But then helpful professionals come along and show him the proper method of tying his shoe. In this helpful tutorial you will see the many different methods of tying one’s shoe in a proper manner including the bunny ears method and others.

——————————————

And here is our video;

Our last video and skill was creating a special effects sequence, again in a group. This was a really fun one to watch all of the videos created because it was a chance to get really silly and stupid. Before we recorded we had to create a shot list so that we could know what we needed to record. We also got to use the green screen and that was super cool. Here is the final video that we called “Fish Boy is Born”;

Challenges

We also had to do at least 2 of the 5 video challenges that were given to us. I chose to so the “Add a Song” and “Playing With Angles” challenges. If you didn’t get it already, the “Add a Song” challenge is where you add a song over a video in a way that they sync up and relate to each other. I chose to use a video that I put on my Instagram that was my friend and I running around an arena on a Timelapse to that really annoying hamster song. And I collaborated with my friends Noah and Cooper to create the “playing with angles” videos. It was pretty fun. Here are those videos;

Angle 1 Angle 2 Angle 3

Conclusion 

So I definitely learned a lot about the history behind videos. I think that it is really cool to learn about the behind the scenes of how movies are made and am now able to identify different techniques and shot types when I watch movies at home. I actually went to see a movie with Dana on the weekend and we were having some annoying fun naming all the different shot types in the commercials. I definitely can use iMovie and clips to their full potential now that I’ve learned all of the tips and tricks. The next video I make will take full advantage of the special effects and transitions that I can now use confidently. So yeah I think I am a professional movie maker :).

As always, Brooke.

Am I Imagining This Destination?

Have you heard of Destination Imagination?

Destination Imagination (or just DI) is an international competition that our school competes in. I am now going to direct you to the DI website because I think that they do a great job explaining what DI is all about. The Destination Imagination website is here. (I really suggest that you go to the website before reading further.)

The time had come for another gruelling term of Destination Imagination . This year, I was a part of one of two Seycove Gr 9 Improv teams. We got to present in person this year instead of a video like last year. It was a lot more fun but definitely more stressful. Our team “Leap Before you Look” was an improv team. So what was this year’s challenge? Well this year’s challenge was called “Festival Frenzy” and in this challenge, we would try to achieve a random goal at a festival from around the world. We had to research festivals, learn how to successfully carry out improv performances, practice running through the challenge, and enhance our skit with imaginary items, represented by a set of cardboard boxes.

The following is a list of all the festivals. Since we are in the secondary level, we had to research 10 festivals. Our chosen 10 are highlighted.

All of our research went into what we call the “festival binder”. The festival binder started off as a shared pages document that all of our research was recorded in and we later printed it out, so that we could bring a hard copy of it to the final competition. Here is an example of what one of the pages in the festival binder looks like;

When we are about to preform at the tournament, we draw one of those ten festivals randomly, along with a random goal (i.e. go skydiving) and a random “fork in the road” that will come into play later (I.e. make soap or find a way to keep your tools from rusting). The goal does not have to actually be accomplished in the skit but it should be heavily incorporated. The fork in the road comes into play during a 30 second intermission between Act One and Act Two. You then declare which fork in the road activity you will be using and then resume the skit to finish up act 2. 

Since we didn’t actually have to create a script or props for our challenge, we had a lot of free time to prepare. We were fairly disorganized at the start and didn’t really start to put tons of work in until later on. Our festival binder was lacking a lot of detail in the beginning but we did end up fixing it towards the end. The unstructured time to practice was quite challenging for certain members of our group and so subsequently we spent way to much time slacking off. Needless to say, this was definitely going to kick us in the ass later if we continued on that way. After a few failed practice performances, we started to get our act together. On the more positive side, I think we definitely showed a lot of growth by the end. Our final performance was pretty good (definitely the best one we had ever done). And even though I screwed up by not finding a watch to bring so we ran out of time for the end of the skit, I think that it still ended in a successful way and I am super proud. Our team was able to bounce ideas off of each other and we worked very well as a group (with maybe a bit too much banter apparently :p).


I know that there are a few things I can work on/hopefully change for participation in DI next year. Our group argued too much and that may just be because we had some clashing personalities but I think it overall did put ourselves at a disadvantage. The banter was never super serious as we all kind of consider each other friends, but I think it was just a bit of a time waster. Speaking of time wasting, we were all easily distracted by unimportant things such as having a irrelevant conversation with someone else. I think that in the end I am super proud of my group and spending time with them was actually quite fun.

And the moment we have all been waiting for, the video of us performing our challenge;

Overall, DI taught me leadership, teamwork, persistence, creativity, and so much more. I am really excited to see how I face future DI challenges in the years ahead. I want to say a huge thank you to my team members, Ben Y, Jocelyn, Noah, and Carter, without whom none of this would’ve been possible. I had a lot of fun with you guys and hopefully we are not in the same group next year 😁.

See you next year Destination imagination 👋🏼!

As always, Brooke

THE MACHINE

Salut mes amis! Welcome to another scimatics post on this bland blog of mine. I have a few blog posts I have to write at the moment so I’m not going to drone on and on with this intro so lets just hop right on into the project.

Project Overview

This project was called “Metaphor Machines” and in this project we were to create a Rube Goldberg machine that represented the steps of the scientific method. We would be using big wooden boards as the base and then we could use any materials to build the pathways. We then recorded the machine working and added voiceovers to explain the scientific method and our representations of it in the machine. Then the final video would be presented to the class.

Project Start Mind Map

As per usual we started the scimatics project off with a project start mind map. I put in any questions I had for the project, what I already knew about electricity and the project, and all of the questions from the QFTs.

At the end of this project we also added to the mind map a section about what we learned from this project and I also answered as many questions as possible that I came up with at the beginning of the project. 

The Project

We did a fun little experiment where we got to test out making and measuring different types of electric circuits up close and personal and in a simulator online. We worked with making a lot of electric circuits in  this project and it is something that I would say I can do confidently now.


We also did quite the bulk of workbook pages to further learn about electricity in all of its wonderful ways. We also learned about the math that can help you find out the current, voltage, and resistance of a circuit. 

We built our first Rube Goldberg machine in the very first class. We used things from around the class to crate a machine that has as many interactions as possible. And I think it was a bit rough but good for our first try.

And a lot of class time went into building our final machine. We each created blueprints individually and then got together in our groups to create one awesome blueprint that our machine will look like. The final machine had to have both parallel and series circuits and we even created switches to turn those circuits on and off independently but only one switch actually ended up working in the end. Ok so here is our final video that was shown to the class

Driving Question

How can we represent the scientific method? 

I have to say that the best answer to this question would be the machine video itself as it shows the representation and definition for the scientific method.

What factors affect the function and efficiency of electric circuits?

Resistance diminishes the current of the circuit. Examples of resistance would be loads (lightbulbs, appliances, etc.) and wires. The voltage also affects how much power is going through the circuit at a time. This can overload loads and cause failure or burnout of the circuit. To much voltage is also dangerous.

Curricular Competencies

Reasoning and Analyzing: Estimate reasonably

Our final blueprint was complete and accurate. It also contained a grid scale. All of measurements are labeled and relatively accurate. It was clean and organized with all lines easily distinguishable.

Questioning and Predicting: Demonstrate a sustained intellectual curiosity about a scientific topic or problem of personal interest

 I used all of my class time efficiently for learning without distractions. I was a team player and always able to help out my group members.

Planning and conducting: Select and use appropriate equipment, including digital technologies, to systematically and accurately collect and record data

Hand built series and parallel circuits are used to good effect with efficiency in your metaphor machine. Accurate circuit diagrams are included in the final blueprint. Our diagrams use proper symbols and are neat and easy to understand. Measurements of current, voltage and resistance are included.

Scientific Communication: Formulate physical or mental models to describe a phenomenon

A video is recorded of the complete operation of the machine and voice overs are added which explain the sequence of the scientific method as the machine progresses.

Conclusion

So this project definitely expanded my knowledge of electricity and the different things that can affect it. In conclusion this project was quite cool and I think that I did a pretty good job overall. Also shout out to Walter the emotional support kangaroo-

Thanks for reading!

As always, Brooke.

Work, Work, Work!

Wednesday Nov 3, 2021. I did not go to school on Wednesday. Why? To go to work!

Wednesday was nation wide “Take Our Kids To Work Day”. I went to work with my mom at Pacific Blue Cross BC. I had been to my mom’s work many times before but this time I would be shadowing her for the whole day.

Not going to school didn’t mean that I could just sit around and do nothing at my moms work all day, no, I was filming like crazy. We were instructed to create a video showcasing our day at work with our expectations/review and an interview.

Without further ado, here is the video;

I would say that the best part of my day was a tie between having a nice lunch out at the hotel for the Burnaby Board of Trade awards luncheon or having some 1 on 1 time with some of my mom’s colleges and get to know them and what they do at the company.

Both this blog post and the video are quite short today but hopefully this got the point across. It is definitely not my most interesting post either but hopefully you found the video a least a little entertaining.

Thank you for watching/reading!

As always, Brooke.

Ah, the golden age of exploration.

Arrrgghh matey! Welcome back to my blog.

Before spring break, we finished another project. This project was all about the age of exploration. Our driving question was “What was the impact of global exploration?” And the answer to that question is very important so I’m just gonna dive right in.

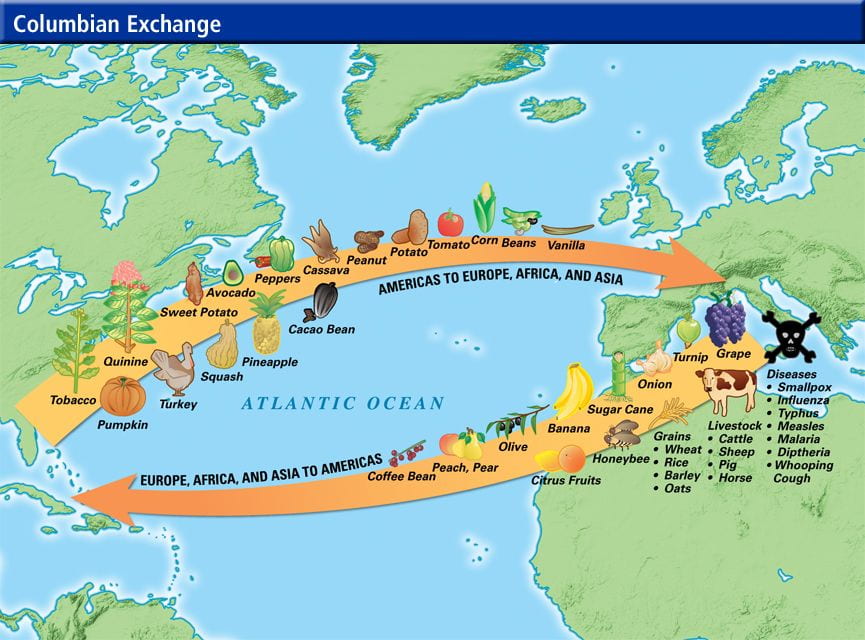
Without global exploration, North America would’ve never been uncovered by the Europeans. Foods like potatoes would’ve never become a staple in the quintessential European diet without the Columbia exchange taking place between the Americas and Europe. 

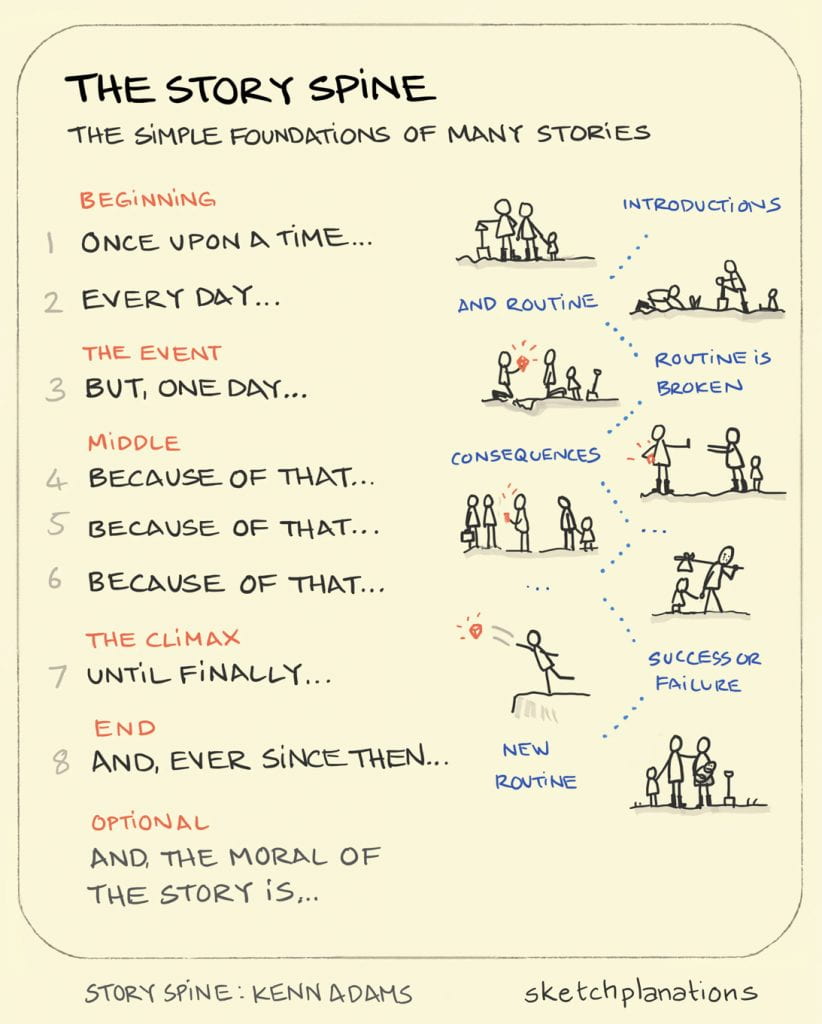
The final product of this project was an informative video on the age of exploration, made with an app called AR maker. If you didn’t know, AR stands for augmented reality, similar to VR which is virtual reality. The video would follow a story that was guided by a script written with the technique called the “story spine”. I think that I have talked about story spine before but here is an example for a quick overview.

We learned a lot about analyzing cause and consequence, the premise of which goes really well with the story spine. You start with the underlying cause, then the immediate cause, the event, the immediate consequence, and finally the long term consequence. We did a lot of work with identifying cause and consequence of events and then we applied our knowledge to what we had learned about the age of exploration.

We created objects to put into the augmented reality that would help us tell our stories. I created my objects in procreate and then made the background transparent in keynote. In the end, AR maker was sometimes very frustrating to use but I ended up persisting and figuring out the ins and outs of the app. Seeing everything of mine come together in AR showed that I am an empowered learner that can use technology to appropriately and effectively construct my knowledge. Here is the final video that I uploaded to YouTube;

This project was very short and so is this blog post but I hope that you enjoyed learning about what I learned. Thank you so much for reading!

As always, Brooke.


Worm the hero

Hola 👋🏼

I have something to unveil to you.

It’s magnificent.

It’s splendid. 

It’s…..

A story.

Ok so maybe that’s a tad bit vague.

We used a random emoji generator to pick out a set of emojis to make a story out of. Mine were; 

An then I used the story spine technique to create my story outline. 

I wrote out my story but then I decided that I wanted to take an academic risk and make the story into a video. I don’t know if i will do this again in the future though because it took a lot longer than expected and has almost made me hand this in late. Here is my Emoji story PDF. 

And the moment you’ve all been waiting for. The video! 

I hope you enjoyed my story and thank you for visiting my blog!

As always, Brooke.