
In this project, we learned how we can build and strengthen the PLP learning team. But before we did this, we had to learn how to use our iPads. We learned mostly how to use certain apps like Basecamp and Showbie.


We learnt a lot more after that though. The driving question for this project was “How can I build and strengthen the PLP learning team?” Our groups started off with learning about what the PLP learning team was, and what we would be doing in this project. How can I build and strengthen the PLP learning team? Hmm. Good question!
We learned about ourselves as PLP learners. Before we started this project we had to make sure we knew about ourselves, so we started the big life journal. In the big life journal we answered questions and went into depth about our future, goals, and dreams for life in general!


These are from my Big Life Journal. ^^
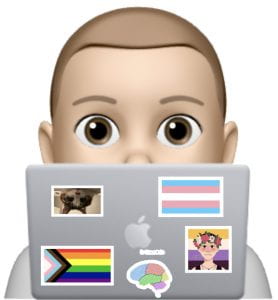
We then started making our Memoji Laptop. We figured out how to use keynote, and insert images that look like stickers! We used this Memoji the whole way through the project. Pretty much what it is is a Memoji of ourselves with a laptop, and on the laptop we include pictures that represents us. Here is my Memoji Laptop. I most importantly chose a picture of my amazing cat to include on my laptop.
We started doing team challenges as well. We needed to learn how to work well in our groups, as those would be the groups we work in for this whole project. Our groups were able to work together to build certain things, like a tower made of cups, a spaghetti tower, and a paper tower! We had to work together a lot during these, as some of them (like the cup tower) we had to do it together or it wouldn’t work. At the end of this project we would make a time capsule of all of the work we did during this project. The picture that I’m going to include next, is a picture of our spaghetti tower. For this challenge our group was only allowed to build a tower with spaghetti and mailing labels. The goal was to get the tallest tower.

As soon as we were told what the time capsule was, we started it. The first thing we made for the time capsule was the User Manual! Pretty much what we did for that was write a guide on how we would work if we were a product. We had to follow the basic formatting, but we got to fill in the blanks. We worked really hard on figuring out how to use pages, and all of its functions. It took me awhile to get the font and sizes right while following the format, but I was able to figure it out after talking with my friends.


Next, we were asked to write on our blog, how we work in a team. We called it our Team Contract. Before we started the blog post, we had to figure out how to use our blog. For one of the parts of our Maker classes, we split rooms and learned how to do our blog. We learned how to make a page, a post, how all the functions work, etc. As soon as we figured it out it was time to make our team contract. There was two parts to this though; our Blog Post and our Physical Representation. On our post that we made, we added our Memoji (the laptop Memoji with our stickers), pieces of our user manual, our creative media, and a paragraph that answers the question ‘How I work in a team’ and another paragraph explaining how your creative media represents that. Once we published that, we started our physical representation. Want to see my physical representation? Eh, probably not. But I will show you anyway.

For this, we got to chose a box with items in it. There were boxes A, B, and C. The box you choose will be the box you use to build with. Next, we made a plan on how we were gong to build this. Some people wrote a paragraph, others drew a picture! After that, we got to build. For mine, I built a brain. The brain represents my creativity when working in a team. I used tinfoil and paper to build it, the tinfoil represents my building and making a plan, and the paper on the inside represents my creativity and drawing.
Once we finished all these things, we got to add it to our keynote presentation. This would be our keynote guided tour we would use on exhibition night. We put all of these things onto our presentation. MAking the keynote was my favourite part. It was pretty complicated at times though. On the front page of our keynote we had bubbles with all of the things included in the presentation! Each bubble linked to a different slide. For example, the bubble that had ‘BLJ’ in it linked to the slide that I put my BLJ on. I found that really cool. After we were done creating it we had an exhibition night where we presented all of our work during this project to our parents. There were tables all around the room and each one had a few of our group members on it. In front of us we had our iPad with our keynote, a print out of our User Manual, and our physical representation.
Today our groups did our last team challenge together. I had a lot of fun making it thats for sure. So pretty much what we did was we got to make a fake horror movie trailer and record it somewhere around the school. First, our group got to make a plan. We had a template from iMovie that we had to follow, and it made it a bit easier. Once we had the plan done, we got to go around the school and film it. I was the faceless person, trying too attack and innocent boy. We edited it together and and got to show it to the class. Wanna see it! Here!
In a team, I am good at reading and getting information out of writing. I can present a written form of my ideas with my group. I share my ideas as much as I can when working as a team. I am good at writing out the information I get from reading. I am creative when it comes to things like writing, drawing or designing. I provide my group with someone to share ideas with and someone to design and make a plan with you. I can work collaboratively with my group well.