This year our first unit in math is about trigonometry, which is math that helps us find the relationships between triangle side lengths and angles. We hadn’t done any trigonometry in past years, but we’d done some algebra, which sort of ties into trigonometry.
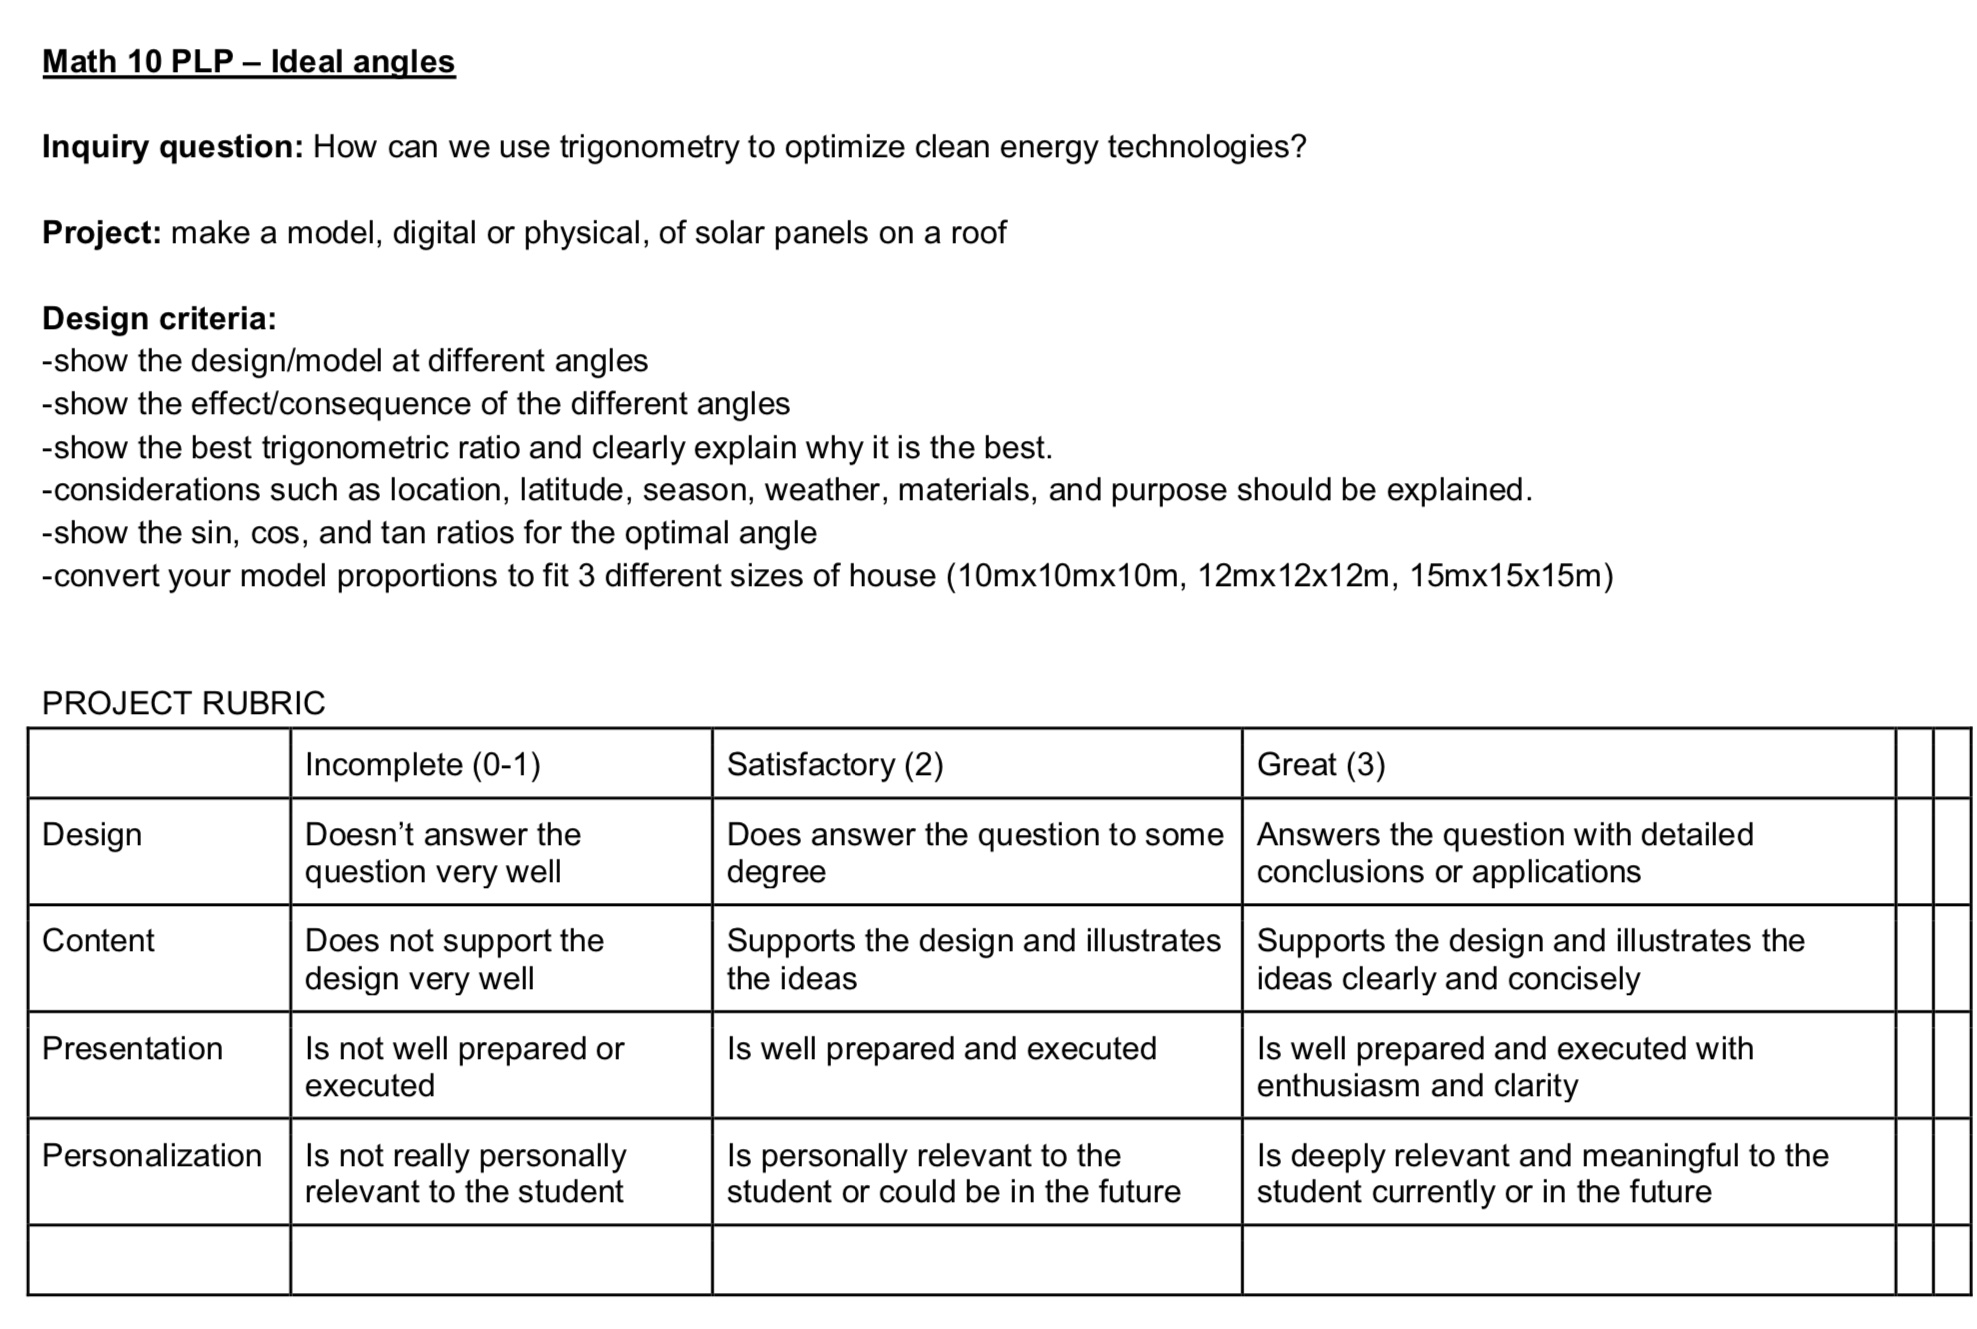
On the first day of math class, we were briefed on our unit project. It was called the Ideal Angles Project. It was going to be due at the end of the unit, but we were to start thinking of what we want to do for it from the beginning. We were to design a 3D model of a house with a solar panel attached to its roof, and we had to use trigonometry to find the best angle to position that solar panel. Here’s the brief we were given:
That day, we also learned about SOH CAH TOA, which are three trigonometric functions we use to find side lengths or angles of triangles, depending on what angles or side lengths we already have. This was shown to us in this YouTube video:
Throughout the unit we would be going through a notes package with lots of different problems and equations in it, giving us practice on the key parts of trigonometry we needed to know. We were given this package digitally, and filled it out in a great notes app, Notability.
We would also do an occasional partner quiz, which is where we would create an equation, solve it, and then see if my partner would be able to answer it correctly. This was a good way to learn, because it teaches you the structure of math problems, and how to answer different ones.
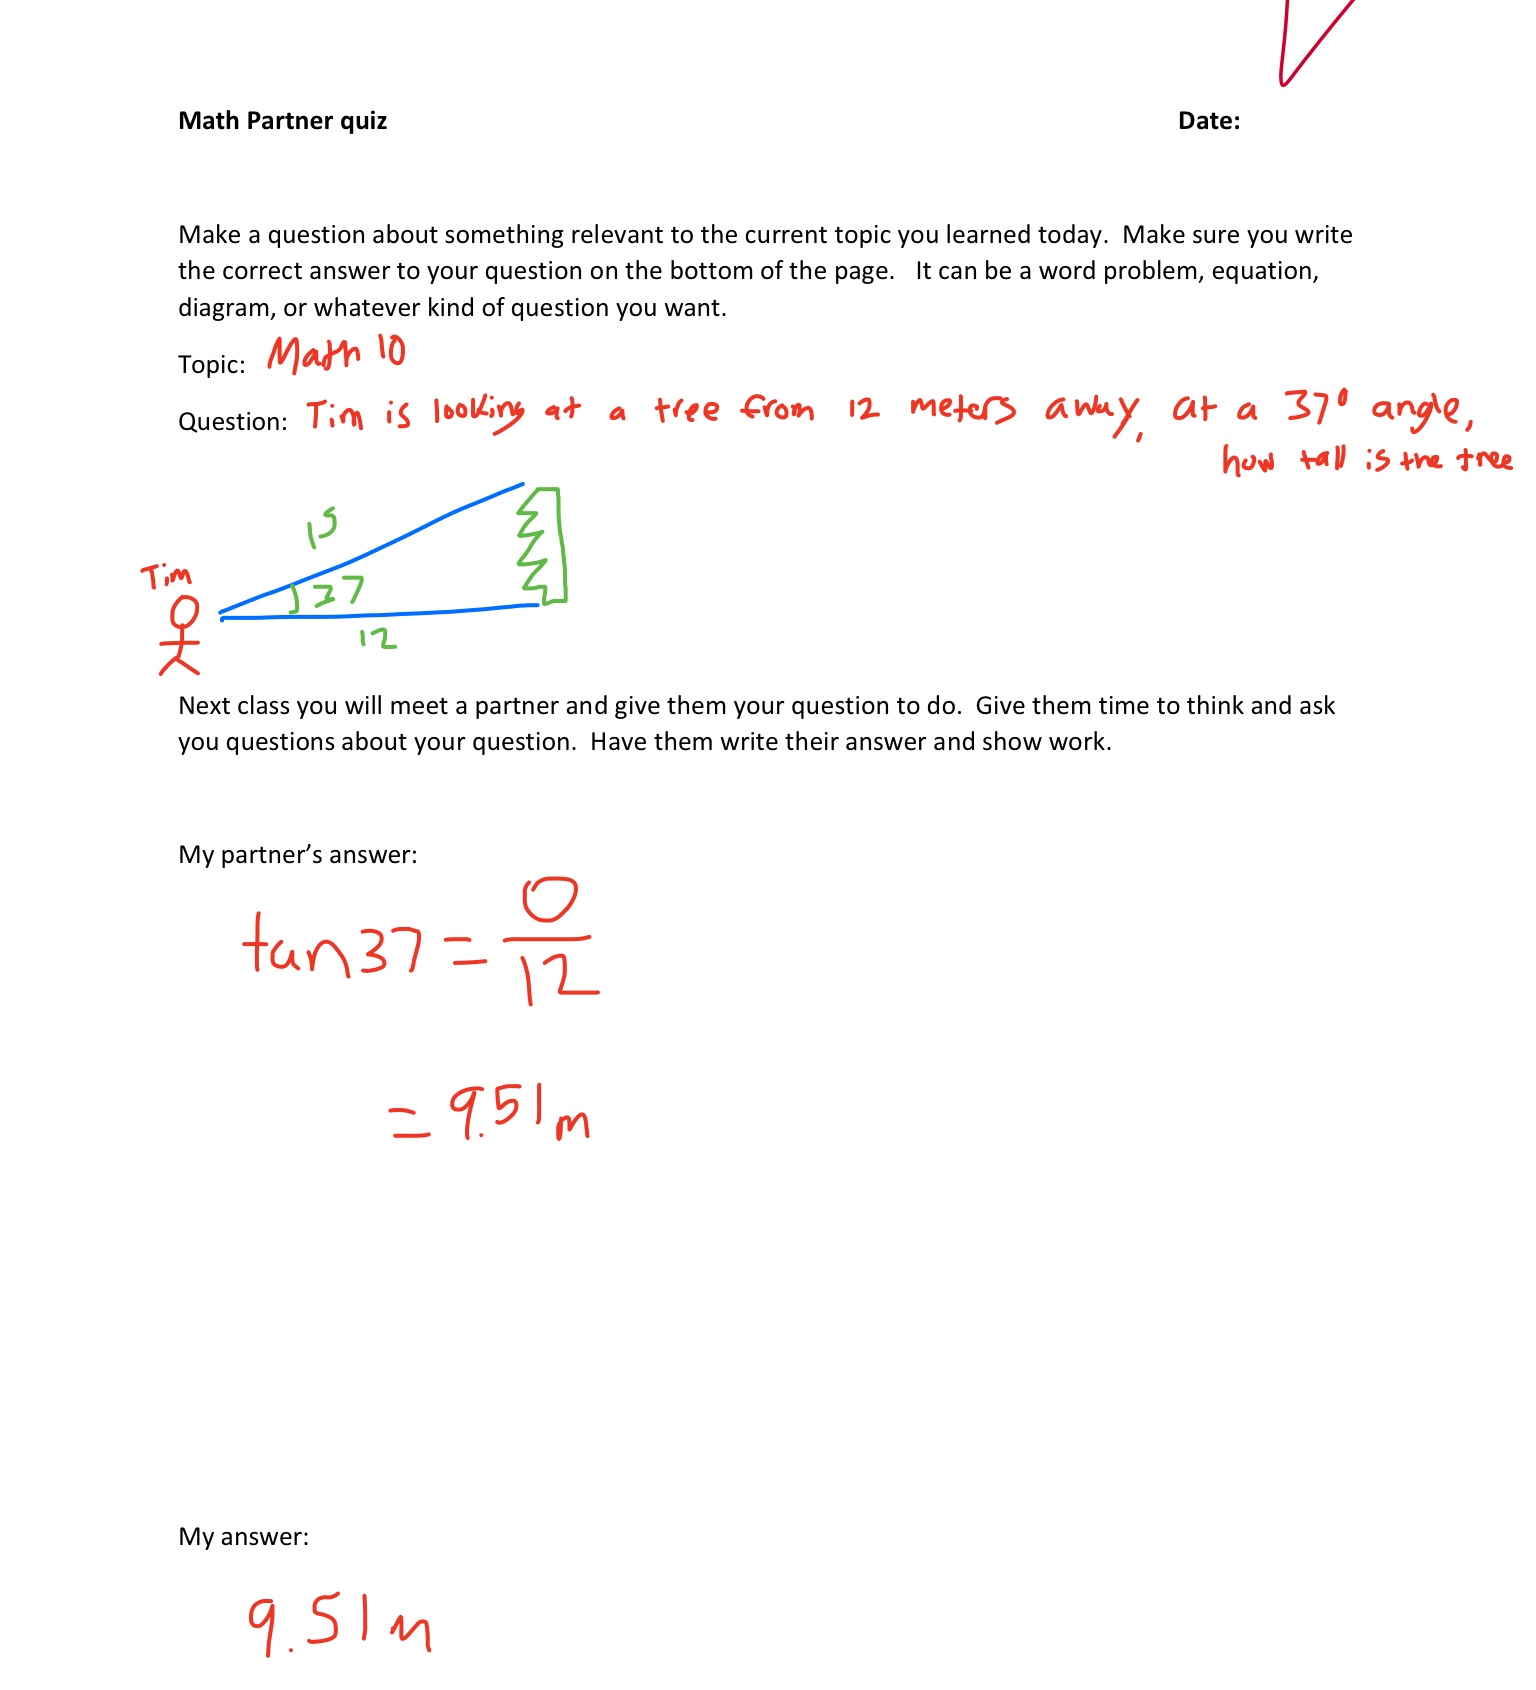
Over the next few math classes we worked on the notes, had some homework pages and a few more partner quizzes. All the while, we were to be working on our project, gathering ideas and planning our model.
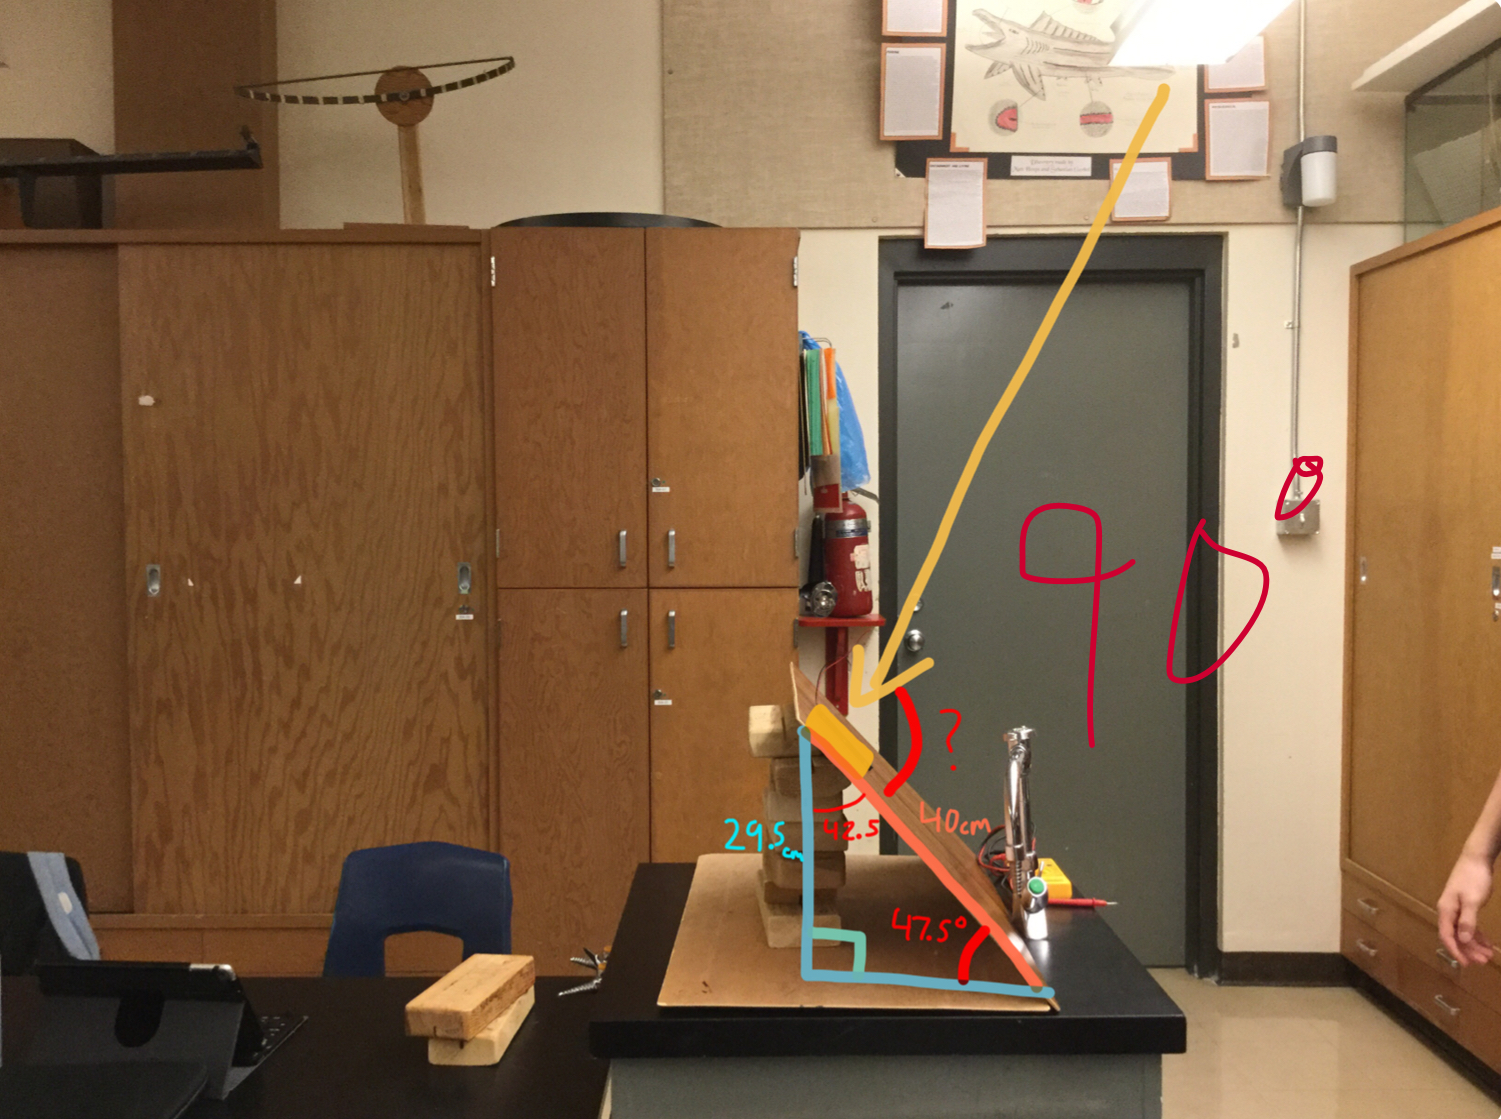
But to help us with finding the correct angle, we first did a lab where we positioned a wooden test divider at certain heights and angles with a mini solar panel on it. We filled out a chart to go with each angle, and saw which angle caught the most amount of sun rays. Here’s a picture of what me and Spencer got for the best angle from the lights in the classroom:
And here’s the chart we filled out that shows us the different angles and how much light power each angle got:
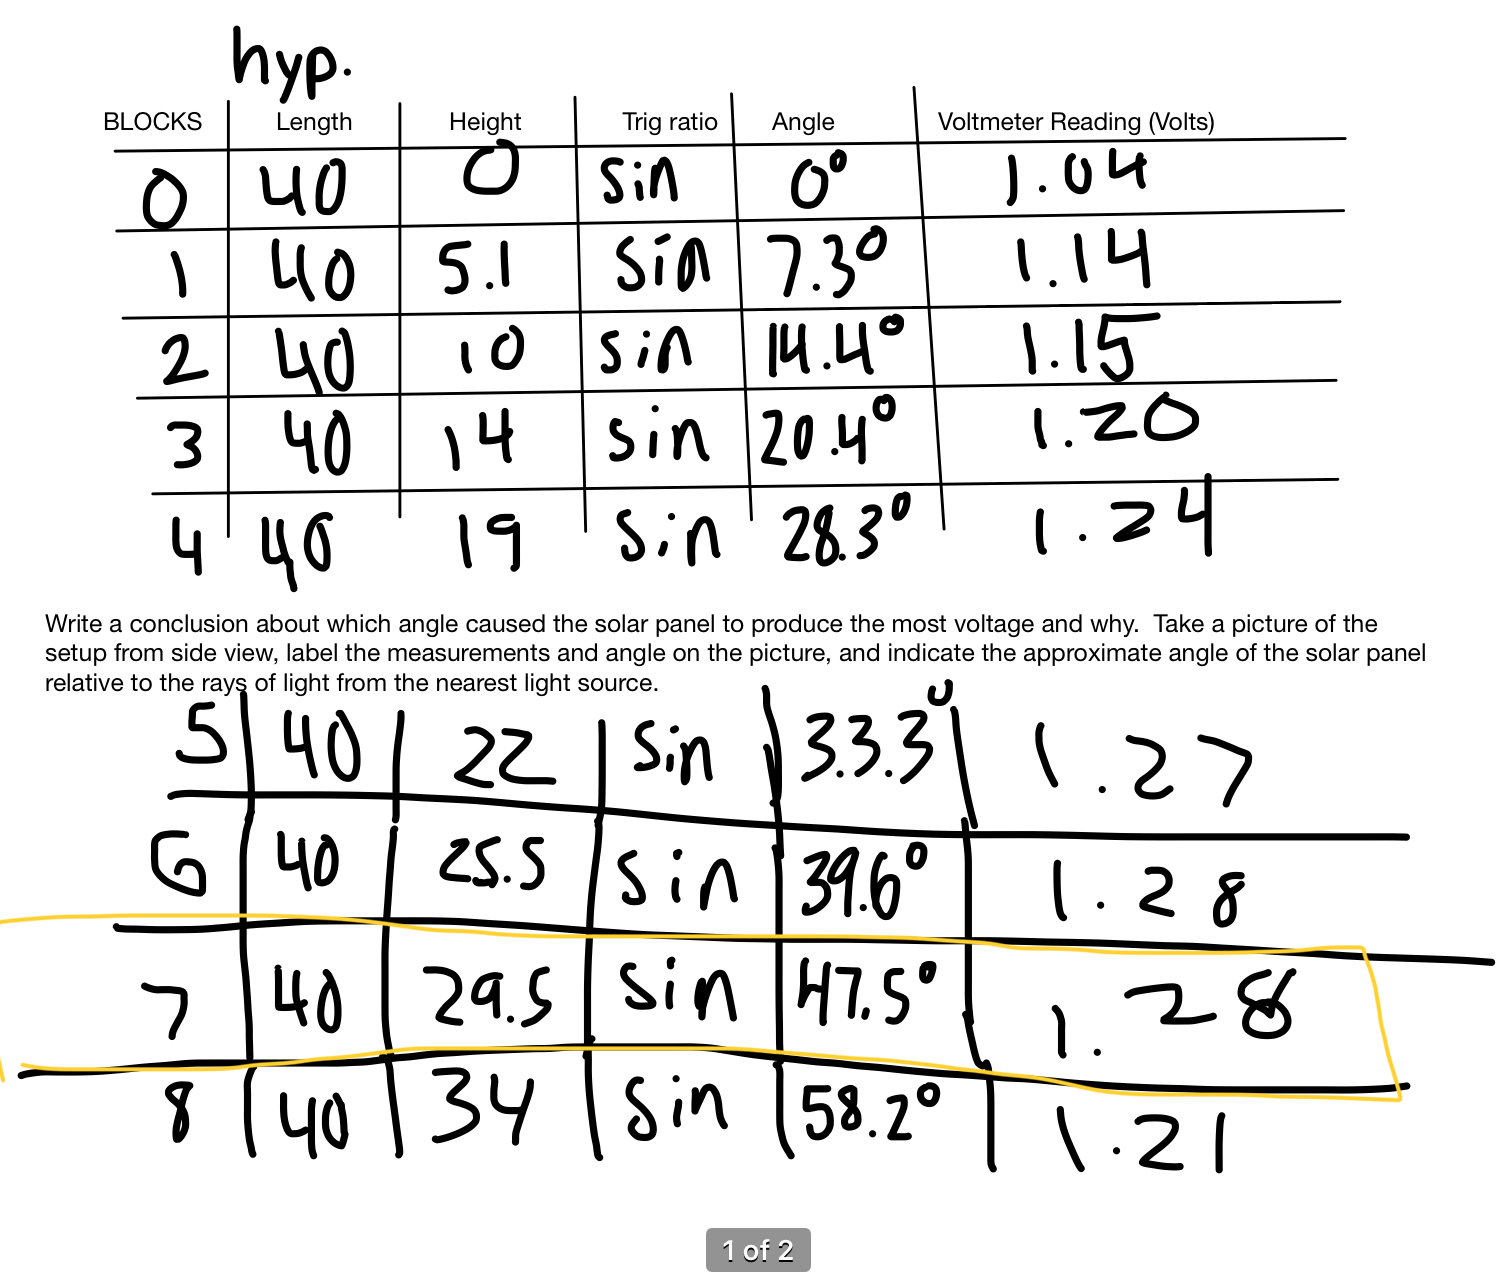
So, after this lab experiment we now know that a good angle will be around 45° because we got the highest amount of energy when the mini solar panel is positioned at that angle. But that is just getting small amounts of energy from the lights, our actual project needs to be positioned to the angle of the sun, in a certain location and season.
And so, I began my project research. I looked up the way to figure out the angle for Vancouver in the winter, and I found this formula:
49 (Van. Latitude) x 0.9 + 30 = 74.1° (recommended angle)
So, that was to be my solar panel angle. Now I just had to build a model that has that exact angle. But first I had to figure out the other side lengths of the soon-to-be triangle with trigonometry. The first side I needed was the hypotenuse, then the adjacent side, and then the opposite side. All sides were important because I had to build my model roof size to those exact numbers. So, I got started.

I chose my hypotenuse length to be 15 cm, which is the solar panel length because the hypotenuse of the triangle is my solar panel, and then from there I calculated the rest of the sides using trigonometry. My triangle then looked like this:
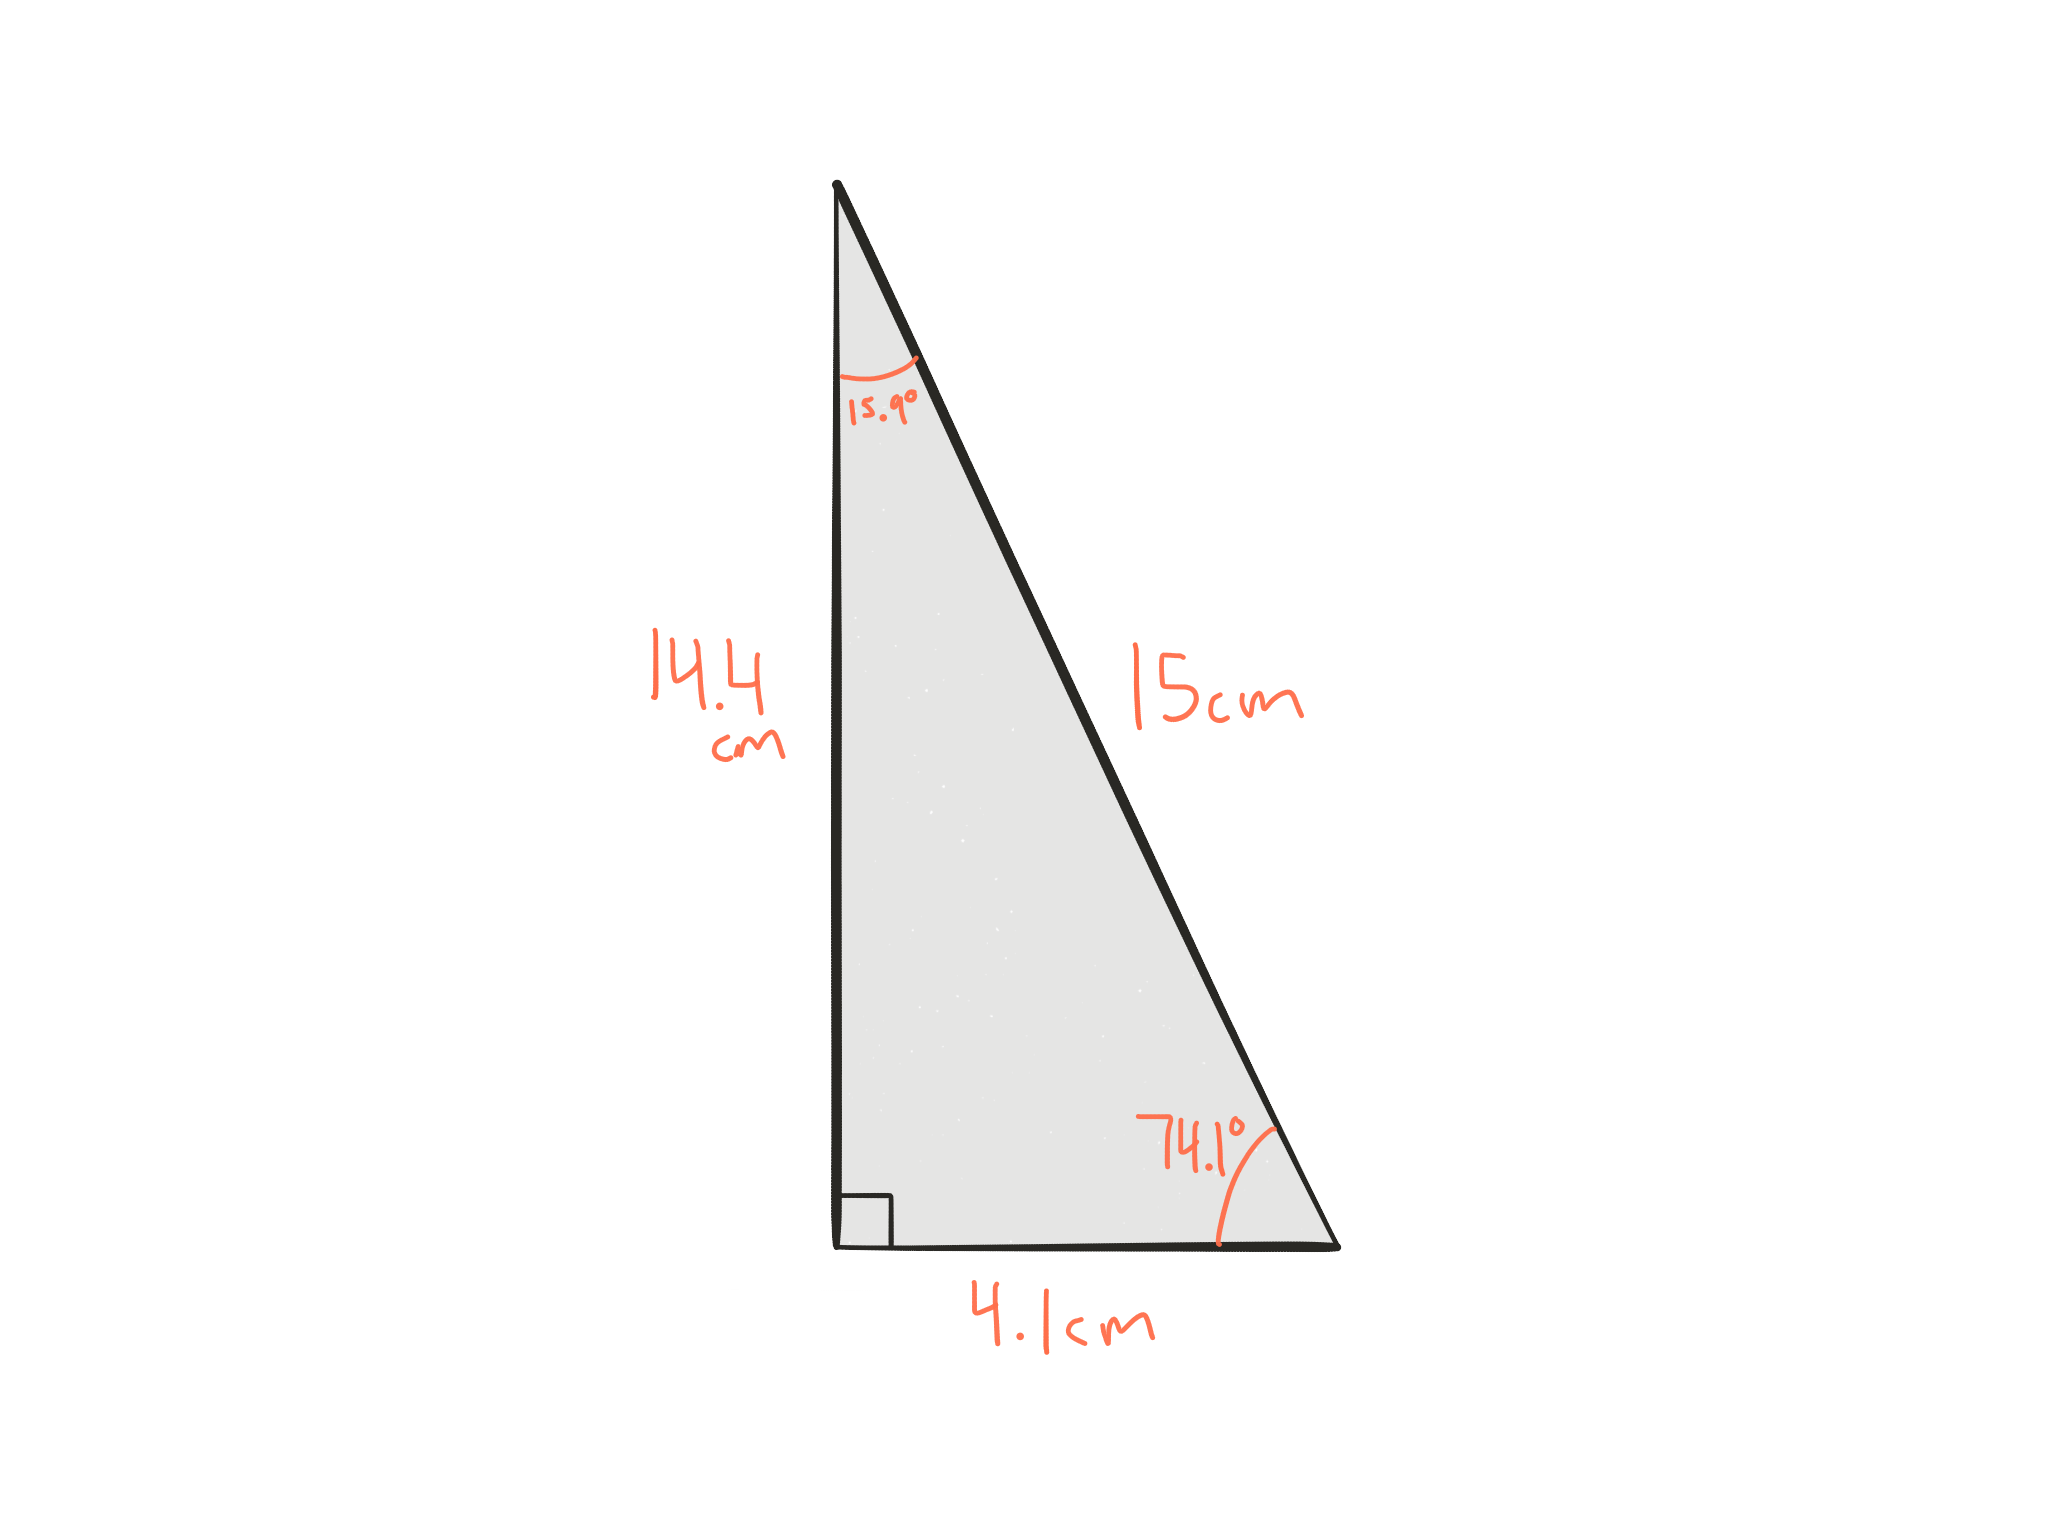
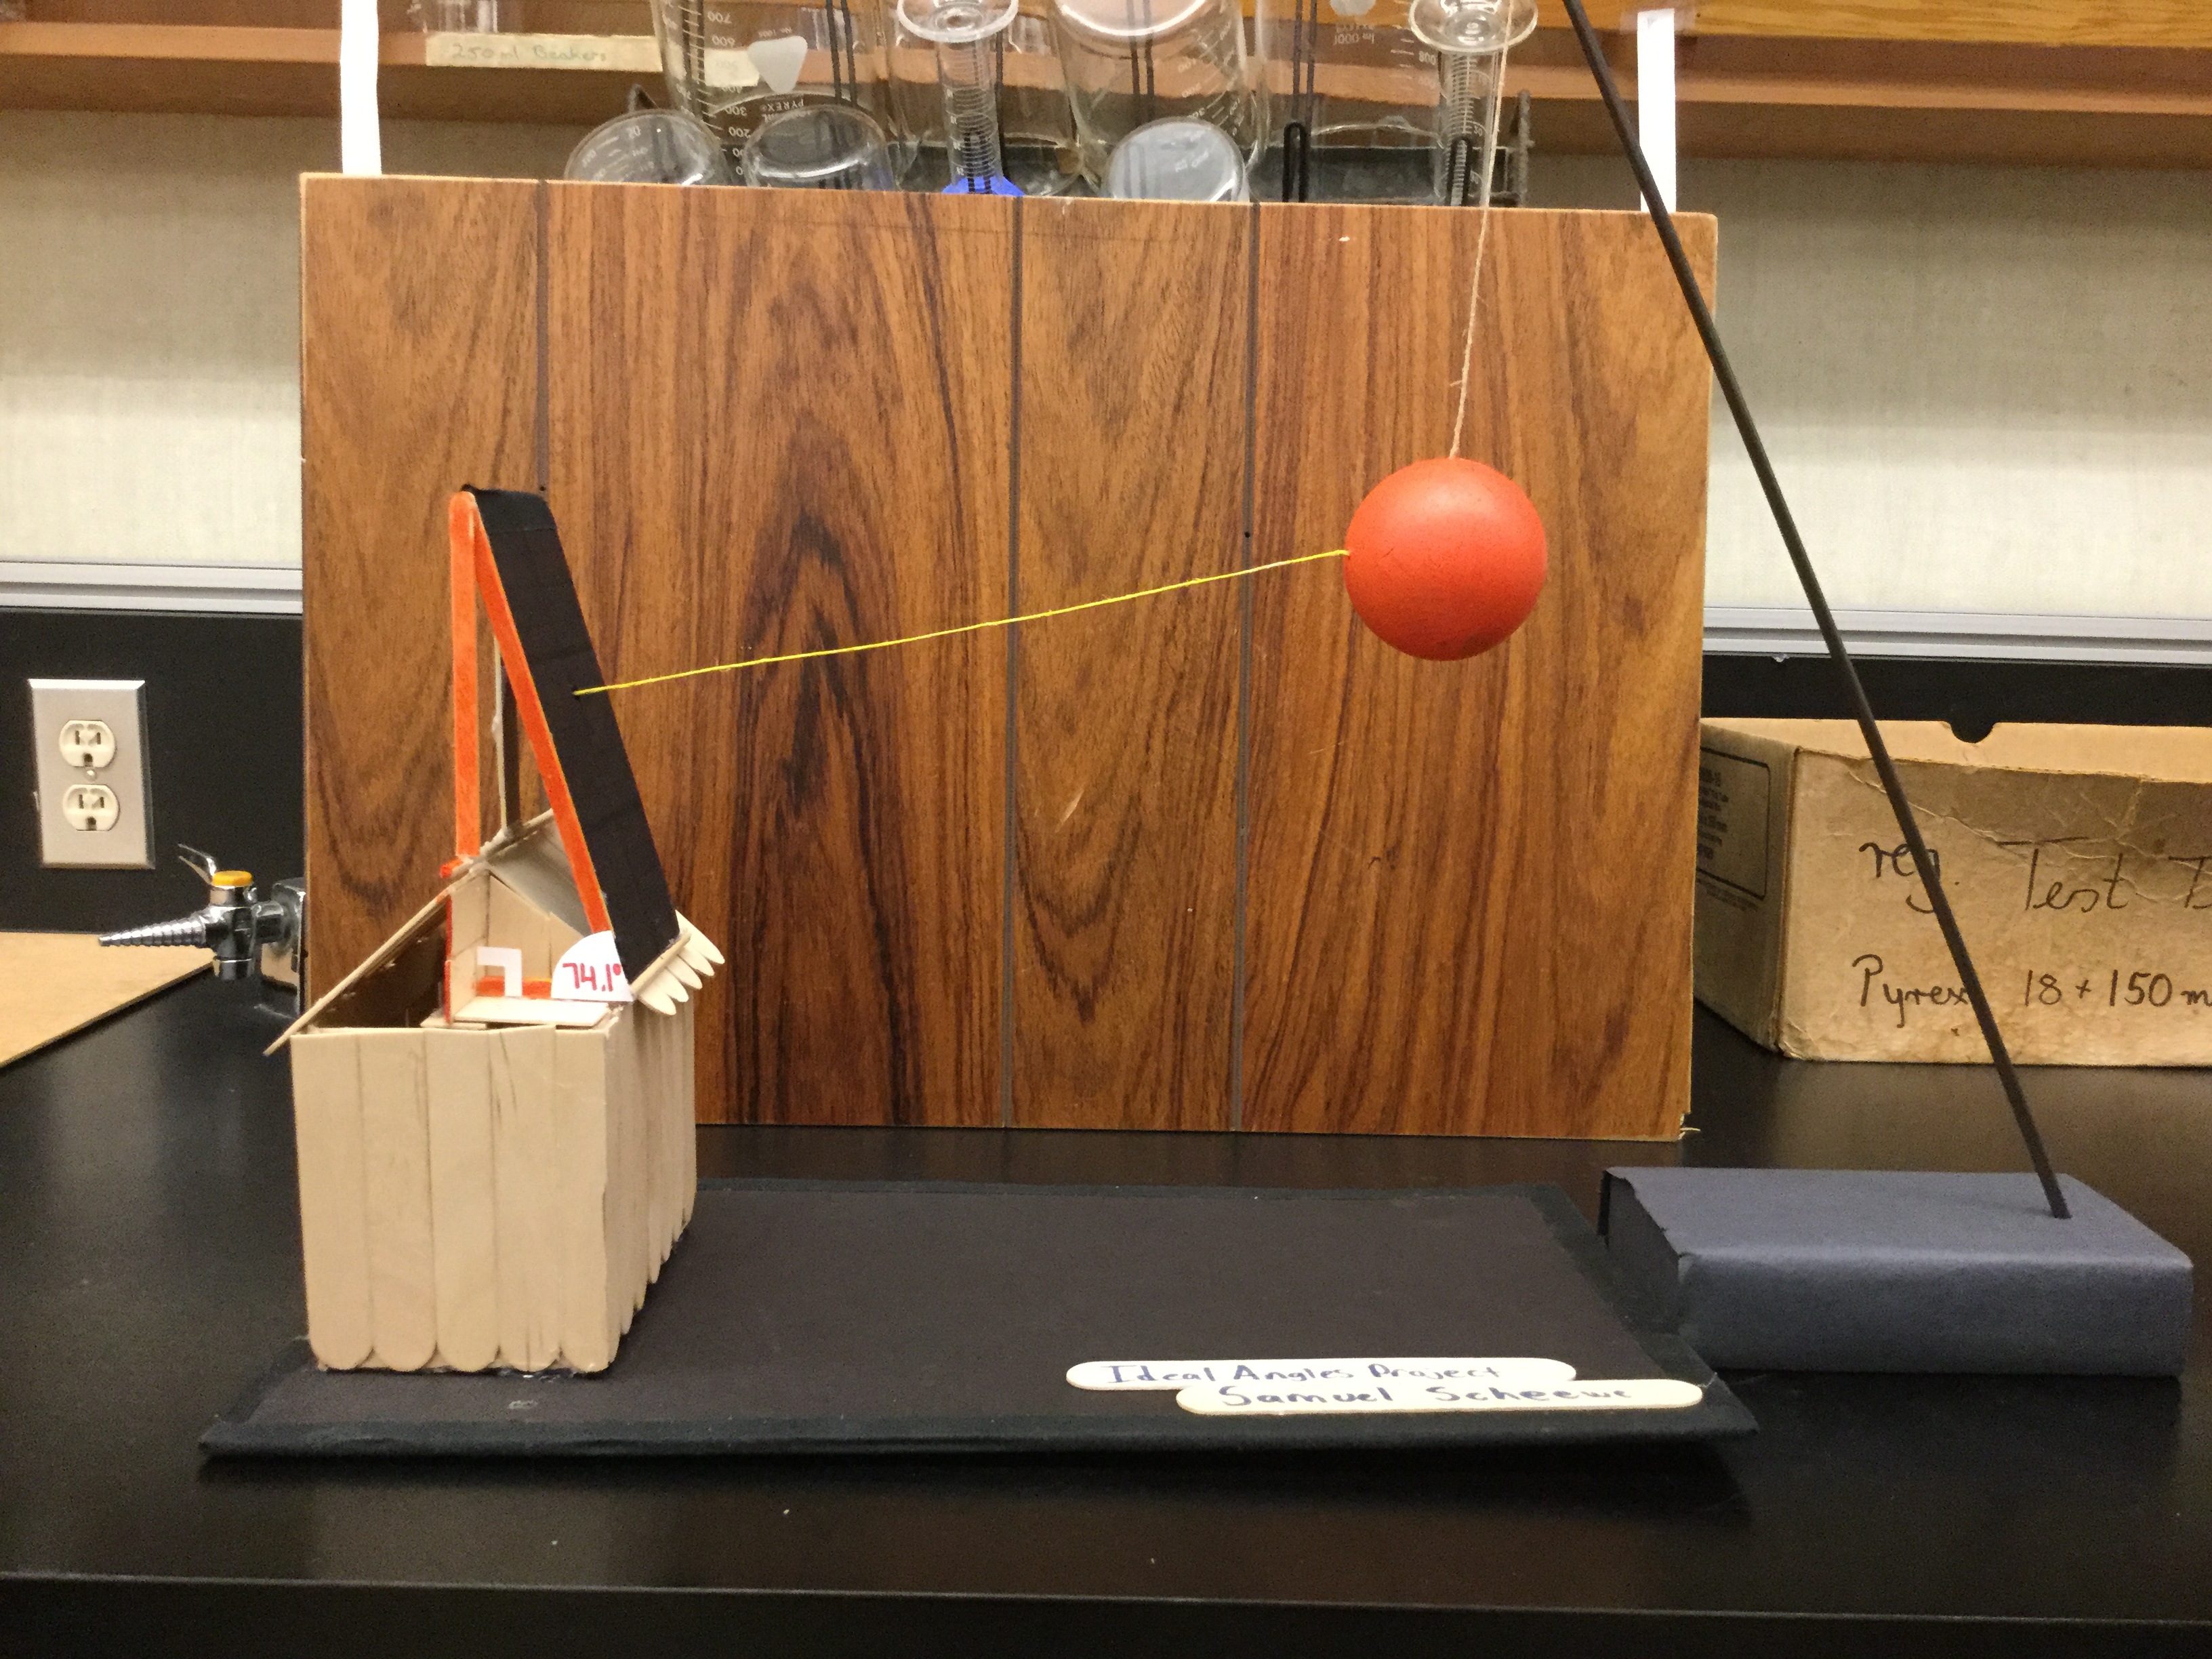
That would be half of my roof. Now I was ready for construction. For the base, I used a section of an old foam tri-fold board, and for the house I used popsicle sticks. For the main part of the house I only had one measurement that I had to use. The width needed to be 8.2cm, (twice the bottom side of the triangle I drew.)
The first thing I did was build 2 rectangles that would be the top frame and the bottom frame. I then cut and glued lots of popsicle sticks that run vertically and connect the two rectangular frames (the walls.)
https://youtu.be/5Jbem1m4hGE
I then added my solar panel (also the foam tri-fold board) to the angle 74.1° using my eyeballs and a protractor. To finish my model off, I glued orange narrower popsicle sticks to the side of the triangle I’m trying to show, to bring it out. Then I glued my house to the base.
I also wanted to show how the sun would hit my solar panel, and so I took an orange hockey ball and suspended it above my model using a thin plastic pole, some string and a small block of wood. And viola, I had me a math/solar panel model!
Overall this project was hard for me in the beginning, I had my idea for the model, but I didn’t know how to use the trigonometry to show it. But once we did a practice test, and marked it together, I started to understand the concepts a lot more. I then was able to get going, and after that, my whole project came together perfectly. It was exactly the way I wanted it. If I could change one thing about it, I’d change the angle of my solar panel since after putting my model together I think that it wouldn’t receive as much sun as it could at a different angle. Anyways, this project was as fun as a trigonometry project could get, and I learned the skills I need to apply trigonometry to not only just math questions.
See you