Getting Energy From Nature Using Plastic…

Welcome, to yet another blog post.

As we are nearing the end of the school year, we are wrapping up units, and prepping for the last units of the year. The unit we just finished combined both math and science to make one project. We merged the science of natural energy types with the math of linear equations and graphs.

We started off this project with our inquiry question, as always.

How can we capture and use renewable energy from nature?

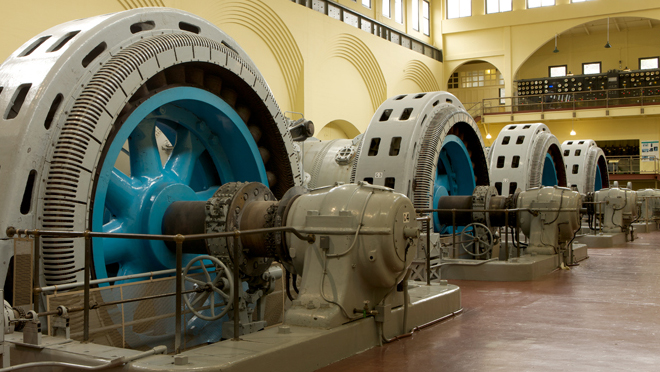
But before we did anything, we took a one day field trip to Stave Falls, a power house in Mission, BC. We learned about how large bodies of water can make electricity using big generators. This type of energy source is really good because it is really clean and causes no pollution. We learned a lot on this field trip.

Next, when we got back to class the next day, we started working on the actual project. We were put into groups, and so me, Adam, Hannah and Robbie began brainstorming ideas.

The goal was to create a mini generator that would create electricity from nature.

Our first idea was a car, and when it rolled it would turn mini motors, generating electricity. So, we built a car using a small rectangular Tupperware container, four mini motors, four wheels, some wires and some tiny LED lights. The car would roll down on its wheels, pick up  speed, and generate lots of electricity.

Theoretically.

But first we needed a hill of some sort. So since we were limited to our science classroom we decided to build a track that the car could go down, Hot Wheels style.

This is me and Adam setting up the track.

But, this didn’t turn out well at all. The track didn’t really hold together well and our car fell off and broke. Also, we realized it wasn’t generating electricity because the wheels were turning in opposite ways, cancelling out all the current we made.

Onto the next idea. A water propeller.

We didnt spend too much time on this idea. Using the Tupperware container, the plan was to have a propeller stick out of the container, which was attached to a motor inside the container that would generate electricity.

But we couldn’t figure out how to seal the container since we had to have a hole in it.

So we moved onto our next idea. A water wheel.

We figured this would be more practical since we knew of a few creek/river options with different speeds.

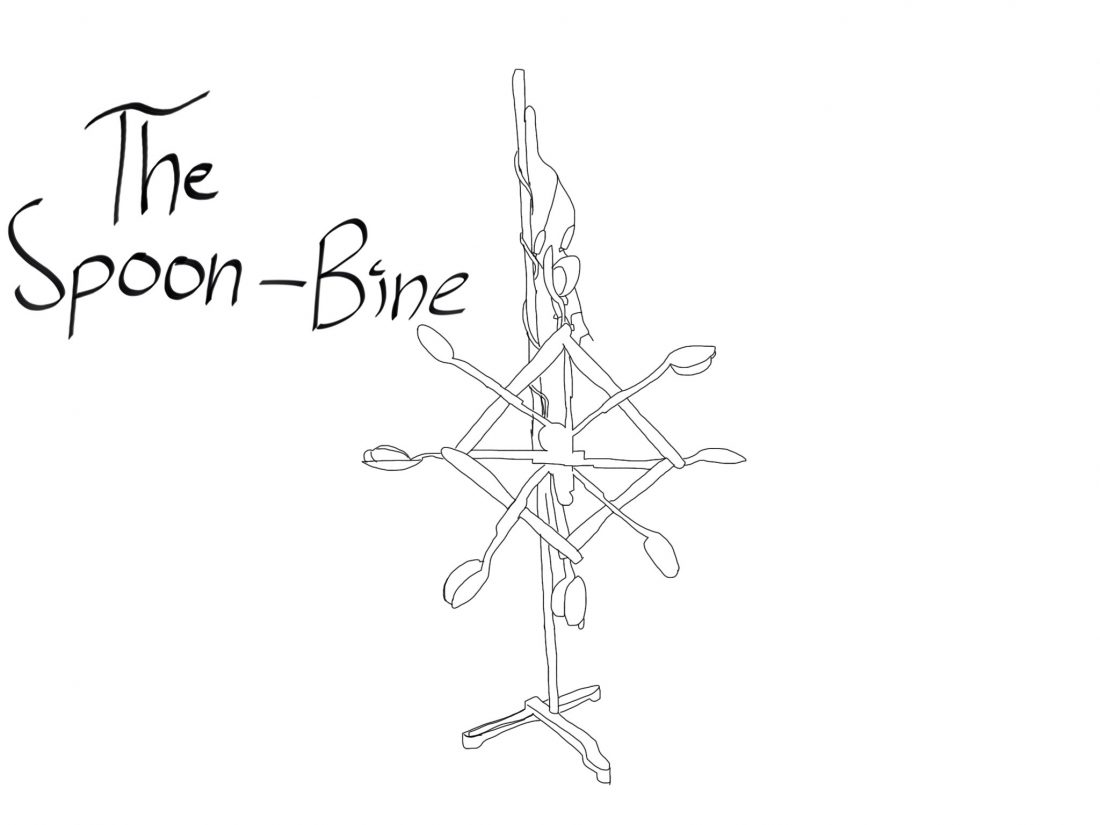
We got to work on the construction of the water wheel, and we decided to use the sturdy materials of plastic utensils and hot glue. Robbie was our main glue guy and we helped him design the wheel. Our first design looked like this:

This water wheel was attached to a hand crank generator, so the goal was to just spin the crank, since it had a motor and wires built into it.

On this particular wheel we had four spoons, all meant for scooping water, and in turn, spinning the crank generator and then lighting up an LED lightbulb.

But once we tested it in a small creek near our school we realized we needed to attach more spoons since it was barely spinning fast enough to turn the LED light on.

The solution was to add 4 more spoons to our design, and it worked really well after that. We tested that, and it turned on our one light. But we thought it could light up more than one. So we converted our light into a parallel circuit with 5 lights. We tested it again and it worked, lighting up all the lights.

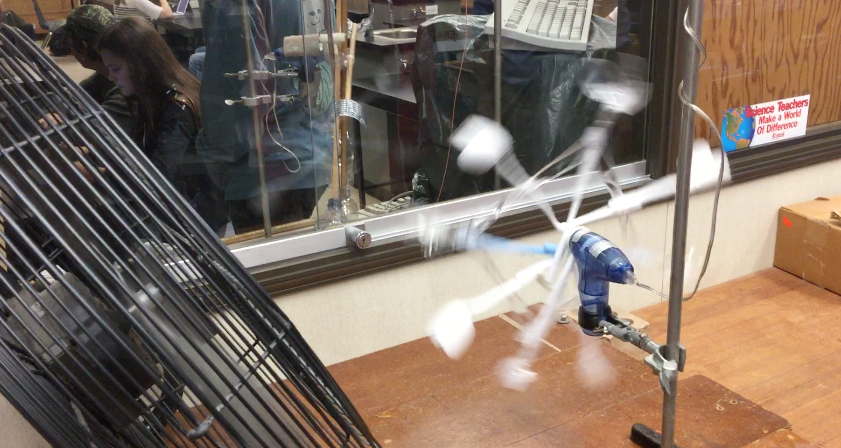
Testing Using Wind Power

But that’s not all, of course. We then had to make an advertisement showcasing our water wheel.

All the while making this project we had been working on linear equations and graphs. This is the math part, and we graphed how much energy over time our water wheel was producing, for our advertisement.

We filmed our advertisement pretty quickly even though we changed our storyline ideas twice.

Reflection

This project was fairly easy for me, and at the same time pretty fun. I say it was pretty easy because my group and I worked well together and we all pulled our weight in whatever we did. We had good ideas that we executed well. The only time we struggled was when deciding on what our advertisement would look like. We filmed our first idea, but then scrapped it when we realized it wasn’t very good. We quickly came up with a new idea and we all agreed it was pretty good. This project was also pretty fun to work on, and we had a lot of fun in our group, which is always good. We came up with a new idea quickly, and it turned into something we were proud to turn in. If I could change one thing about this project it would be to cut the time we had to work on this in half. We had three weeks but we only needed one and a half. With too long of a timeline, we end up with nothing to do during classtime sometimes. But, other than that I think this project was fun and a good learning experience.


Thats all for now,

See you

Science is Fun.

Science is fun.

This term in science we’ve done a lot of interesting stuff, but only one project. We have been doing a lot of labs, experiments, and working with chemical equations. We learned about Lewis diagrams, Bohr models, exothermic and endothermic reactions,  balancing equations, and much more.

We have been working on all kinds of science terms and reactions. Before we really go into the unit, we made a unit Mind Map, to diagram what we already knew about this subject. Here is the one I did at the beginning:

At this time, I didn’t know much about our subject, just what I’ve learned in the past years of chemistry. But we did learn a lot over the course of the next few weeks.

The main part of our classes were directed to our projects. We had the choice of two different projects, a video, or an experiment. Both types would be partner projects and they are both about one specific chemical reaction. The video would be an animation where the characters are reactants in the reaction. The experiment project would look at how chemical reactions are used to identify the composition of a substance.

I ended up choosing the video project. I really couldn’t tell you why, maybe it’s just because I thought it would be easier since I’ve done a lot of videos in my past, I’m not sure. The project brief we received is below:

Oh, and I was partnered with Calum. We started planning, and we started looking for a reaction to use in our video. We looked at a few options, but settled on elephants toothpaste.  We chose this because it’s a basic experiment and would be easy to explain how everything worked as characters. The main idea of this reaction was as follows:

This experiment contains these main “ingredients:”

– Hydrogen peroxide

– Water

– Dish Soap

– Potassium iodide (catalyst)

A catalyst is something we didn’t learn in class, but me and Calum had to research more to find out what it really was. It’s basically just another element you add to an already working chemical reaction to speed up the process dramatically. This reaction would work on its own, but would take hours and would not be nearly as spectacular. The catalyst is added in, and boosts the reaction speed by a lot. We learned that a catalyst doesn’t get chemically altered in any way during the experiment. We also learned more ways to speed up chemical reactions:

– Increase the concentration of the chemicals

– Add heat to the reaction

– Add some sort of catalyst

This was pretty interesting to me. But, enough about catalysts, let’s get into the fun stuff: the “toothpaste.”

Our reaction was fairly simple. We have two compounds, hydrogen peroxide and potassium iodide. Hydrogen peroxide decomposes into water and oxygen gas, which is in the form of foam, and without the iodide ion of potassium iodide, the reaction would be too slow to be worth it. The reaction between the hydrogen peroxide and potassium iodide removes the oxygen from the hydrogen peroxide, and the dish soap catches that released oxygen gas. That is where the foam comes from.

For our project, we made a video. Me and Calum quickly came up with an idea once we had our reaction. We thought that a football play was similar to our reaction in a way, and so we wrote a script for our story. We were having trouble thinking of an app to use for the animation, we tried Explain Everything and an app called Animation HD, but both would’ve taken a lot of needless work. We then had an idea. But watch the video to find out how we did it:

To make this video, me and Calum used the PLP iPad tripod, and angled it so it was looking directly down at a big whiteboard Calum had. Then we timelapsed us drawing the different scenes, and used a stop motion app for the animated parts. Then we put it together using iMovie, and added music.

Our video shows us actually doing our experiment at the end, even though we didn’t need to. Another group, Sofia and Ryan, were doing Elephant toothpaste as their experiment project and so we decided that we should help them a little, and then both film the experiment for project uses. And that’s what we did, and it was pretty fun.

Just recently, since it’s the end of the unit, we made an end-of-unit mind map of all the new knowledge we acquired throughout this unit:

To conclude, I’m very satisfied with this project. I feel me and Calum successfully completed our project, and in a really creative way. I think that the analogy we used, and the way we made the video, on the whiteboard, was a really unique way of showing our learning. I had a lot of fun drawing on the whiteboard, and I’m proud of the video we created.

Thanks,

See you


A Game For Math Nerds

Well hello again.

I’ve been posting a lot lately haven’t I?

Well that’s because we just got back from a big trip, the term is ending, and we are finishing a massive unit. But this post isn’t about the trip, or disruption or anything of that sort.

Today, I will talk about math.

This past term in math we’ve done two projects. One about golden ratios, and now the one this post is about, algebra.

Oh, algebra. Why does math have to involve letters all of a sudden? What’s wrong with using numbers to do math?

Well this unit was more about algebraic expressions and algebra tiles. We did a lot of practice working with algebra tiles in different types of equations. We learned about three main types:

1. Factoring expressions

2. Expanding expressions

3. And perfect squares

We then spent the better parts of our classes working on worksheets, and smaller assignments, so we’d know the math we needed for a project.

Once we’d done a lot of practice and worksheets, we were briefed on our project.

We were to create and design our own board game that was fun and showed all the math skills we were learning. It was a partner project, and I ended up with my main man, Simon Devisser.

Our first idea for the board game was a fast paced card game. The idea was that you’d have a pile of cards with algebraic expressions on them in the centre. The card would either have a diagram of some algebra tiles, and if you flipped over that card you’d write out the equation, and if the card had an equation on it, you would have to arrange the algebra tiles. Whoever completes the equation on the card first would win.  So, the first player would flip over a card and both players would race to complete the expression, and whoever completed it first would earn a point.

But this idea didn’t showcase all the math functions and skills that it needed to, and was a little too repetitive. So we began working on another new idea.

And we came up with a good one, in my opinion. We thought that we’d make a board game with a little bit of a twist. Instead of having a board with a start and a finish, we’d make one without an end.

The way you would finish was by collecting all the algebra tiles you needed to complete the algebraic expression you were given at the beginning. You earned points by answering more algebraic expressions correctly along the way. Whoever collected all their tiles first wins.

We even made a video of us explaining how to play the game, and us actually playing it:

Me and Simon got together and made our board game. We set out all the pieces and got ready to play. We filmed us briefly explaining how everything worked, and then showed a short version of us playing the game.

When we actually started playing, it went a lot smoother than I thought. I didn’t really know if everything would work right, or the expressions would be too hard or something, but it all went really well. Me and Simon played by the rules, and some we had to make up as we went along and figured out how it worked. But I’d say that we were really prepared and we both had a strong idea of what the game would look like and be like to play, and we pulled it off with flying colours.

The game itself was actually kind of fun to play, surprisingly. We should sell it to… some company…

Overall I was really happy with how everything went. The one thing I would improve on is our procrastination and time management in class. Sometimes in class we’d get distracted or carried away with something else, and would lose valuable classtime. I think that we should’ve focused more in class, and that would have made it a lot easier on us in the long run. I say that because we left the whole project other than the planning stage until the very last minute, which made us hand in our project video a little late. But other than that, I am quite proud of this project.


Thanks for reading,


See you


You Know About Ratios, But What About Golden Ones?

For our last unit in math class before the Christmas break, we looked at a mathematical theory/ phenomenon called the Golden Ratio.

Like me, you’ve probably never heard of it. Well, let me tell you. It is a design that has a rectangle outside, and on the inside, smaller squares that repeat in an endless spiral. Here is a picture of one on its own:

Now, what’s special, is that this rectangle has a special ratio for its side lengths. The ratio is      1 : 1.61803…

The second number, 1.61803 goes on forever, and is similar to the more popular number Pi. The ratio means that on the rectangle, and measurement on the short side will be a multiple of 1, and the measurement on the longer side will be a multiple of 1.61. These two sides will always have that ratio, otherwise it’s not the golden ratio.

For example, if the side length is 2 on the short side, the longer side will have a length of 3.23, and so on.

The golden ratio has been used by many famous artists, like Da Vinci in his famous The Last Supper painting:

Its also been used in lots of architecture, like the well known landmark The Parthenon, in Rome:

The reason it is used in these places is because it is believed that it is aesthetically pleasing to our human eye. And so, this became our project. We needed to design and create a work of art that showcased multiple golden ratios. It could be anything from a poster, to Music, and to drawings.

After some thought and research, I decided to draw my own picture, even if I’m not really artistically gifted.

The first step was to research the golden ratio more, and find my inspiration for my drawing. It took me a while to choose an idea, and I went through several different sketches. I finally settled on a skier coming down a mountain. To draw my thoughts and ideas, I used an app called Sketches Pro, which I grew to like. A great feature is that this app lets you draw on many different layers, so your different objects you draw don’t interfere with each other. This helps it stay neat. At first I didn’t know about this feature, and got stuck once my drawing looked like this:

But then, I re-started and it was a lot better. I traced my skier onto the canvas, and then added my backgrounds and things around him. I then finished, and after looking at how I could bring everything together, I put each thing in specific places to fit with the golden ratio. This is my drawing before I overlayed the golden ratio diagram:

And this is after:

But I still needed more golden ratios. I then used the rock drop in the snow to be the central object that the golden spiral loops around on. I used this technique, moving my objects around, to help me find more golden ratios in my drawing, and came up with this as my final project:

For each golden ratio, I used a different labeling method. For the big one over the whole image, I used a fraction method that works for any numbers that fit the golden ratio proportions:


For the skiers arm, I used an algebraic method that shows the ratio of the sides of the rectangle and how they work together to make a golden ratio. This also shows how you can replace those letters with numbers, and it will help you add them together easier:

And for the rock in the center, which, believe it or not is its own golden ratio, I marked it with the actual measurements I got from measuring the rock on my ipad screen. If you divide 2.87 by 1.78, you get 1.61, which is the golden ratio. I also like having the second golden ratio under the big one, because it shows how the golden ratio repeats itself infinitely.

Well, that sums up this unit and project. At first, I didn’t think this project was going to be fun. I had no idea what the golden ratio was at first, and didn’t know how to apply it to art. But then once I researched and got going, I felt more prepared. I actually really enjoyed the drawing part of the project, since I love skiing and I liked using the app. Overall, I had fun during this project, and learned a lot more about ratios, even the golden one.


See you

Genetics: Small Stuff, Big Importance

Like we do most years in science, we just went through a unit about DNA. I’ve never really enjoyed this unit, as it is always a little confusing, and it’s not very appealing to me. But this was more about traits being passed down from parent to child, and what makes those certain traits pass down. We also were learning about twins and their DNA.

The driving question for this unit is:

“How does DNA and genetics determine the characteristics of living things?”

In this Unit  looked at what makes us different from each other as people, and how and why we look similar to our parents. We looked at how to predict what traits would be passed down from parent to child, and the probability of each. We also looked at genotypes and phenotypes, all before we started working on our project.

And once we got to the project stage, the driving question is:

It’s kind of strange to think about, and at first it sort of makes sense. But we jumped into a lot of learning and research. We learned even more about these following topics and fancy scientific words:

Genotypes and Phenotypes
DNA
Genes, Dominant and Recessive
Traits being passed down
Punnett Squares
Pedigree Charts
And much more

Me and Spencer, my partner for this project, needed to know all about these concepts before we started our project, which was to make a 5-10 minute podcast explaining the answer to the driving question. The podcast had to include the explanations of those words, and since in class we’d been going through this website that teaches us step by step about each of those, that’s what me and Spencer turned to to gather our information. We went through the information, picking out facts and important parts to use in our script. We also watched a few of this guys videos:

Once we’d gathered what we needed, we began turning the facts from bullet points into a podcast script. It didn’t take us long to put together, and we got to the recording stage fairly quickly. But before we got there, we proofread our script of course.

Our recording and music making was smooth sailing, we used GarageBand to record our voices and make the music, and iMovie to put all the recording clips together. But since it’s just a podcast, there wasn’t any visual we could use in iMovie, so the screen is just black. But it’s exported as a audio file.


Once we had our full version put together, we listened to it, balanced the audio a little, and then we were ready.

Overall, I was happy with the way it turned out, but I also felt I could’ve improved the grammar in some places to make it more engaging and easier to understand. I also would definitely add some humour of some kind in there somewhere to spice it up. This project, just like my math trigonometry one, was tough to get started on, but then once me and Spencer got going, it got easier. I had fun recording and just like all my podcasts and videos I’ve made, I enjoyed listening/viewing how it turned out in the end.

To sum up my learning in this unit, I have two visuals that help demonstrate how much I learned. At the beginning of the unit, we did a mind map of what we knew then, and then we did another mind map at the end of the unit, showing what we know now.

Before the unit:

I guess I have learned a lot in this unit, and it wasn’t too terrible. Overall the unit was interesting, and me and Spencer’s Podcast was good, so I’m happy about that.

Thats all for today,


See you

Trigonometry Sounds Scary… It Is…

This year our first unit in math is about trigonometry, which is math that helps us find the relationships between triangle side lengths and angles. We hadn’t done any trigonometry in past years, but we’d done some algebra, which sort of ties into trigonometry.

On the first day of math class, we were briefed on our unit project. It was called the Ideal Angles Project. It was going to be due at the end of the unit, but we were to start thinking of what we want to do for it from the beginning. We were to design a 3D model of a house with a solar panel attached to its roof, and we had to use trigonometry to find the best angle to position that solar panel. Here’s the brief we were given:

That day, we also learned about SOH CAH TOA, which are three trigonometric functions we use to find side lengths or angles of triangles, depending on what angles or side lengths we already have. This was shown to us in this YouTube video:

Throughout the unit we would be going through a notes package with lots of different problems and equations in it, giving us practice on the key parts of trigonometry we needed to know. We were given this package digitally, and filled it out in a great notes app, Notability.

We would also do an occasional partner quiz, which is where we would create an equation, solve it, and then see if my partner would be able to answer it correctly. This was a good way to learn, because it teaches you the structure of math problems, and how to answer different ones.

Over the next few math classes we worked on the notes, had some homework pages and a few more partner quizzes. All the while, we were to be working on our project, gathering ideas and planning our model.

But to help us with finding the correct angle, we first did a lab where we positioned a wooden test divider at certain heights and angles with a mini solar panel on it. We filled out a chart to go with each angle, and saw which angle caught the most amount of sun rays. Here’s a picture of what me and Spencer got for the best angle from the lights in the classroom:

And here’s the chart we filled out that shows us the different angles and how much light power each angle got:

So, after this lab experiment we now know that a good angle will be around 45° because we got the highest amount of energy when the mini solar panel is positioned at that angle. But that is just getting small amounts of energy from the lights, our actual project needs to be positioned to the angle of the sun, in a certain location and season.

And so, I began my project research. I looked up the way to figure out the angle for Vancouver in the winter, and I found this formula:

49 (Van. Latitude) x 0.9 + 30 = 74.1° (recommended angle)

So, that was to be my solar panel angle. Now I just had to build a model that has that exact angle. But first I had to figure out the other side lengths of the soon-to-be triangle with trigonometry. The first side I needed was the hypotenuse, then the adjacent side, and then the opposite side. All sides were important because I had to build my model roof size to those exact numbers. So, I got started.

I chose my hypotenuse length to be 15 cm, which is the solar panel length because the hypotenuse of the triangle is my solar panel, and then from there I calculated the rest of the sides using trigonometry. My triangle then looked like this:

That would be half of my roof. Now I was ready for construction. For the base, I used a section of an old foam tri-fold board, and for the house I used popsicle sticks. For the main part of the house I only had one measurement that I had to use. The width needed to be 8.2cm, (twice the bottom side of the triangle I drew.)

The first thing I did was build 2 rectangles that would be the top frame and the bottom frame. I then cut and glued lots of popsicle sticks that run vertically and connect the two rectangular frames (the walls.)

https://youtu.be/5Jbem1m4hGE

I then added my solar panel (also the foam tri-fold board) to the angle 74.1° using my eyeballs and a protractor. To finish my model off, I glued orange narrower popsicle sticks to the side of the triangle I’m trying to show, to bring it out. Then I glued my house to the base.

I also wanted to show how the sun would hit my solar panel, and so I took an orange hockey ball and suspended it above my model using a thin plastic pole, some string and a small block of wood. And viola, I had me a math/solar panel model!

Overall this project was hard for me in the beginning, I had my idea for the model, but I didn’t know how to use the trigonometry to show it. But once we did a practice test, and marked it together, I started to understand the concepts a lot more. I then was able to get going, and after that, my whole project came together perfectly. It was exactly the way I wanted it. If I could change one thing about it, I’d change the angle of my solar panel since after putting my model together I think that it wouldn’t receive as much sun as it could at a different angle. Anyways, this project was as fun as a trigonometry project could get, and I learned the skills I need to apply trigonometry to not only just math questions.

See you

Always Be Safety!

Welcome back,

A few days ago, our PLP 10 class began our first small project for Science class. Before we could do any labs, we needed to know the safety rules in the classroom. And we did that by making a video that demonstrates three or four situations in a lab that could happen, and what do do in those situations. I was in a group with Spencer and Kyle, and we bang planning out which safety situations to include in our video. We came up with this list:

The next thing to do was film. We decided to film right then and there in our science class, and I believe that was our first mistake. That was because we couldn’t get good quality shots, and we didn’t have very much control of our surroundings at all. This wasn’t good. We filmed all our shots and then we put them all into iMovie, where I put them in order and added some music. We didn’t use audio, we thought it would be a cool idea/technique, but after getting critique from our teacher, we decided to add some dialogue. But, we didn’t have time to re-film our whole video over again, and since Kyle was sick, we decided to add my voice as Kyle’s thoughts during the video. So me and spencer found a quiet area outside and recorded it.  Our final product was this:

This definitely wasn’t my best video, and I would have loved to do it again for a better mark, but we had to move on. Overall, it was fun to make, but it didnt turn out as well as my group and I hoped.

See ya


DNA Lab / Build

Hello,
In this post I will be talking about two small projects we did this week in science class about DNA! The first one, a lab. We did a lab where we looked at the DNA of a strawberry through a microscope. The procedure went something like this:

– Put half a strawberry into a plastic bag
– Add a little bit of water, dish soap and salt
– Seal the bag and squish it all together
– Pour the mixture into a test tube until half full
– Add 10ml of cold ethanol
– Watch
– Remove top chunks from test tube and put under microscope
– Observe

Here are some pictures of the lab:

Ready to start

The mixture all together


This is what we saw through the microscope:

The close up


The other project we did was a mini DNA model that we built out of pipe cleaners and straws. It needed to show DNA in a double helix form, and also the 4 different base pairs. The straws are split in the middle to show the two different bases together, and the part sticking out of the side is sugar and phosphate. Here is a picture of it with a diagram of one beside it:

Both projects were quick, but also fun to do, and I learned what I needed to learn easily.