In PLP Things are a bit different, and by a bit, I mean a lot. I won’t go into full detail on what PLP is all about in this post, because that isn’t what it’s about. In a nutshell, in PLP we focus on project based learning. We go on lots of field studies, work in groups most of the time, and post on our very own blog, (or as we call it, a learning portfolio). In PLP five out of your eight classes are PLP, meaning that you have the same people in your class most of the time. English, socials, science, math and maker are all PLP classes. French (or Spanish), PE and whatever you choose for your elective are all outside of PLP. English and socials are combined into one class, called humanities. Math and science are also combined into one class, called scimathics. Since the classes are combined, each one takes up two blocks/periods. This is what a grade eight schedule looks like:
Day One
humanities
scimathics
PE
French
Day Two
humanaties
scimathics
elective
maker
Almost everyone’s schedule looks different, but they are all similar. The only thing that changes are the three non PLP classes. In humanities we don’t switch between English and socials every day, we actually focus on one unit at a time in each class. It works the same for scimathics. Sometimes we can tie both science and math (or English and socials) into the same lesson, for example my Minecraft project for scimathics.
During Oregon we did many cool things. This blog post will be an example of just a few of the things that we did.
Why we went to Oregon.
Oregon was more than just your average field trip where the only reason you go is to learn. We didn’t just go to Oregon to Learn about marine life. We went to get to know each other better and work better as a team, or as Ms Willemse says a family. Being close with your classmates not only helps make you closer with your friends but it helps a lot with group work, which we do a lot of in PLP. One of the other reasons why we went to Oregon instead of just learning in a classroom was because it’s fun! When something is fun, you tend to remember it better. For example if I asked you what you and your friends liked to do at recess in grade three you would probably remember it, but if I asked you what you learned about in grade four, you probably wouldn’t remember.
Oregon ads
During our trip we made ads about Oregon. We were split into 5 groups and were assigned a place and a business to make an ad about. We have been learning about advertising and advocacy since the beginning of October. So we had a pretty good idea of what to do. If you read my post about advertising and advocacy you will see that we made a tourist ad, a business ad and an advocacy ad. You will also notice that above I only talked about a tourist ad and a business ad. This is because we didn’t have to do an advocacy ad! Ha, just kidding we actually did =(. Our advocacy ad was about tsunamis.
Business ad
For my business ad my group was assigned South Beach Fish Market. To make
the business ad we had to come up with a list of questions to ask the manager of the restaurant. We recorded the interview (with the owner’s permission of course) so we could listen to it again later. To make the company’s logo I took a picture of the back of the manager’s shirt and painstakingly traced every line on the crab. Then I coloured it red with a blue background because when we asked in the interview they sais that their colour scheme was red and blue.
Tourist ad
I didn’t have to do quite as much for my tourist ad as I did for my business ad. For my tourist ad my group was assigned Fort Stevens non historical. Otherwise known as Jetty Observation Tower. When we were there it was very windy and rainy, but it was still a really cool experience. To create the ad I chose a photo of the water because that was my favourite part of Jetty Observation Tower.
Advocacy ad
Just like the tourist ad my advocacy ad didn’t involve as much work as my business ad. For the advocacy ad everyone in the class, not just my group was assigned an ad about tsunami awareness. For this ad I illustrated a tsunami wave over a city.
Our Book
During Oregon we were working on a book that we made using Book Creater. The book explains what we did and where we went each day, it also has some facts about the places we visited. When we were making our book during Oregon we drew things like what animal we wanted to see, or what our favourite meal was. We also wrote about different things like how big haystack rock is, or explaining how we set up our experiment. If i were to go back and do this book again I would spend less time worrying about the drawings and work on it more on the bus. Here is my iBook.
If i had the chance I would go back in the blink of an eye. Oregon was a life changing experience and just one more reason to be in PLP.
Currently in school we are learning about Julius Caesar. So instead of just reading about him (and all the other people from the play) Ms Willemse assigned us a body biography. My group was assigned Marcus Junius Brutus the Younger. We got to work researching him right away. So once we were done our research we outlined the body of one of our classmates and started drawing.
Who was Marcus Junius Brutus the Younger?
Marcus Junius Brutus the Younger (aka Marcus Brutus) was born on October 23 85, BCE and he lived in Rome in a Roman temple. His parents were Quintus Servilius Caepio and Marcus Junius Brutus the Eldera. He was a military commander and a politician who loved his family and his people. On March 15 44 BC Marcus Brutus assassinated Julius Caesar with 9 others. His father was killed by Pompey the great under terrible circumstances. He committed suicide on his birthday of 42 BCE by getting someone to hold a sword while he ran into it.
What we put on his body and why.
We put an army helmet on his head and armour on his leg because he was a military commander.
We put a Roman temple on his body because he lived in one
We put a shield over his heart with people behind it because he believed in protecting his people and we put a family by his heart because he loved his family.
The baby and the tombstone represent when he was born and when he died.
We put a thought bubble of him killing Caesar and a sword in his hand to represent that he was part of the assassination of Julius Caesar.
The sword in his hand represents the fact that he committed suicide.
We put a symbol that says SPQR on his body because he was a politician. SPQR stands for Senatus Populus Que Romanus and was the symbol for Roman politics.
This was a really fun project and I’m looking forward to learning more about Julius Caesar.
This past school year we have learned about a ton of cool and useful things, things like different camera angles, advertising and advocacy, how to code, we’ve even had a mini exhibition! One of the most useful things that we have learned about (in my opinion anyway) is learning to have a growth mindset. We have been working on having a growth mindset all year and I think that I have improved since the beginning of the year.
What is a growth mindset?
having a growth mindset means that you are willing to push yourself out of your
comfort zone and maybe even fail at something. You think things like, what could I do better next time or, if I fail I can learn from my mistakes and improve for
next time. If you have a growth mindset you want people to congratulate you on how hard you worked not on how smart you are. You believe that you can learn anything and you can get better at anything. You know that your effort determines more than your current abilities.
What is a fixed mindset?
Having a fixed mindset means you would rather put less effort into an assignment and get a good mark than put a ton of effort into an assignment and get a great mark. If you fail, you get frustrated and give up. If you have a fixed mindset you want people to congratulate you on how smart you are, not how hard you worked, because let’s be honest, you know you didn’t work as hard as you could have. You believe that you’re either good at something or you’re not. You think that your abilities determine more than the effort that you put in.
Most people have a mix of a growth mindset and a fixed mindset. In some areas they know they can improve and they want to improve so they work really hard at that certain thing. In other areas however they don’t think they can get any better, so they don’t bother trying. Probably the most common thing to happen is for someone to know they can get better at something but they just don’t want to put in the time and effort it takes to get better at it.
My growth mindset experience
In my mini exhibition blog post I explain how I had to completely change the design of my house a few days before the exhibition and normally that would make me really annoyed and think “why me? What did I do to deserve this?” But for some reason I wasn’t even that annoyed. If this happened at the beginning of the year however, before i knew about having a growth mindset versus having a fixed mindset I probably would’ve gotten really stressed. The final product would’ve probably reflected my mood at the time (meaning I would have done a poor job, just in case you couldn’t figure that one out). In the end I ended up loving my project and it was all thanks to my growth mindset.
In class we made long term goals that we were willing to work towards and maybe even fail at. We had to make it one (max 2) sentence long and put it on a selfie or just a picture of us. We submitted them to showbie, our teacher Petra Willemse would either tell us something she wanted us to change or she would say “print” which meant that we didn’t have to make any changes and she was going to print it and put it up on the wall. When I handed in my first draft Ms Willemse told me to put some shading behind the letters, so I went into photoshop fix and drew it in by hand. I submitted it again and I got a print! My goal is now hung up in the classroom on public display next to the goals of my other classmates.
Here are the links to all the apps that I used to make my long term goal: pages, photoshop fix, showbie and snapseed.
For humanities we had to come up with a question based on the environment and try to find an answer to it. Obviously it couldn’t be a yes or no answer. We wrote down our top three choices for what we wanted to research and submitted them to our teacher so she could approve one of our questions. My three questions (in order) were: 1) How can we differ housing to adapt to the rising sea levels? 2) How does changing currents affect prey? 3) in what ways can a lack of knowledge about sea life cause some sea animals to go extinct? The teacher (Ms Willemse) chose my #1 question and helped me reword it to this: How can I adapt my coastal housing so it won’t be washed away from the rising sea levels?
So I was very glad that I got my #1 question. I started by researching what is causing rising sea levels and how fast they are rising. After I discovered that sea levels are rising an average of 3.3 mm a year I had to think of why that would be a bad thing. I came up with a few reasons, if it takes that long to rise people won’t bother with rebuilding their house because they will think “oh I have lots of time. I don’t need to do this now”. In other words, they’ll keep putting it off then it might be too late to “renovate” their house. Another reason is: the water will saturate the ground near/underneath your house so after a while your house (most likely the basement if you have one) will rot. As soon as my question was approved I knew that I wanted to build a model of the house. My initial plan was to build a house on stilts,
but then I was thinking about different ways to create a house that wouldn’t get washed away with the rising sea levels and I thought about possibly creating a floating house because a house on pillars might be too expensive.
I kept working on my “diagram” for the house on pillars though because 33% of people get seasick in “normal conditions” meaning small waves, and 66% of people get seasick in “bad conditions” meaning large waves, things you wouldn’t necessarily want to be on a boat in. So I decided to go with the pillar idea, until my friend pointed out that a house on pillars may not be very legal because of earthquakes. So the project was due in 5 days and I was basically back to the drawing board for the diagram. Luckily my research still applied to the new model that I was going to build. I did some more research about earthquake proof buildings in Vancouver to see if I could just add something to my current building and then this picture came up.
So it turns out that there is a building in Vancouver BC called The Qube that people are saying is earthquake proof, because in an earthquake the cables suspending the building would allow it to rock back and forth. As I was looking at that picture I realized that it was slightly raised off the ground, and since I was trying to create a house that wouldn’t get washed away with the rising sea levels I thought that I should base my building/house off it. Obviously I couldn’t make a direct model of the building, so I had to modify. First off, The Qube is not a house, it is a headquarters for Westcoast Transmission Co, and when I wrote my inquiry question I meant a home. So I came up with this . I had a lot of fun making the house and garden.
Group work
During the the mini exhibition I was the group leader. This was my first time ever being a group leader and I will admit, it was more stressful than I thought it would be. Since I was group leader I had to organize everything. I was in charge of making sure that everything we needed was going to be there, I had to tell people what to bring and where to set everything up. It would’ve been a lot less stressful if we had another week or so to make our projects but things got complicated with the Oregon trip being postponed. I think it would have also been a lot better if we distributed the work load better. I felt like there was a lot of work that I had to do for the exhibition, like: making a chart of where everyone would set up their projects/tables
Organizing who would bring what for our toss game (fake food, containers, pop cans etc)
Trying to sort out what group would get the projector
Figuring out how we wanted our corner of the room to be set up (ie decorations, what we would do with the whiteboard etc)
And on top of that I had to make my project for the mini exhibition.
Google year in search is a video by google about what has happened this year and what people googled. It is important to know about what is going on in the world and what people are googling. It is also important to know about (almost) everything that happened in 2016 whether it happened to you or not you were alive at that time.
One thing that I didn’t understand in the video was when a rocket looking thing landed on water. After asking some of my class mates If they knew what it was called. Apparently it’s called SpaceX and it’s basically a company with the goal to create technology to reduce space transportation costs and make the colonization of Mars possible.
When I was looking at the top search trends of 2016 for Google I was surprised to see that people were looking up “Who is Siri?” I found this surprising because I am an Apple user so Siri is the only “intelligent assistant” that I really know anything about.
I’m probably not the only one who finds it slightly surprising but at the same time there are probably some people who would find it shocking if someone else didn’t know what cortina was.
If I made my own year end review I would include my grade 7 graduation, meeting new friends at Seycove, Halloween, Christmas and New Year’s Eve. I would also include some smaller things like my friends birthday party or my trip to Shuswap Lake this summer.
In Maker we are learning how to code, so we downloaded Swift playgrounds. It is an app that gives you simple instructions on how to code. In each level you have to issue a set of commands to make the character toggle switches and collect gems. With swift playgrounds they don’t always teach you something new every level.In the first few levels they did teach you something new every level, but as you progress further they teach you something new every five (or more) levels so you can practice what they just taught you.
The first level is very easy as you can tell. All you have to type in is: moveFoward() moveFoward() moveForward() collectGem(). You don’t even really have to type it in! As you can see at the bottom of my picture they already have all the options laid out for you at the bottom which is quite nice because it means that you don’t have to spend a bunch of time writing out all the code. The levels move along quite “swiftly”. Hehe get it, swiftly? They don’t move too fast though which is nice.
Level 1
For this level it gives you a hint at the top. It says “figure out how to collect the first gem and see if that works for all the gems”. So I did what it said, and it worked! Just like magic! Maybe it was my amazing coding skills though. How will you ever know? Anyway, here is the finished product.
After a while our teacher asked us (the class) to write a reflection about our experiences with swift playgrounds. We have written two reflections so far. We usually code for a few days and then write a reflection. Here are my two reflections:
Currently in school we are learning about advertising and advocacy. So as a challenge we had to make our own advertisements. After each draft we got into small groups of about 5 or 6 and critiqued each other’s ads. We gave one specific comment (something specific that they could improve upon) and one helpful comment (something that you liked about the ad that they could improve even further upon).
For this ad we had to advertise a certain place to teenagers. I chose Cambridge St in Vancouver BC because it is so beautiful in the fall.
The Tourist ad
Draft 1
You can see how much my ad has changed from draft one to draft three. In draft one most of my feedback was about how I made the ad too crowded with photos.
Draft 2
With this one I got some mixed messages. I still got people commentingon how my ad was too busy. Someone also said that my pictures blended together too much and that I should outline them. So I was at a bit of a loss on what to do.
Draft 3
On the app that I used for post one and two you couldn’t outline photos, so I decided to try a different app. If I could I probably would’ve had more than one photo, but alas (sighs) I could not figure out how to turn the photos. Luckily for me I think it turned out better this way! So yay for that!
The advocacy ad
for this ad we had to advocate for a change in people’s behaviour towards earthquake preparedness. As you will read in the paragraph below I misheard the instructions at first and did my ad wrong. So really it had nothing to do with earthquakes. I chose to do my ad about fire because I thought it would be different from the other ads and it would be fun to make.
Draft 1
You’ve probably noticed that draft one is a little different from draft 2 & 3 cough cough sarcasm cough cough. This is because I misunderstood the directions that our teacher gave us. She said “you will be creating an advocacy ad about a disaster”. What I failed to hear was the part about it being related to earthquakes (because that’s what we are/were learning about in science).
Draft 2
My teacher said we had to use our own photos so I thought “do you know what would be fun? I know! How about we set a cardboard house on fire!” Since it took a while to make the cardboard house and then try to figure out how to set it on fire in the rain I decided that I wasn’t about to just throw all my hard work out the window and start from scratch. So I researched a bit further, and turns out that fires and earthquakes are actually related!
Draft 3
For draft three I rearranged the text so it lined the photo like a picture frame. I made the paragraph that was at the bottom into four different sections. The right and left columns, I separated “did you know that there is a high risk of fires after an earthquake” and put it at the top and I put “have an escape plan, get out alive” in the bottom corner. I also put “Don’t let this be your home” near the bottom.
The Business ad
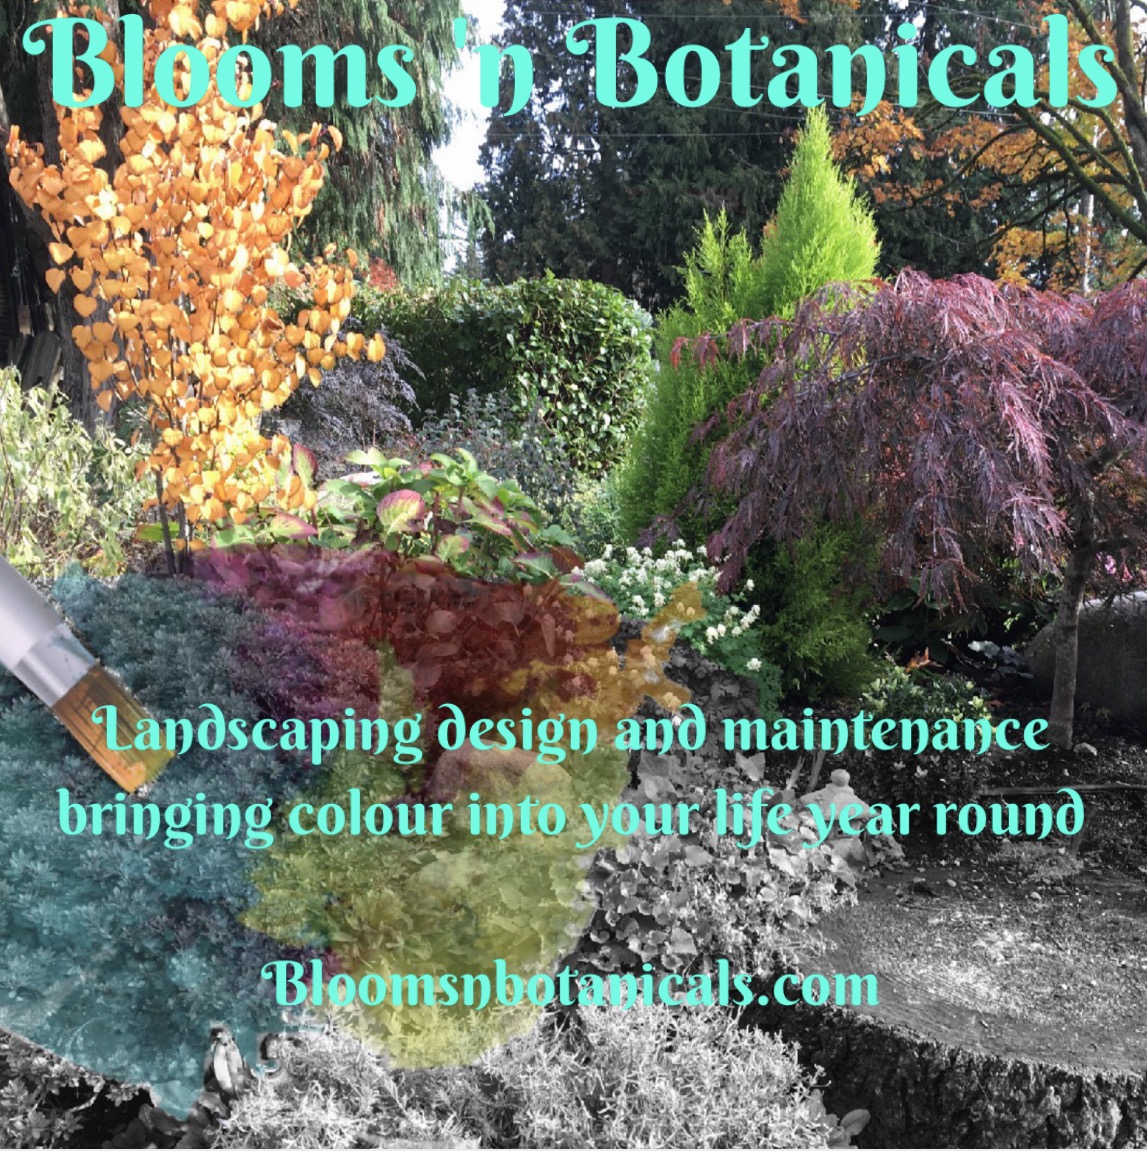
for this ad we had to advertise a certain business. We had to know the owner or someone who was close with the owner. I chose Blooms ‘n Botanicals because my mom’s friend created the business.
Draft one
To make draft one I took pictures of my garden from different angles. While I was taking the pictures I had to try to keep my house out of the background because I wanted the focus on the garden.
Draft two
I didn’t change much between draft one and draft two. I just reworded the bottom part. Most of the feedback that I got for this one was about the green colour that I put my text on. They said to make it more green and to make it brighter.
Draft three
One of the comments on my second draft was that there was too much green. So I decided to colour the bottom half of the picture gray. Then I put a paintbrush on the ad to make a point that the company brings colour to your garden. For this ad I was going to change the green but I decided to edit the photo first and then once I edited the photo the text showed up on it. The only reason that I had the green in the first place was because you couldn’t see the text if it was on top of the photo. Once I edited the photo though, you could see it easier. I’m probably going to outline the text so you can read it easier.
This angle gives the impression that the person (or animal) on screen is powerful.
I This photo was pretty easy to take because I’m short, but bacically I got down on my knees and pointed the camera up. Pretty simple.
The High Angle Shot
This shot is generally used to Tell the audience that the person (or animal) on screen is less powerful.
This shot isn’t the best because I am actually shorter than the Person I was taking a picture of. Next time I should probably stand on a box or something. B
The Medium Shot
This shot is basically just looking at the person (or animal) straight on
This shot was probably the easiest to take because I just pointed the camera straight forward. That’s it. Nothing else. Just straight forward.
The establishing shot
this shot is just what you would think it establishes where the movie or short film will take place.
All I did to take this shot was back up a lot and take a photo. I know sooo complicated.
The Close-up shot
(Flattering I know). The close up shot is a shot that is close up. No… Really?
For this I just zoomed in on her face and took a photo.
The Wide Shot
This kind of shot is generally used to capture a large group of people in one shot.
for this I just backed up a bit and took a photo. To make it better next time I should take a panorama.
 In PLP Things are a bit different, and by a bit, I mean a lot. I won’t go into full detail on what PLP is all about in this post, because that isn’t what it’s about. In a nutshell, in PLP we focus on project based learning. We go on lots of field studies, work in groups most of the time, and post on our very own blog, (or as we call it, a learning portfolio). In PLP five out of your eight classes are PLP, meaning that you have the same people in your class most of the time. English, socials, science, math and maker are all PLP classes. French (or Spanish), PE and whatever you choose for your elective are all outside of PLP. English and socials are combined into one class, called humanities. Math and science are also combined into one class, called scimathics. Since the classes are combined, each one takes up two blocks/periods. This is what a grade eight schedule looks like: