Hey there,
Welcome back to my blog, and in this post I’ll be talking about the biggest project of the year. Blue Sky. We do a mini-version in the winter before Christmas break, but really that’s just getting us ready for this one. This one we work on for about a full month, maybe a little more. This year is a bit different than last years Blue Sky, because this year our project has to solve a problem that appeals to a specific age group. The age groups were, babies, toddlers, Tweens, seniors, and pets. Between the grade 8s and 9s, there were about the same number of PLP students per age group. Anyways, as it does every Blue Sky, it took me about a week longer than everyone else to think up an idea to do my project on. Seriously though, I don’t know what it is, but I can never just have an idea off the top of my head! After thinking for a bit, the idea I came up with was this:
Age group: Tweens
Problem: Tweens can’t drive themselves to a mountain bike trail
Solution: A multi-use mountain bike skills trainer that Tweens can use in their own driveway
After this basic idea, I needed to think of how to actually build it. In all of my Blue Sky projects, I have always built something, which I prefer and love to do rather than presenting an idea. Back to the planning. I drew up a rough beginning of my first piece of my project:
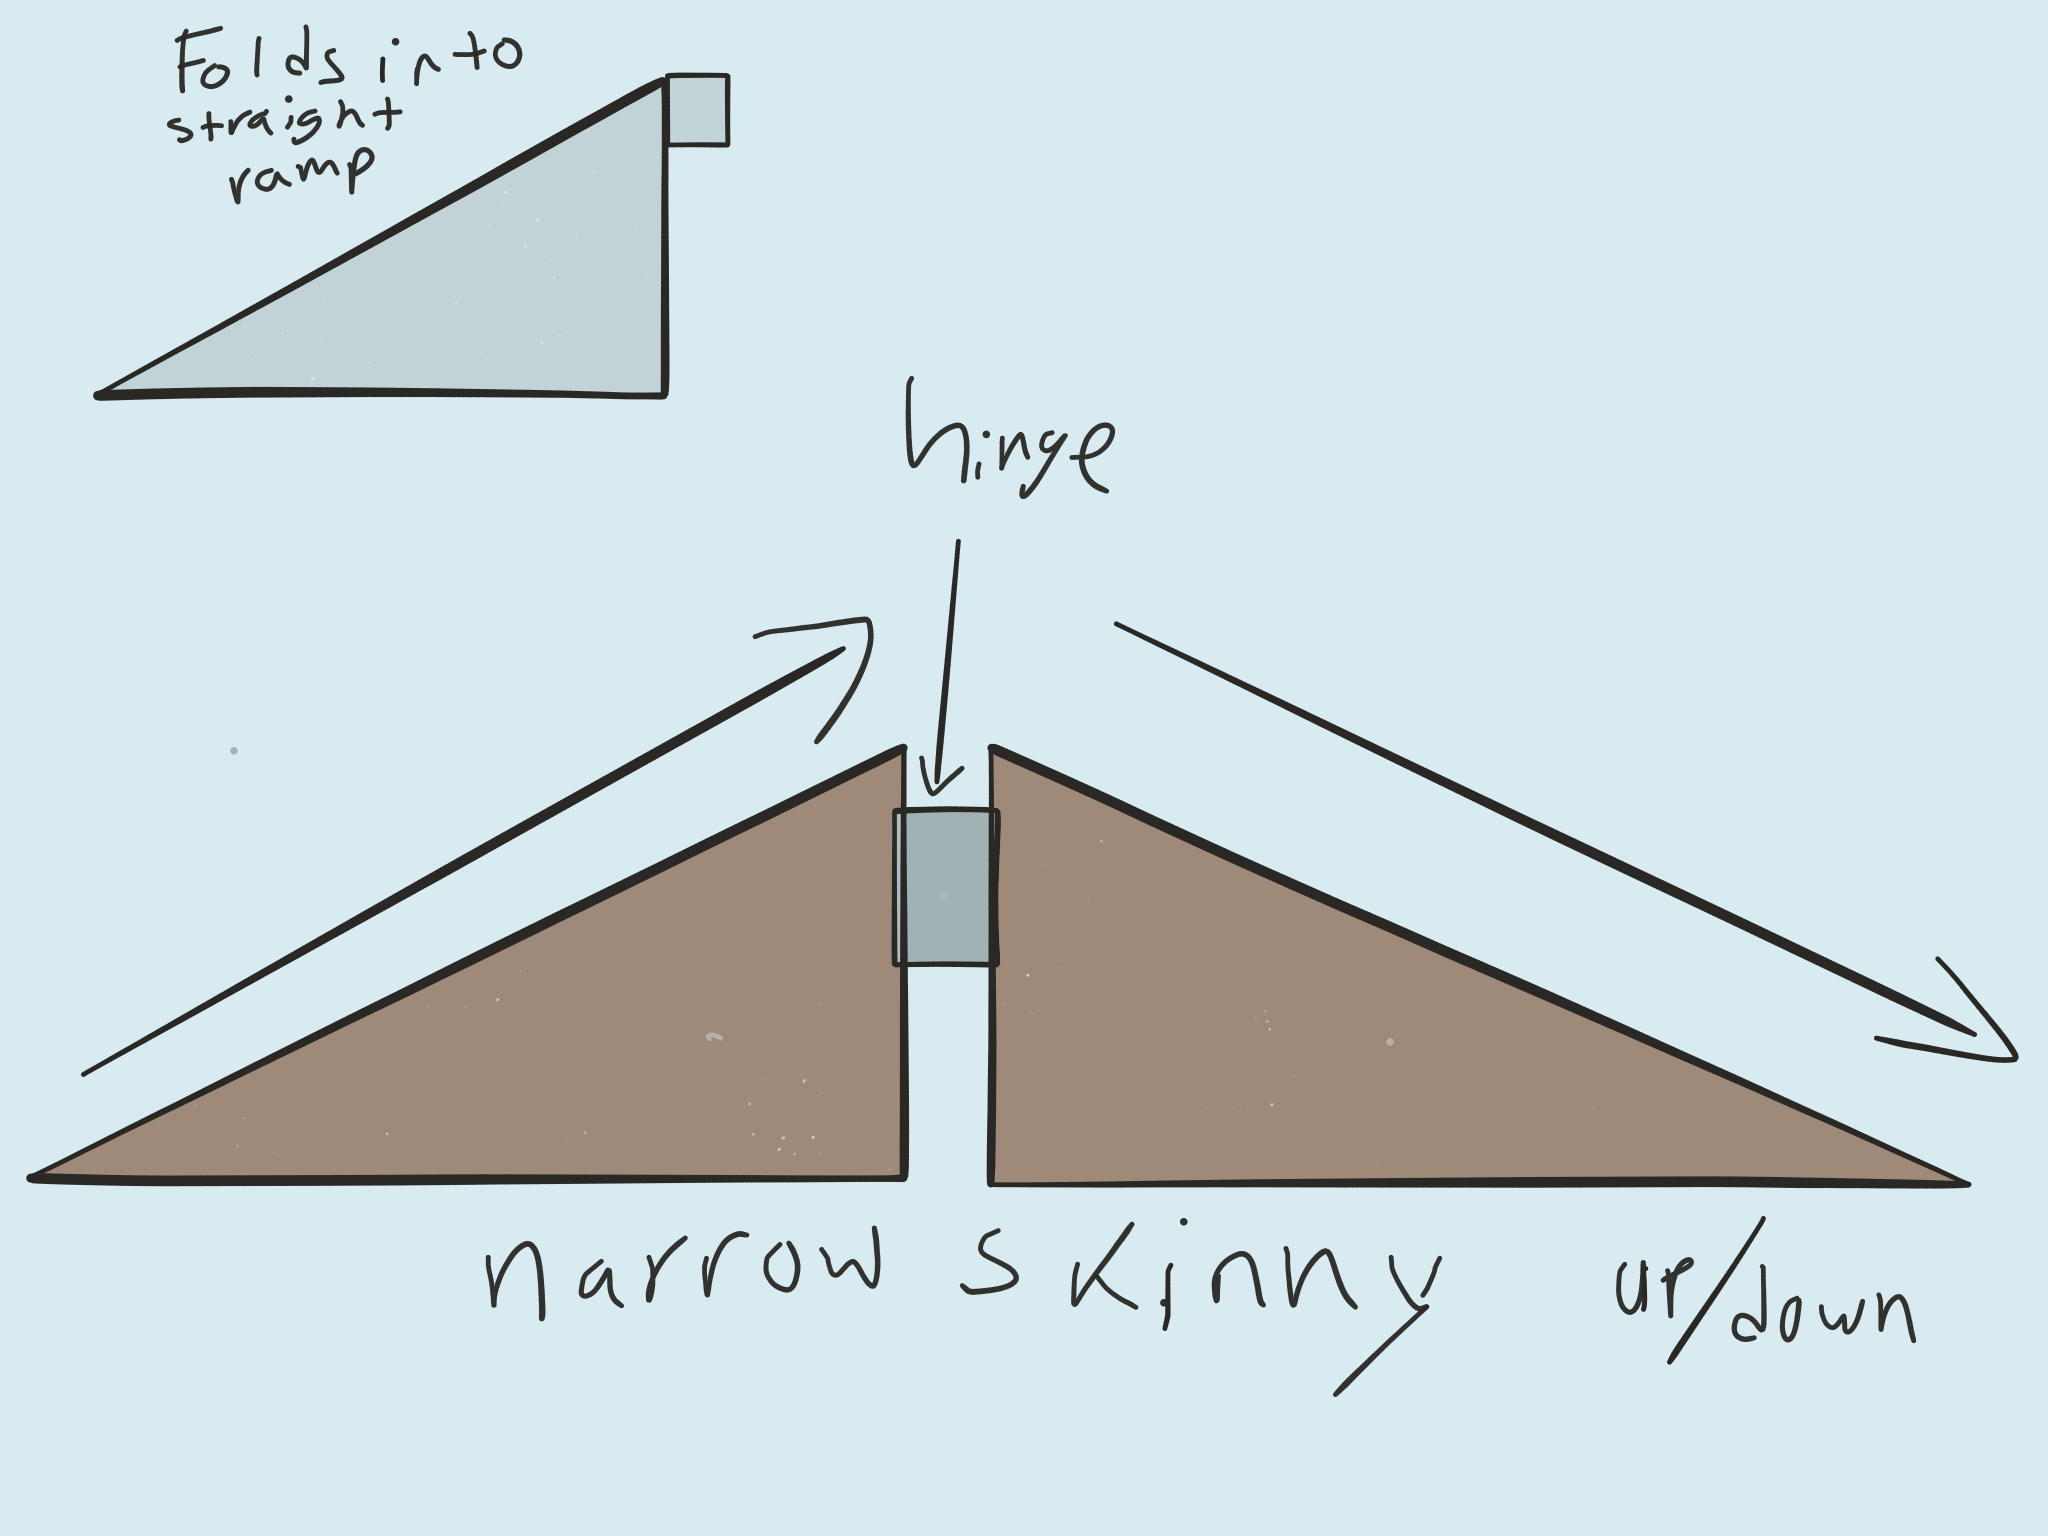
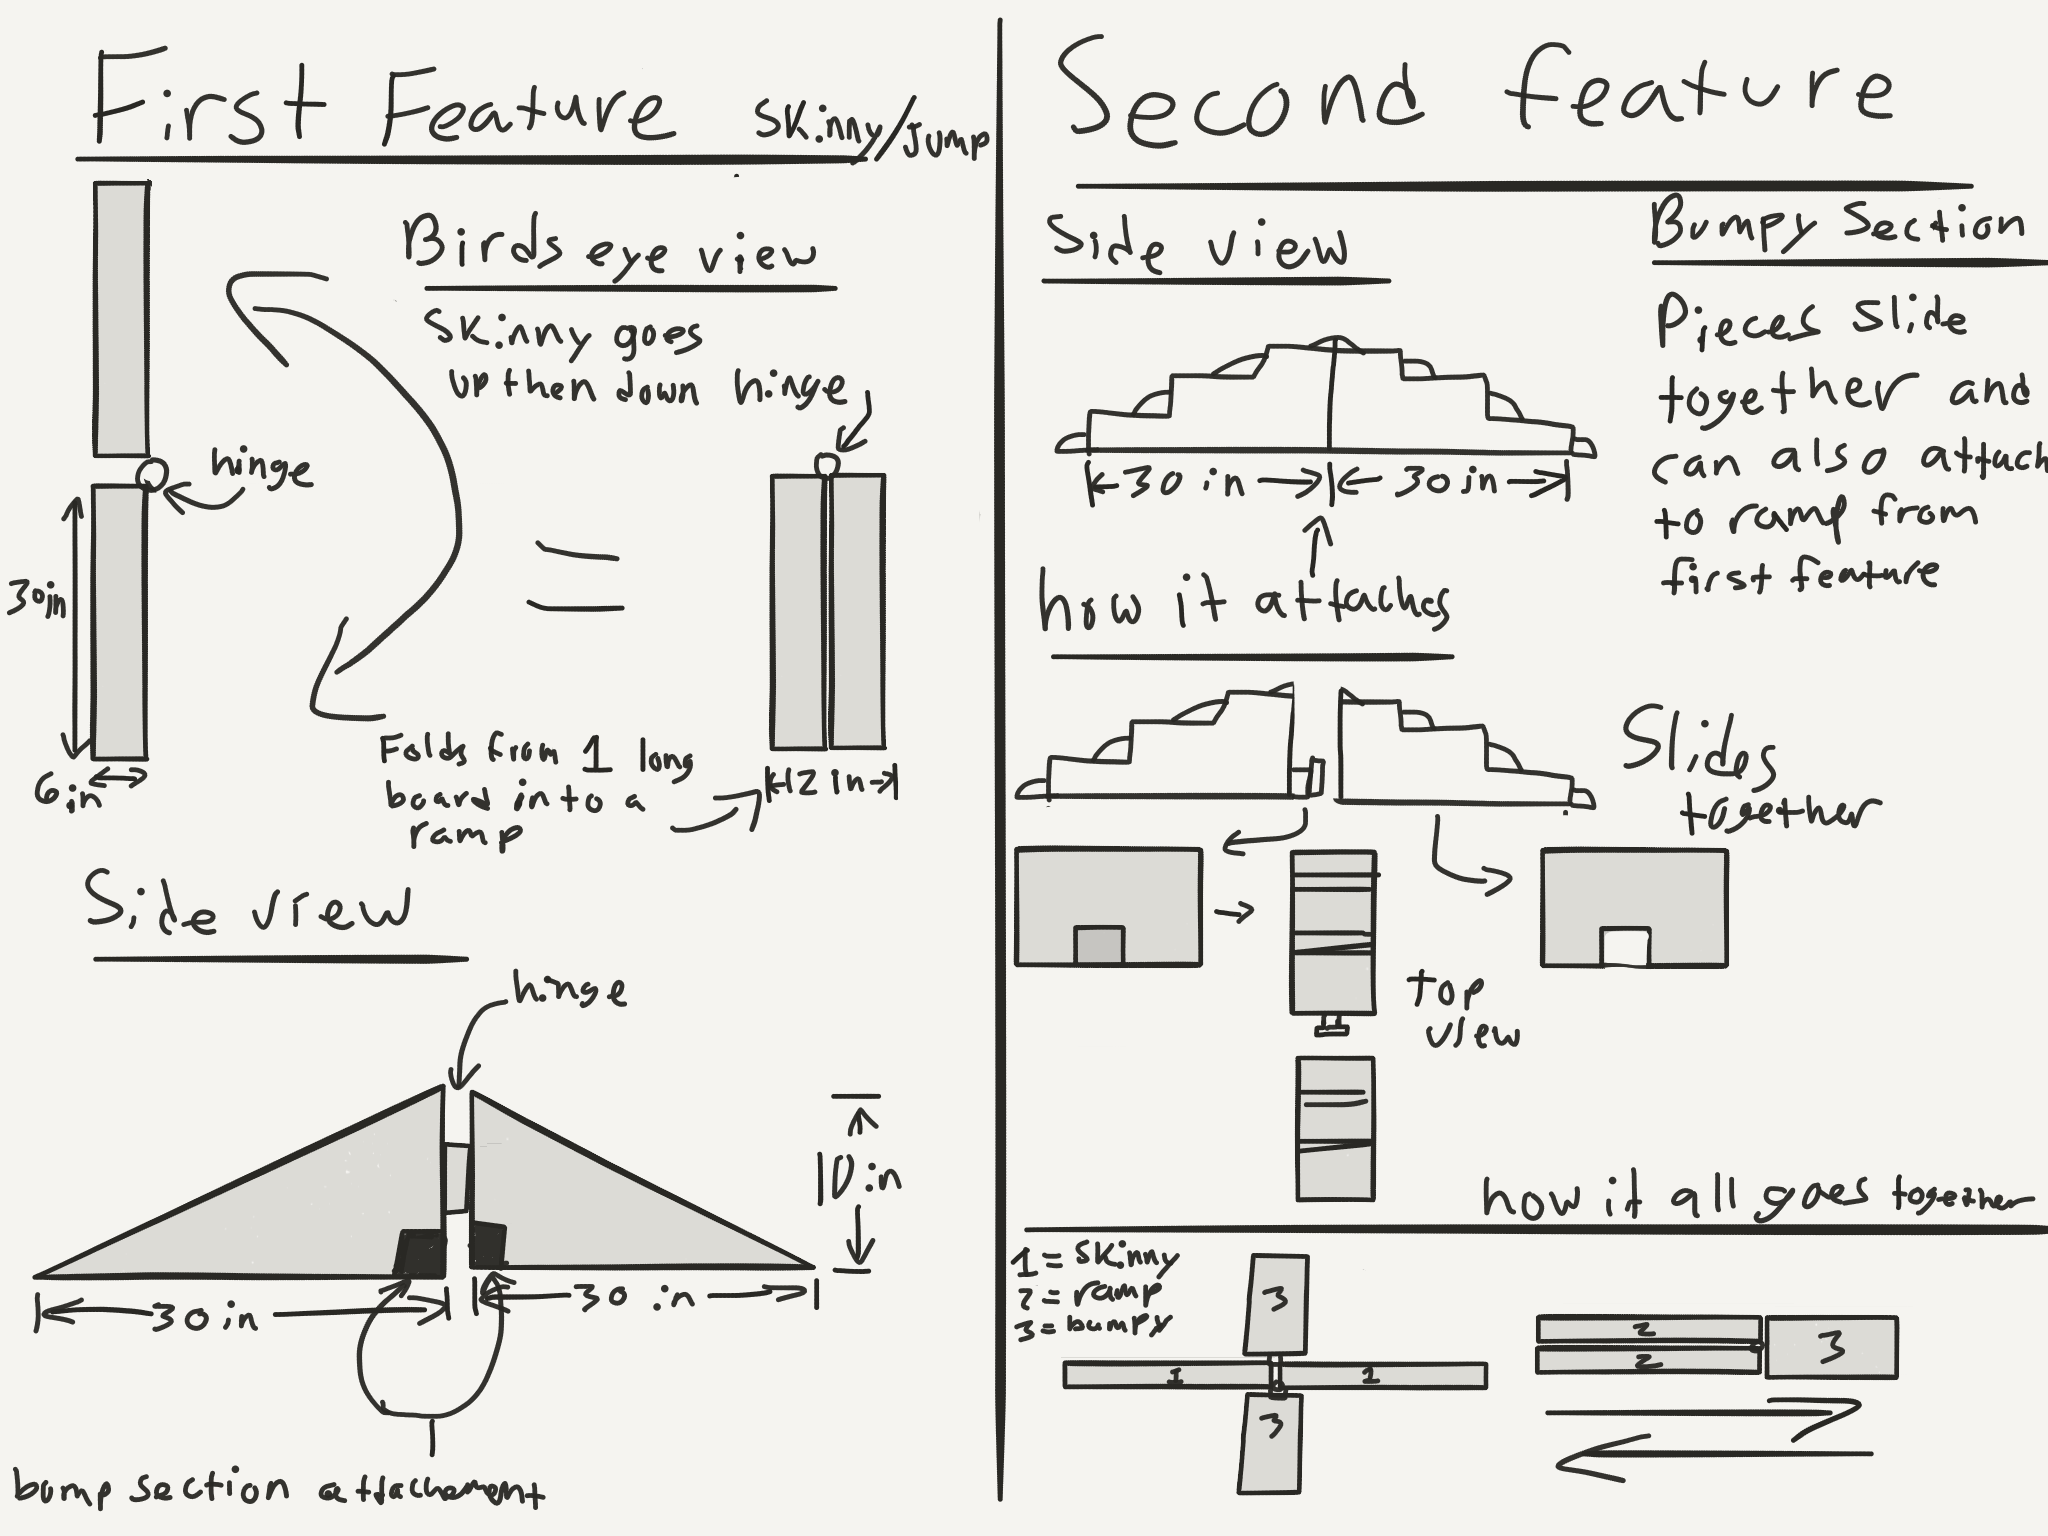
This would be a two piece ramp, that splits in half by a hinge to make a skinny. By the way, I LOVE mountian biking so this project is going to be fun. The next step was to design the second half of my project, the bump sections. I wanted something a beginning mountain biker can use to jump off of, and practice bumpier sections. So I designed this mini-staircase to go with my ramp, and how the whole project would fit together:
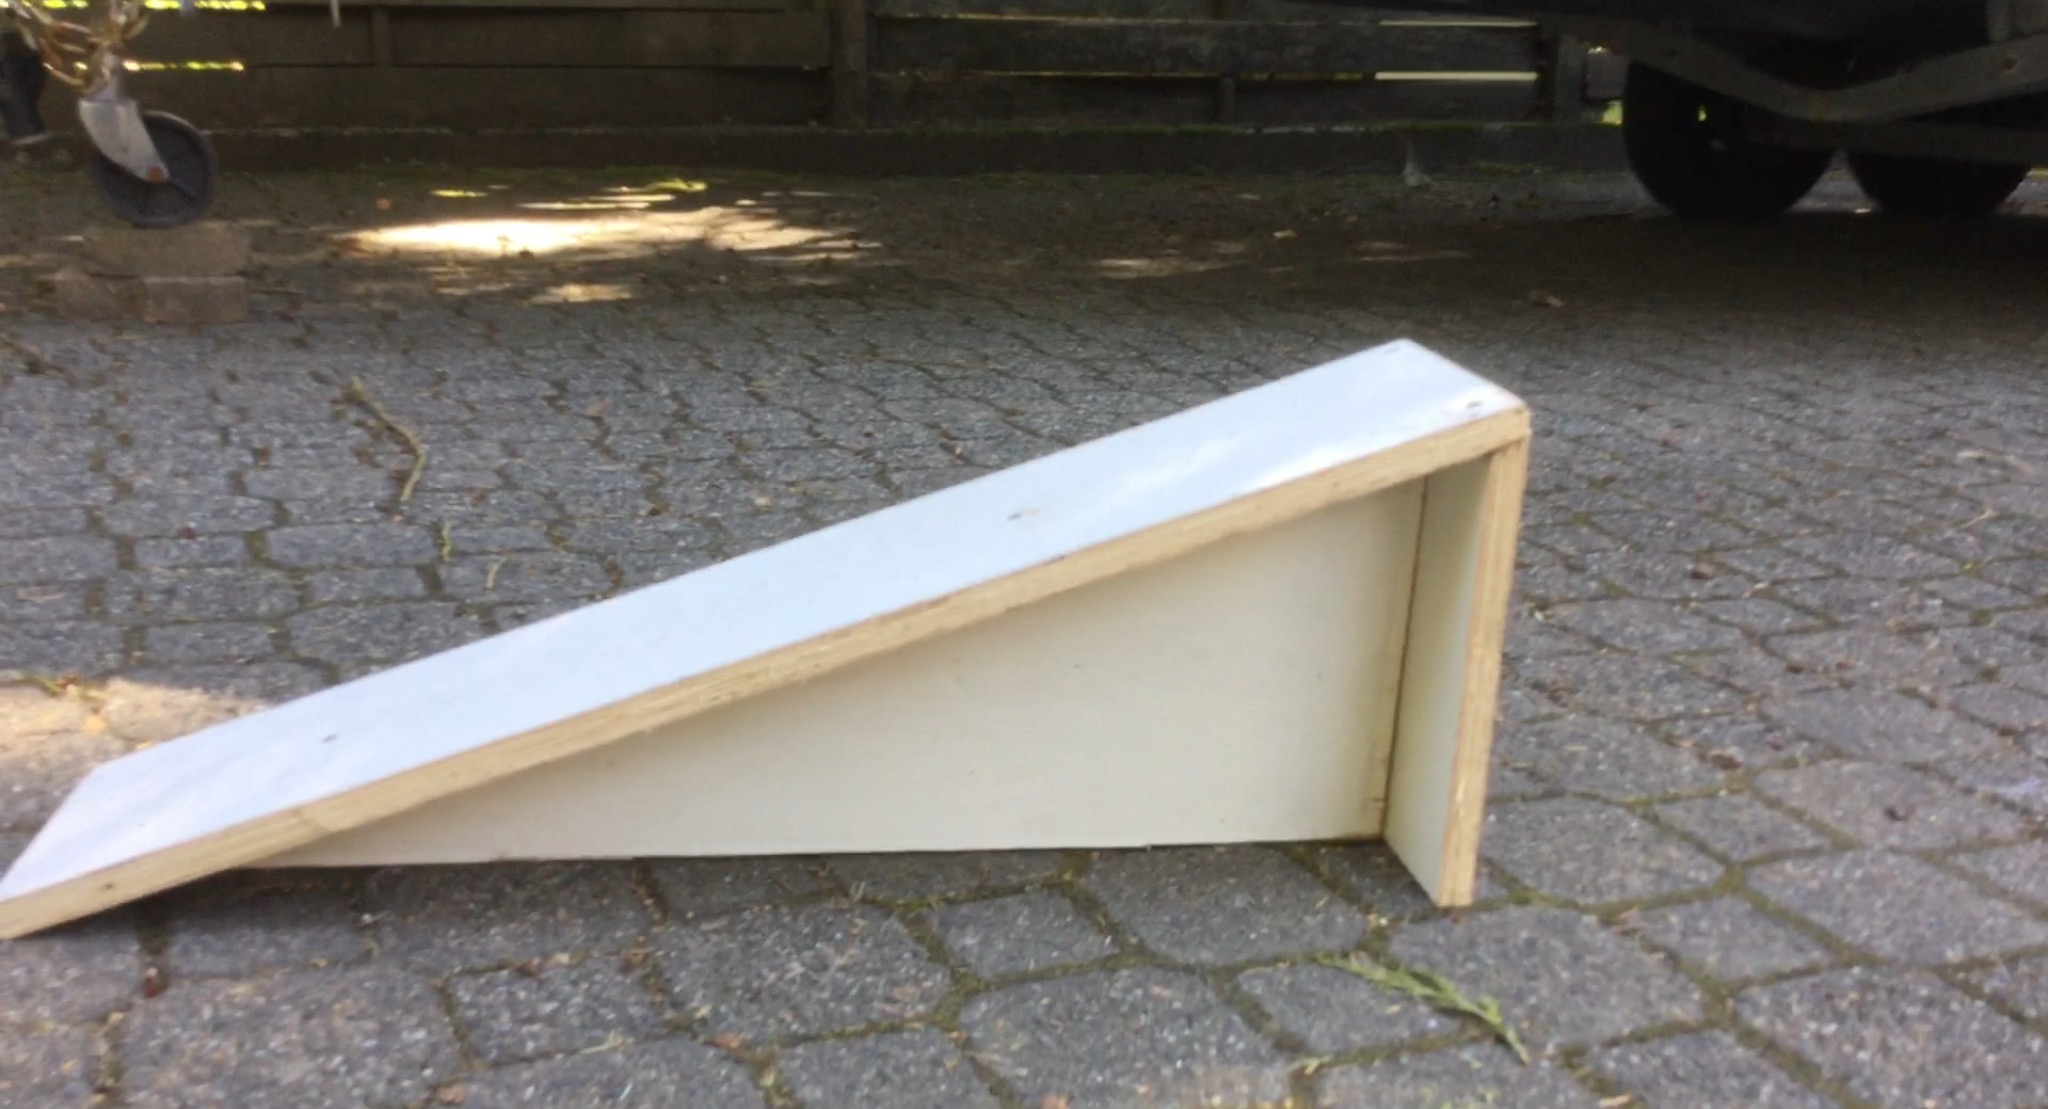
The next part was to build my first prototype. We were encouraged to have three different prototypes of our projects, but since I had limited materials available for free, I only had enough for one, and that’s all I needed. My first prototype looked like this:
After I built it, I needed to test it. So I got out my mountain bike and rode over it. Here is me testing it:
https://youtu.be/F3Kpe-ie-Gs
This didn’t go as I planned, the ramp was too steep of an angle, and the top board was too short, so it didn’t feel smooth at all. It didn’t work as a ramp, and felt very awkward to ride over. So, then I built my next draft of my ramp:
https://youtu.be/epNCmZje1hI
https://youtu.be/onV2qrfsZ1I
This one I liked a lot better. It felt more smooth and more jump-y. This was good. So I then built another one exactly the same, and attached two hinges to them at the front, so they would swing on a hinge. Here’s me demonstrating the hinge mechanism:
https://youtu.be/zNgLnctkGIA
The next step was to build the staircase part. So I designed quickly, and found some wood around my yard that would be perfect. Then I started building:
https://youtu.be/cljQ_11wg7A
It actually turned out great on the first try. I was happy with how it performed, after I tested it out of course:
https://youtu.be/gyLMYL0UXxM
Then I built the second one. This one I had some problems with… I accidentally sawed my base piece in half thinking it was unused wood so I could use it for the steps… then I quickly realized I didn’t have a base anymore and where the step pieces came from…
So then I had to support the base piece with some ugly-looking side pieces (I was running low on wood) in order to hold it straight. This worked, and once I put it together it held strong. But, since I sawed the base piece to fit to my step pieces, the base on this staircase was an inch shorter than the other, so they aren’t the same, sadly. But, then once it was ready I tested everything together:
https://youtu.be/4JhTE4MgEqQ
It all worked perfectly! I spent some time, and had a lot of fun “testing” my pieces…
But then I got back to work and painted everything I made, black and grey.
https://youtu.be/wvJurDw9Rfc
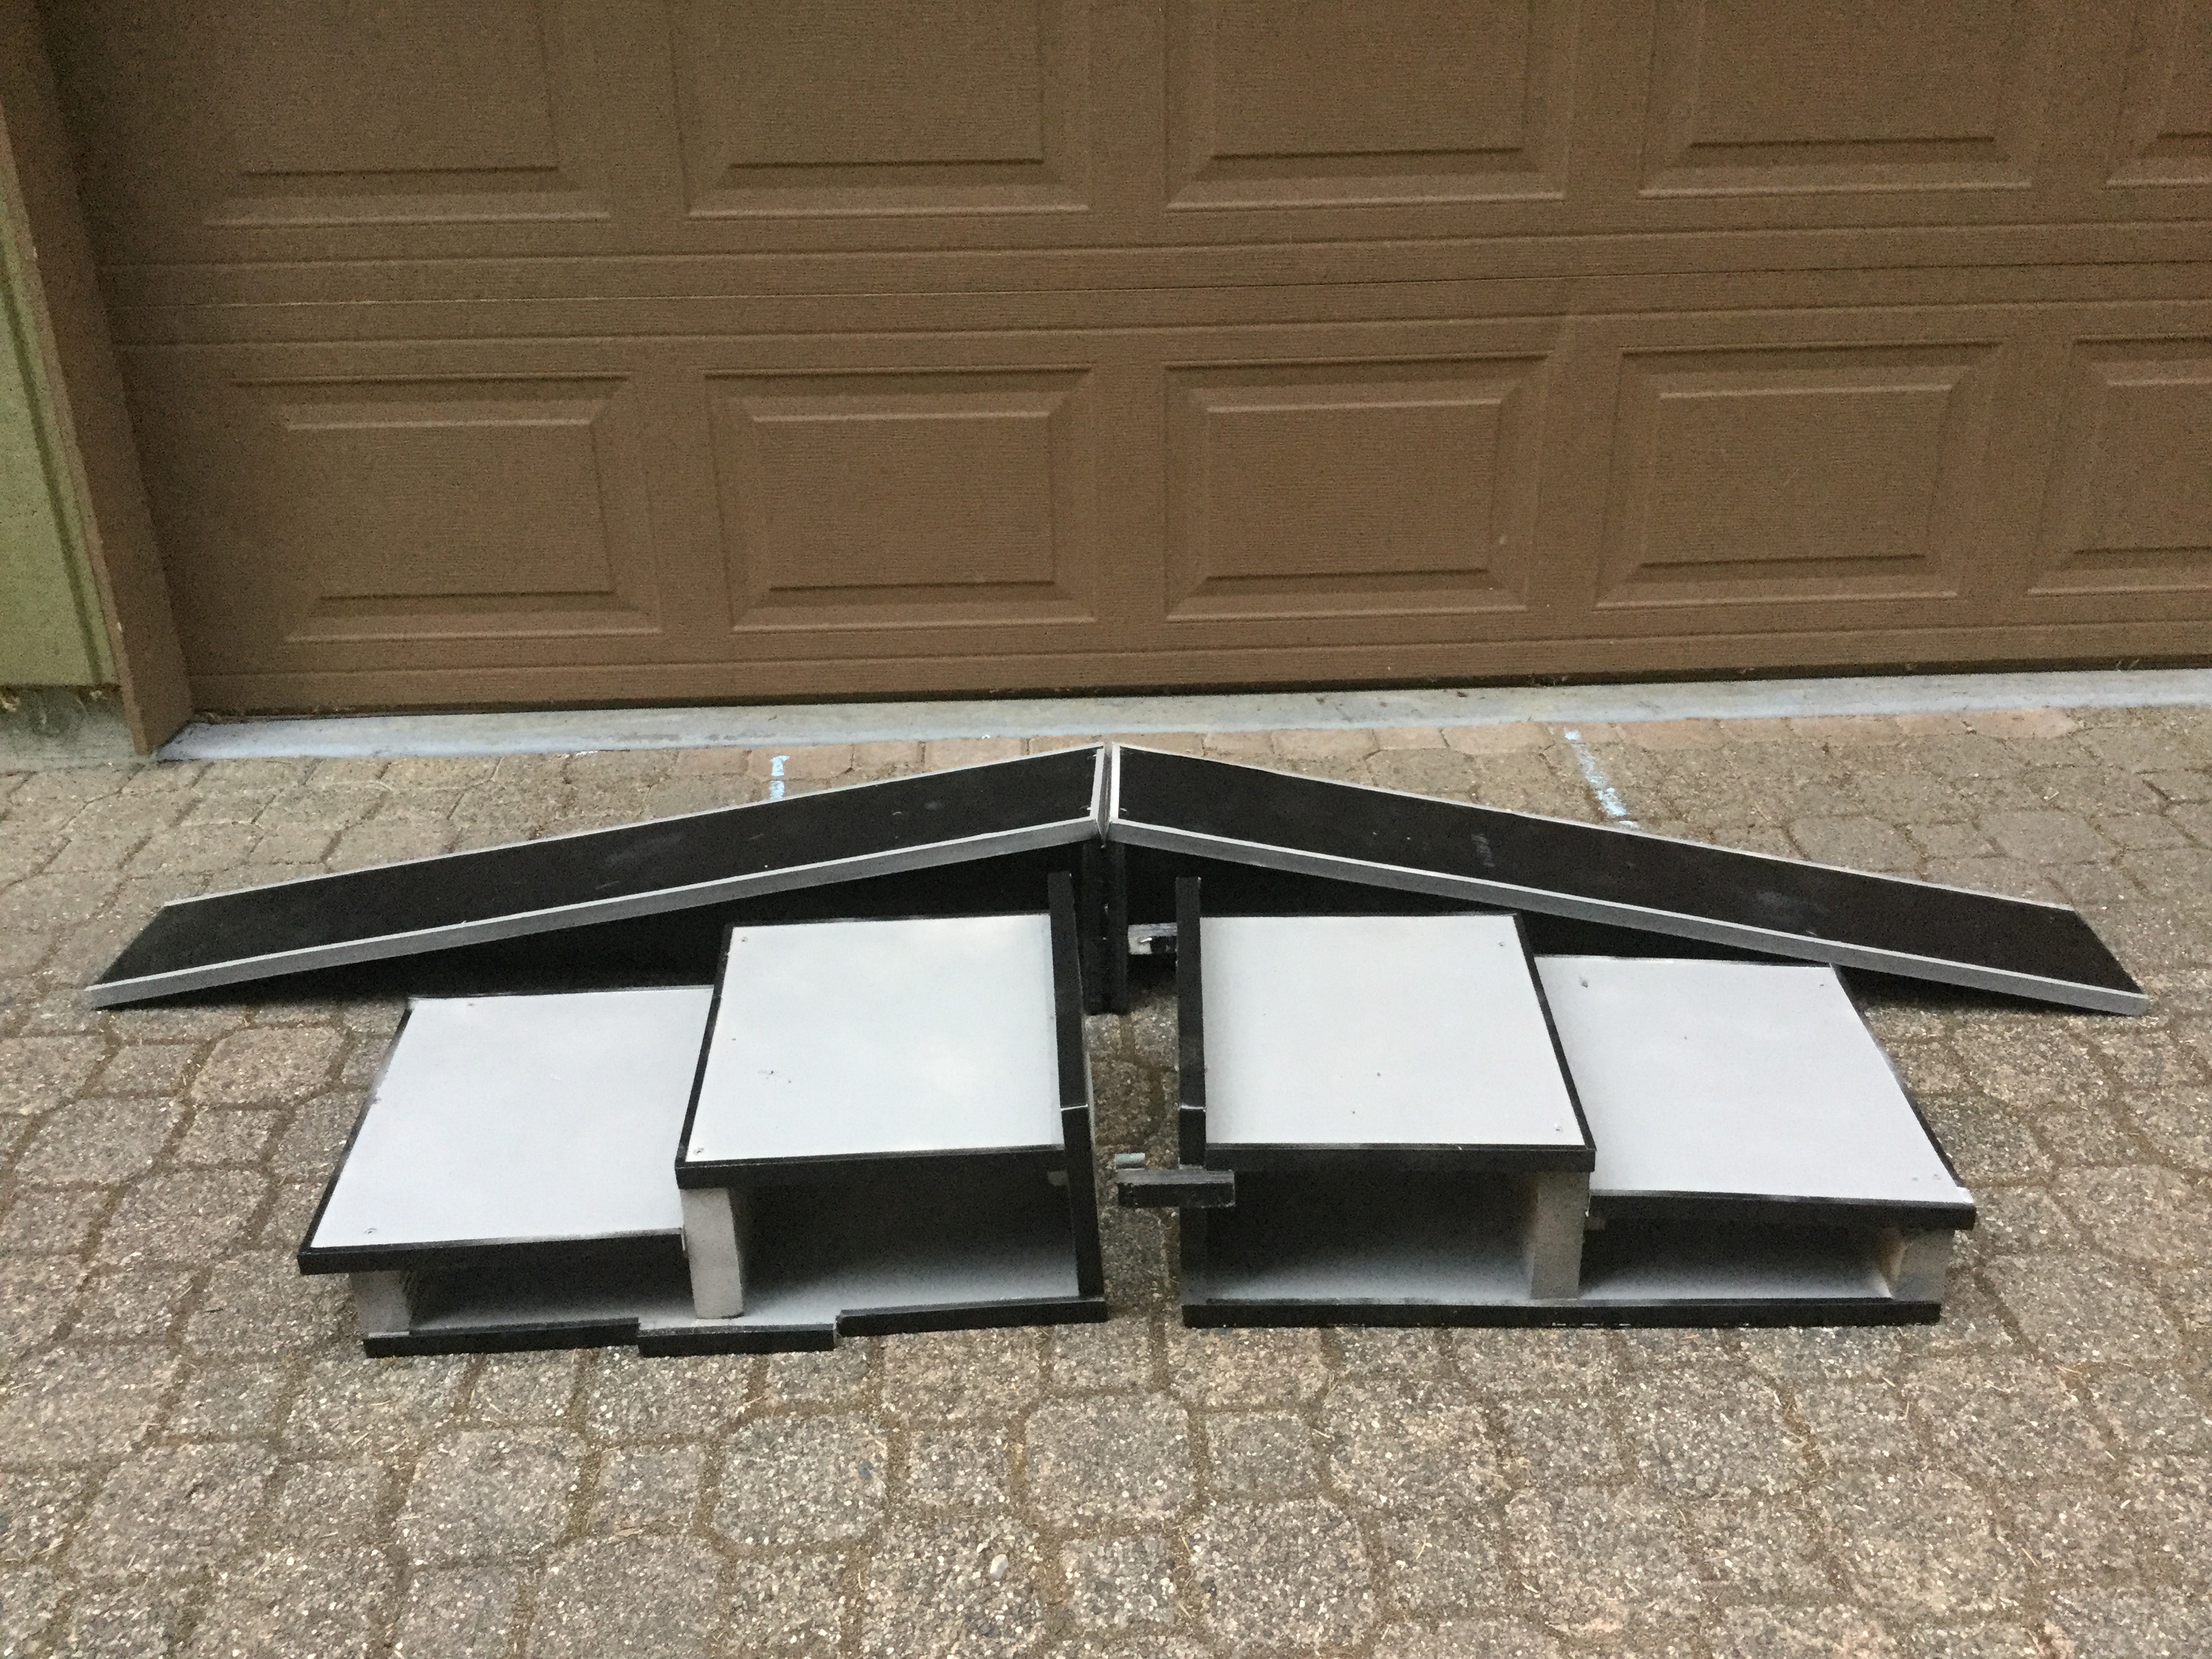
I even found some plastic siding from our old closets that fit on the ramp and stair pieces to make them look even better. In the end they all looked like this:
Now it was time to get ready to present in the exhibition on June 15. The first thing I did was to take all the time lapses I took of my creative process and combine them into a 4 minute or so video explaining my process. I presented this video with my project at the exhibition. In fact, here it is:
https://youtu.be/K4-2BJuL1SQ
I’m very happy with how this video looks. It’s very to the point I thought, and doesn’t bore the viewer, which is something we all learn how to do in PLP. But, as usual in PLP, that’s not all. I also made a poster board with my creative process (I know, the creative process is a big deal) on it to visually show my project off and attract more visitors on exhibition day. I wrote out four of the main steps to my project and briefly described what happened in each stage. Overall, when exhibition day rolled around, my table looked like this:
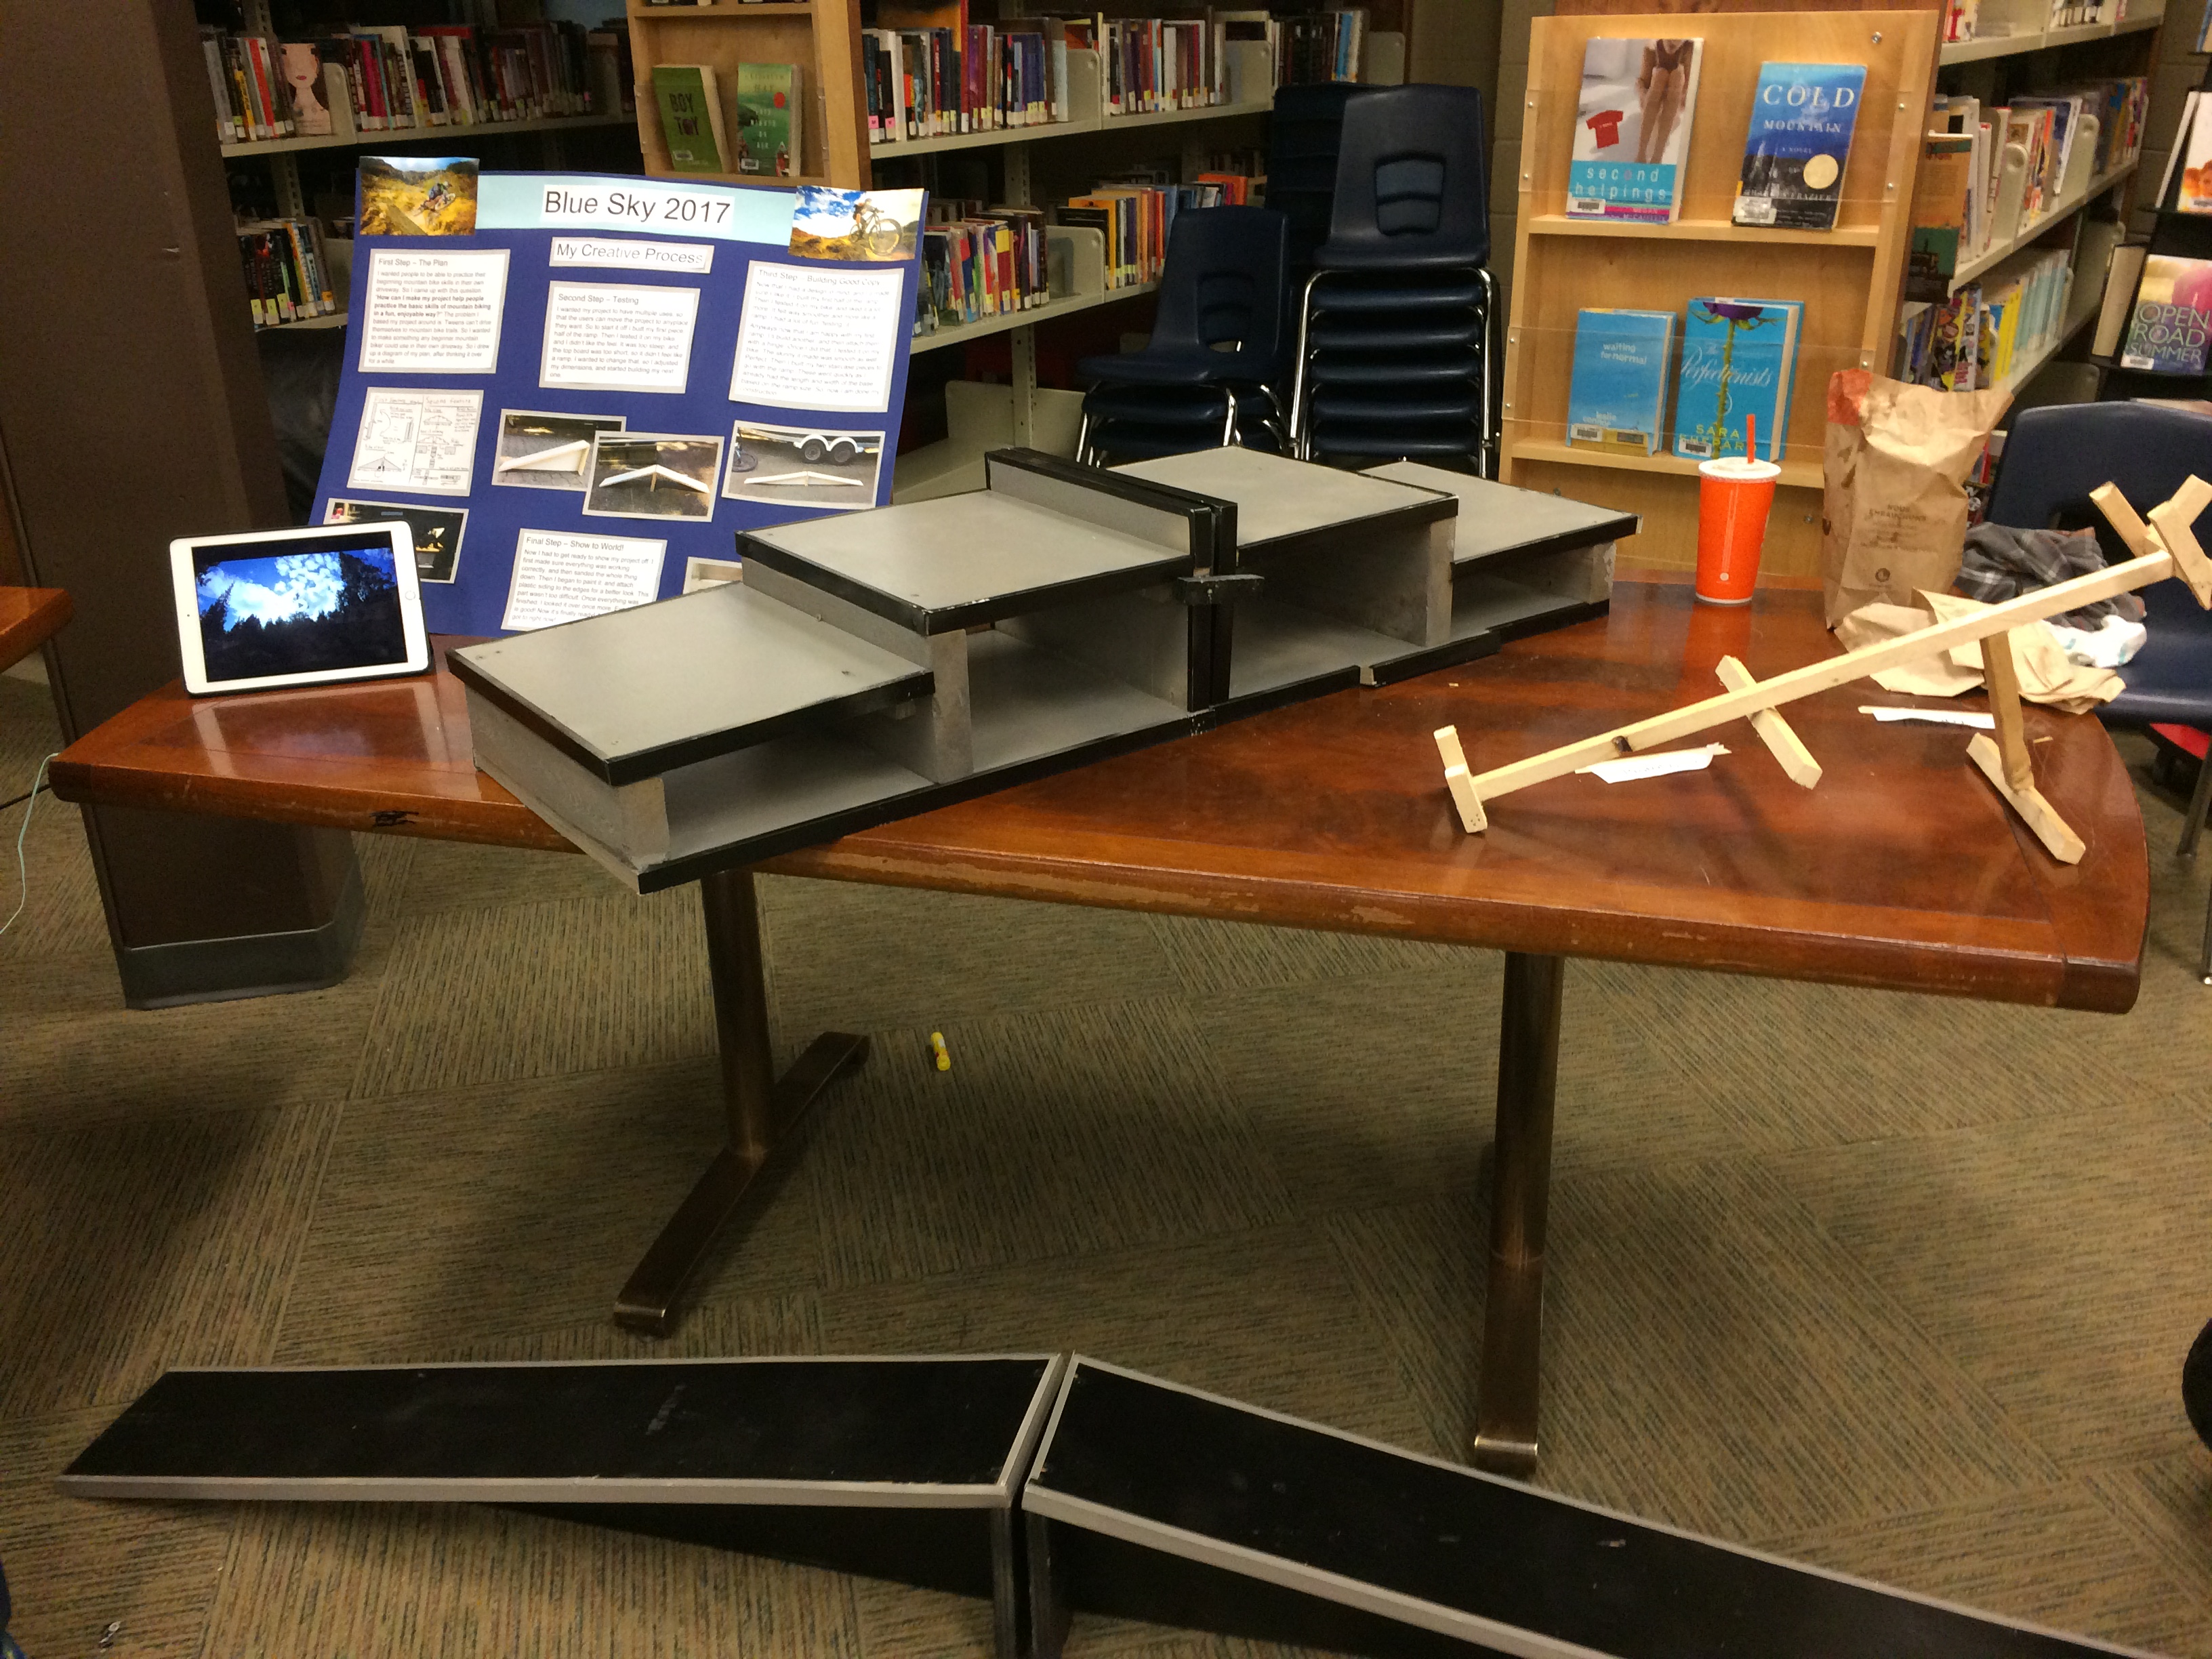
(Ignore the stuff on the right side of the table, it’s my friend Simon and his project, same with the A&W food…)
The main idea or use that I wanted my project to be used for was:
A really easy to use multi-use skill trainer, I wanted people to be able to use this product wherever they want in whatever shape they want. They could even use obstacles in their yard and add this project into it, like the ramp at the bottom of a step, or the ramp going up the steps, but I wanted it to be anything they want.
I’m quite pleased with how my project turned out, and I thought it suited me and my abilities. I enjoyed the construction of my product, as I said earlier I love to build, and also the presentation of the whole thing. I found it relieving and satisfying to show it off. Overall, it was super fun and I am happy with the whole thing.
Thanks