Welcome back to another scimatics blog post. This post like most of my other posts is going to be about the project we just finished. I personally really enjoyed working on this project because it was fun and I also learned a lot. This project like every other project had a driving “How can we represent the scientific method and what factors affect the function and efficiency of electric circuits?”. So I answered this with my group when we made our Rube Goldberg Machine. Before I talk about how we got the final product here is how our video explanation turned out.
Like every other scimatics project we started by making a mind map to find out what we already knew. I didn’t know much about Rube-Goldberg machines and or circuits and how they can be connected. So in my project start mind map its filled with a bunch of questions I had. Then we were put into groups and got to build a mini Rube-Goldberg machine. I liked this activity because it gave me an idea on what the final product could potentially look like.
Throughout the few weeks that we worked on this project we learned about electricity and circuits. This included completing workbooks and actually getting to try and create our own circuits with our groups. My group had Ariane, Sabrina, Ines and me. I am super happy with my group and I because we used up all of our class time well and completed everything on time. We all showed a complete understanding of what our tasks were and we even completed the final machine before the due date. This leads me to the actual building part of the project. We started by choosing a large piece of wood to be the base of our Rube-Goldberg machine. After that we built our own individual blueprints of what our machine could look like. Then during class my group met up and decided to incorporate a bit of everyone’s individual blueprints into our final blueprint. While we were building our machine we changed a few details so we made sure to also change our group blueprint along the way. I am super happy with how our machine turned out.
-

- Planning with the blueprint
-

- Final blueprint
-

- Electric Circuits
-

- Adding circuits to the machine
-
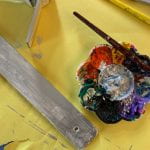
- Painting Ramps
-

- Glueing everything onto machine
Curricular Competencies:
Questioning and Predicting:
Throughout this project both my group and I used all of my class time very well for both the individual activities and the group ones. Our group did a good job making sure all the work was evenly distributed and I think thats what made our group work so well together.
Reasoning and Analyzing:
Our group decided to change and add some things to our Rube-Goldberg along the way so we made sure to also change those things to our final blueprint. Our blueprint includes the background grid scale as well as the needed measurements. To make everything easily recognizable we colour coordinated all of the different objects and materials.
Planning and Conducting:
Our machine included a series circuit and parallel circuit that we created. You can see accurate diagrams of our circuits in our final diagram. We made sure our diagrams included people symbols and are neat. We also made sure to included the current, voltage and resistance. I think our blueprint included everything needed and was created very well. If we were to do this project again I do not think we would need to change anything.
Scientific Communication:
Our video includes the clip of of machine working, it also includes voice over which explains the scientific method as each step of the machine happens. In our video you can clearly see everything that is happening. In our video we recorded the voice overs outside so you can hear the wind which made them sound not the best. So if we were to revise I think that we would record them inside where it’s quiet.
Overall I am super happy with how the final machine came out and I think I worked very well with my group. Before you leave don’t forget to go check out Ariane, Ines, and Sabrina’s blogs to figure out how they thought our project went.

Leave a Reply